

Advanced MIDI Routing for Producers: 3 MPE Aware Setups in 20 Minutes
Last Edited: Sep 20, 2026
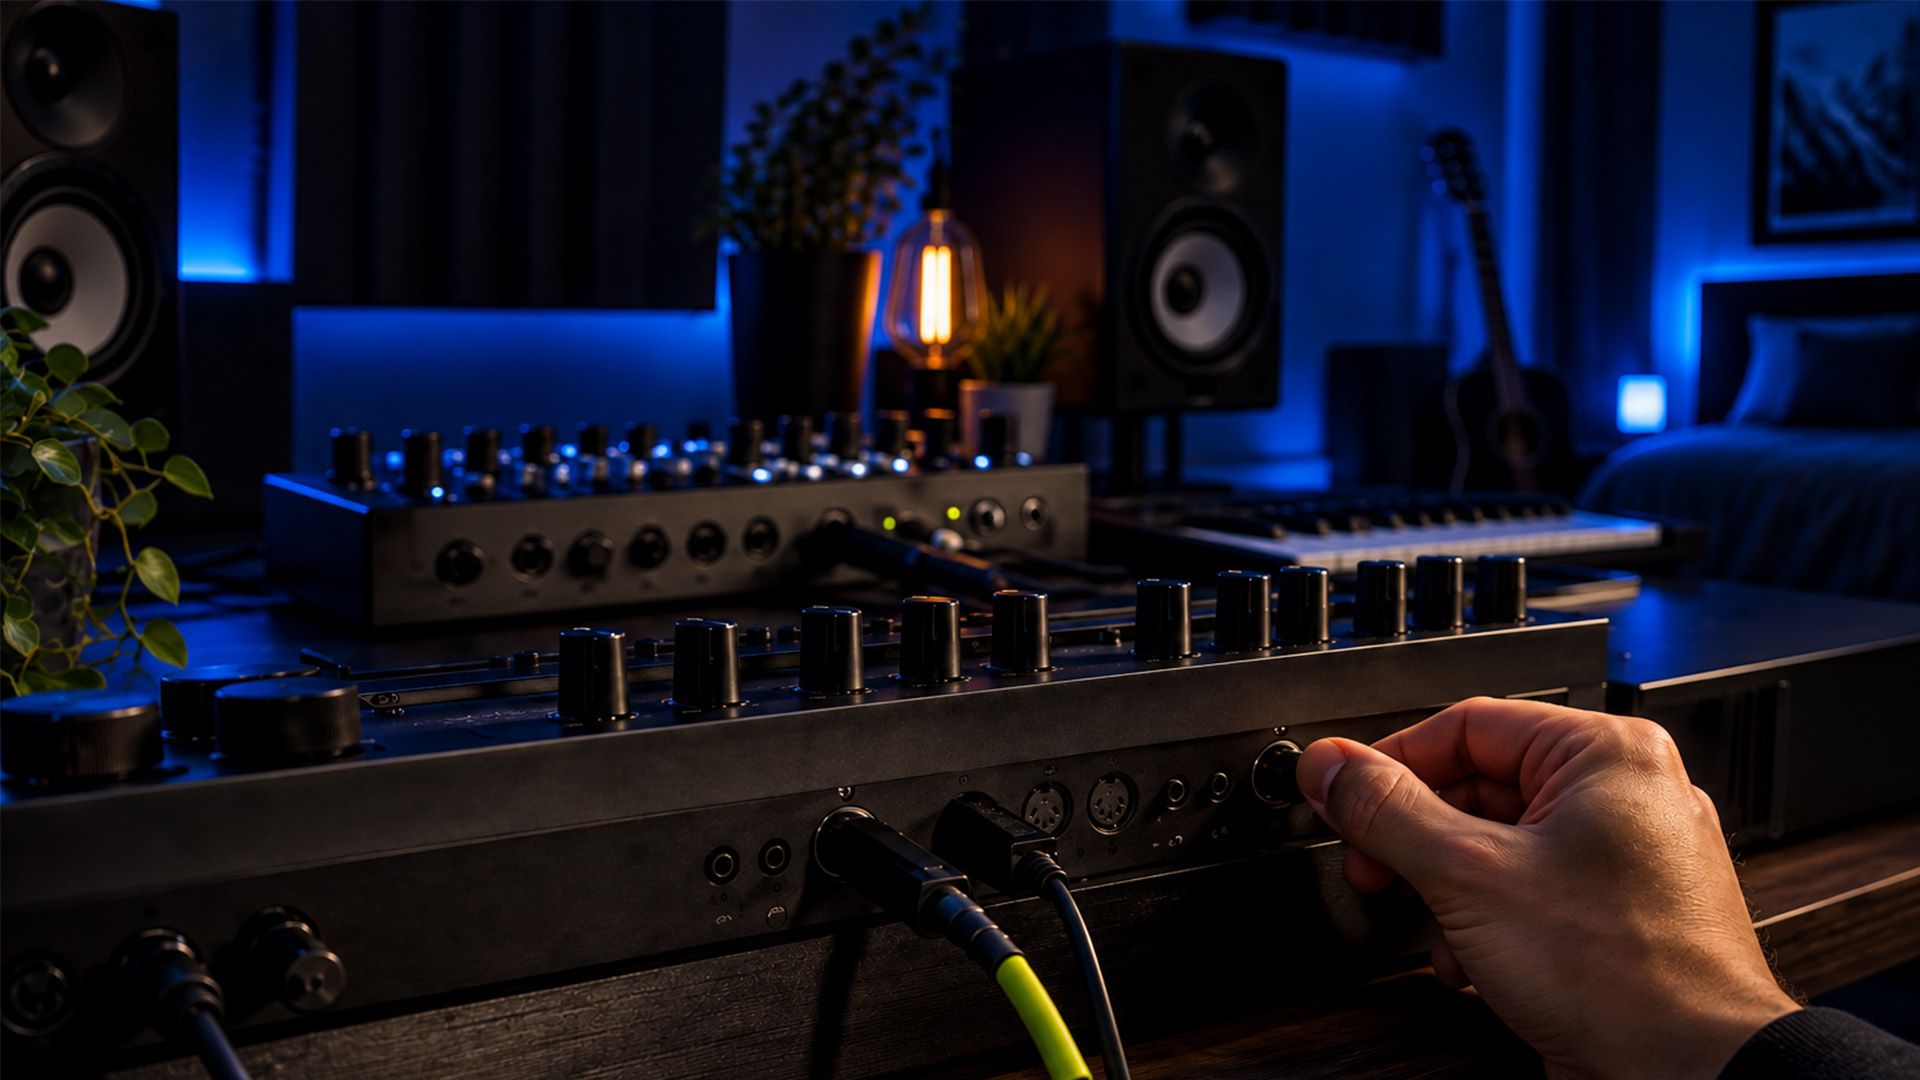
Advanced MIDI routing means combining, merging, splitting, filtering, and transforming into a single signal chain, while staying MPE-aware for modern expressive controllers. The fastest way to understand it is to build one: create a note-range or velocity split, add a channel filter, and attach a simple transpose or velocity scale. Once that route behaves the way you expect, the prep checklist below keeps every subsequent route just as predictable.
TL;DR:
- Confirm that your MIDI hardware can handle multiple applications or use virtual drivers to prevent connection conflicts.
- Always test complex routes with fixed MIDI files or loops to identify potential misconfigurations early.
- Handle MPE streams carefully by first isolating global data and per-note channels before applying transposes or remaps.
- Use scriptable command-line tools for reproducibility and visual patch-graph tools for real-time debugging, depending on your workflow preference.
- Document your routing setup thoroughly with diagrams and session notes to simplify troubleshooting and future modifications.
Get Your Setup Ready Before You Build Any Route
Before you chain filters and transforms together, get your foundation right. A wobbly setup makes every advanced route feel unreliable, even when your logic is correct.
- Check your hardware’s multi-client behavior. Most MIDI interfaces can only talk to one application at a time. If yours locks out a second app, bridge it with a virtual MIDI driver: IAC on macOS, loopMIDI on Windows.
- Decide what this session actually needs. Are you merging two controllers, splitting one keyboard across instruments, or handling an MPE stream? Name the job before you touch a patch cable.
- Turn on a MIDI monitor and label your ports. You can’t debug what you can’t see.
- Save a snapshot before testing anything complex. Transforms that misbehave are much easier to undo from a preset than from memory.
How Merging, Splitting, Filtering, and Transforming Work
Four operations do almost all the heavy lifting in advanced MIDI routing, and they build on each other in a specific order.
Merging and splitting control the shape of your signal flow. Merging fans multiple controllers into one synth input, useful when you’re combining a keyboard and a wind controller into a single patch. Splitting does the reverse: one input feeds several destinations, which is how keyboard splits and instrument layering work. FluidSynth’s router documentation treats these as explicit rule sets rather than passive pass-through, and that mindset matters. A router isn’t a wire; it’s a program you write.
Filters decide what gets through before anything is changed. Channel filters isolate a specific input channel. Note-range filters cut a keyboard into zones. CC filters strip out unwanted modulation data. System-message filters block clock and aftertouch data that performance synths often mishandle, a step producers skip more often than you’d think, according to FluidSynth’s usage guide.
Transforms reshape what survives the filter. Transpose shifts pitch by semitones. Velocity scaling reshapes dynamics. Channel remap and CC remap let mismatched gear and plugins communicate without a firmware update.
- Filter for note range: keep notes between 36 and 60.
- Filter for velocity: split at a threshold, not a range.
- Transform: scale surviving velocities before sending them onward.
- Transform: remap CC1 (mod wheel) to CC11 (expression) for a plugin that only listens to one.
Here’s a compact velocity-layering example: notes with velocity 64 or below route to a Pad instrument with a softened velocity curve; notes above 64 route to a Lead patch at full dynamics. Two filters, one transform each, and you’ve built a dynamic instrument from two static ones.
Pro Tip: Test your filters with a fixed MIDI file or a hardware sequencer loop before you play live. A repeatable input makes it obvious which stage of the chain is misbehaving.
How Do You Route MPE Streams Without Scrambling Them?
MPE (MIDI Polyphonic Expression) assigns each note its own channel, so pitch bend, pressure, and slide are per-note rather than per-instrument. That structure is exactly what breaks when a route treats it like ordinary MIDI. An MPE stream has one manager channel carrying global data and a block of member channels, each tied to a single active note. Route it through a plain channel filter and you’ll either drop notes or flatten their expression.
RouteMIDI handles this with dedicated commands: mpemono collapses an MPE zone down to a single channel for non-MPE gear, mpexp expands a mono stream back into an MPE zone, and mpesplit divides one zone into multiple output zones for multi-timbral setups.
- Isolate the manager channel first if you only need global pitch bend or CC data.
- Isolate member channels separately when you need per-note expression preserved downstream.
- Explicitly suppress or re-emit MPE configuration messages. Leaving them unmanaged during a zone relocation confuses non-MPE receivers, since zone-aware handling requires per-note channel remapping.
- For feeding an MPE keyboard into a non-MPE synth, run
mpemonofirst, then apply your transpose or velocity transform after collapse, never before.
That order matters more with MPE than anywhere else. Transform a per-note channel stream before collapsing it, and you risk scrambling which note owns which pitch bend value.
Which Routing Tools Fit Your Workflow?
Pick your tool by how you think, not by what’s popular. Some producers want typed commands they can save as scripts; others need to see the signal path.
- Command-line routers like RouteMIDI win when you need scriptable, reproducible MPE operations. If you’re rebuilding the same complex route across sessions, a saved command file beats reclicking a patch every time.
- Visual patch-graph tools such as Midilize turn invisible virtual buses into a drag-and-drop canvas on macOS, with splits, transposers, and velocity modifiers you can see and debug in real time.
- Browser-based patchbays like the MIDI Patchbay tool require no installation and run locally via Web MIDI, making them good for quick tests or for teaching someone else your setup.
- Lightweight Windows utilities like loopMIDI and GlueMidi solve multi-client and hot-plug headaches that plague hardware interfaces.
- Embedded routers inside synthesis engines, such as the FluidSynth MIDI router, handle routing directly inside the sound-generation chain rather than as a separate app.
The Order of Operations That Prevents Most Routing Headaches
Good routing hygiene isn’t glamorous, but it’s what separates a session you can debug in five minutes from one that eats your afternoon.
- Filter before you transform, always. Sending unfiltered system messages, such as clock or aftertouch, into a transform stage risks malformed output and added CPU load, and transforming before filtering is a common source of jitter.
- Name every port and route. “Loop 1” tells you nothing three weeks from now; “KB1 to Pad Low Split” does.
- Keep a panic route on hand. A single mapped control that broadcasts a note-off across all channels saves you from a stuck note mid-performance.
- Write down your channel map in session notes. Future you, or a collaborator, will thank you.
Pro Tip: Follow the RouteMIDI processing order even outside RouteMIDI itself: filters, then transforms, then MPE operations, then conversions, then outputs. It’s a model worth borrowing regardless of which tool you use.
Three Routing Setups You Can Build Right Now
- Keyboard split. Create a note-range filter at your chosen split point. Route the low range to Synth A, the high range to Synth B. Confirm with a MIDI monitor that no notes leak across the boundary before you trust it live.
- Velocity layering. Set a velocity threshold rather than a range. Scale velocities down for the pad branch so soft playing stays soft, and let the lead branch pass through at full strength for accents.
- MPE to non-MPE bridge. Run
mpemono(ormpexpif you’re going the other direction) to collapse the zone, remap the resulting channel to whatever the target synth expects, and suppress MPE configuration messages the receiving device won’t understand. Add a panic mapping before you test anything live, since collapsed MPE streams are especially prone to stuck notes during setup.
Each of these takes minutes once you’ve done it once. The first time, budget twenty.
Fixing Stuck Notes, Feedback Loops, and Latency Fast
Feedback loops occur when a routed output finds its way back to its own input, usually via a MIDI thru cable or an overeager merge. Mute the suspect route or physically remove the return cable, then reintroduce connections one at a time.
Stuck notes occur when a note-on never receives its matching note-off, often after a mid-performance route change. A panic control that broadcasts note-off across all channels clears it instantly.
- Compare your DAW’s audio buffer with your routing layer’s delay; a mismatch between them causes more perceived lag than either one alone.
- Prefer direct USB or Thunderbolt connections over network MIDI when timing has to be tight.
- Network MIDI works fine for monitoring or remote rehearsal, but avoid it for live performance timing.
- On macOS, CoreMIDI Thru connections aggregate multiple device inputs into a single persistent thru connection, which reduces jitter, though it can trade off some absolute latency.
How SoundBridge Supports These Routing Workflows
SoundBridge’s MIDI and audio routing tools are built to handle exactly the layered, filtered, transform-heavy setups covered above, alongside bi-directional plugin and hardware control and high-fidelity processing up to 192kHz. That combination matters when a route feeds a virtual instrument on one end and a hardware synth on the other.
If you’re new to building routes inside a DAW rather than a standalone router, start with the fundamentals in Audio Mixing Step by Step, then apply the split and transform patterns above directly to your instrument tracks. Create your virtual ports, route them into SoundBridge, and save the result as a template so your next session starts where this one left off.
Handling Dynamic Routing on the Fly
Static routes get you through a session, but the more interesting work happens when the route itself changes while you play. A sustain pedal, an expression pedal, or a spare CC knob can act as a routing switch, flipping which instrument receives your notes without you touching a mouse.
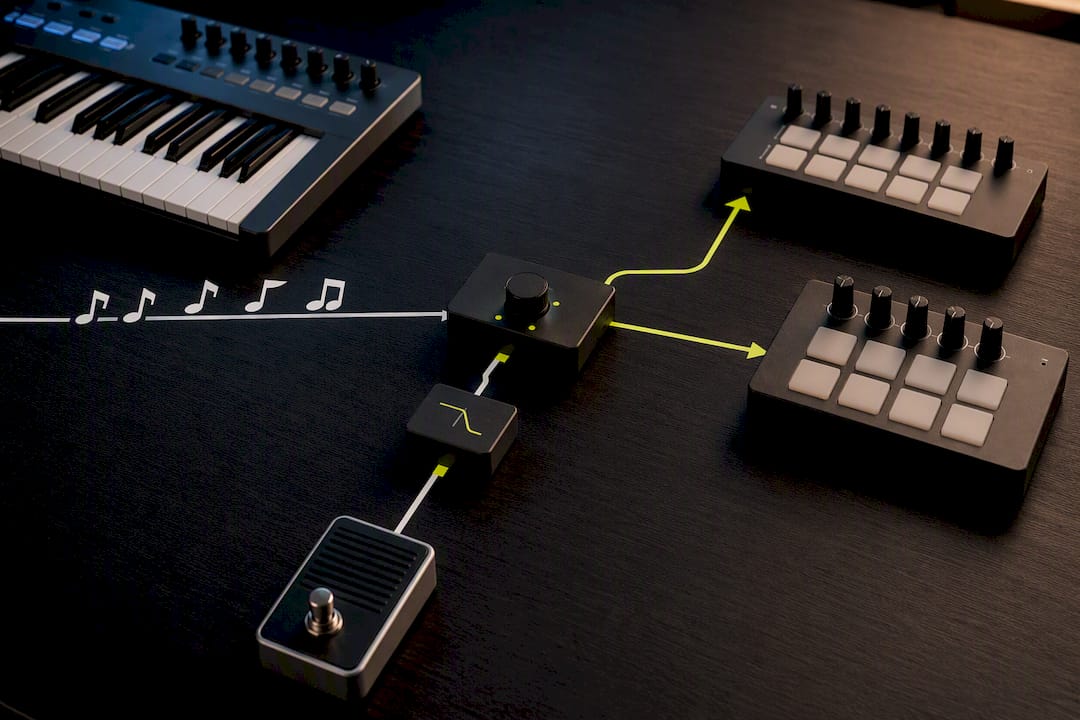
Automation lanes in your DAW can perform the same task on the timeline. Instead of manually re-patching between the verse and the chorus, automate a CC value that your router reads as a trigger to change the active split point or swap which output channel gets the signal. This is how many live-performance keyboard rigs handle instrument switching mid-song without a visible seam.
The trick is keeping the control signal separate from the musical signal. If your routing-control CC and your expression CC share a number, you’ll get unpredictable results the moment both fire at once. Reserve a CC number nobody else touches, and filter it out before it reaches your instruments, since a stray routing-control message landing on a synth as modulation data is a common and confusing bug.
Foot controllers with multiple assignable switches are worth the investment here. Two or three dedicated buttons for route changes, separate from your sustain and expression pedals, let you build genuinely performable routing without breaking the flow of a take.
Managing Multiple MIDI Interfaces Without Chaos
Once you’re running two or three MIDI interfaces at once, priority becomes the real problem. Which device’s clock does the session follow? Which controller wins if two send conflicting CC data to the same destination?
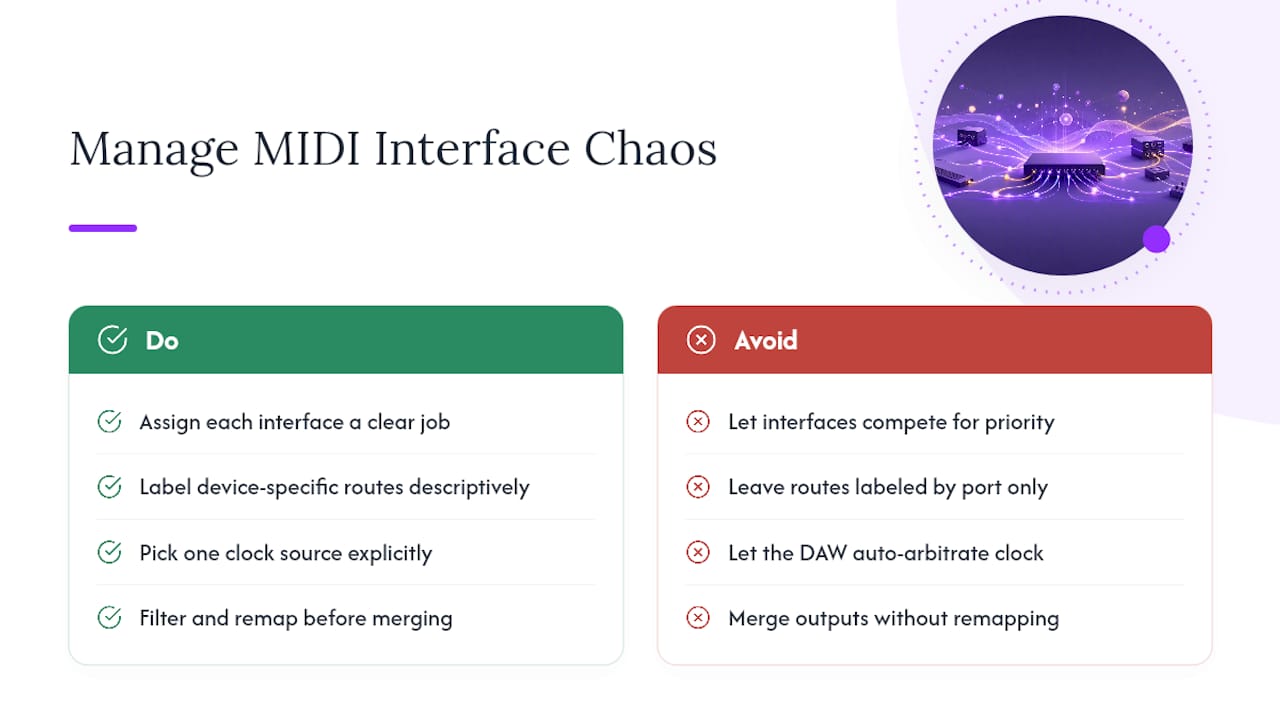
Assign each interface a clear job rather than letting them compete. One handles your primary performance controller, another handles a secondary or backup keyboard, and a third might exist purely for a control surface sending transport and routing-switch data. Label each device-specific route the same way you’d label a plugin chain, because “Interface 2, Port 1” means nothing six months from now.
Device-specific quirks matter more than most producers expect. Some interfaces send extra active-sensing messages that can clutter a route; others handle running status differently, which occasionally trips up stricter routers. When two interfaces both claim to be your clock source, pick one explicitly rather than letting the DAW guess, since letting the software arbitrate silently is a common source of drift.
If you’re routing hardware from more than one manufacturer into a single session, expect to spend real time on channel mapping. A synth that defaults to channel 1 for everything will collide with another device set the same way the moment you merge their outputs. Filtering and remapping before the merge, not after, prevents that collision from ever reaching your instruments.
How Advanced Routing Interacts With Your DAW’s Own Tools
External routers and DAW-native MIDI tools aren’t competitors. They’re different layers of the same signal path, and the best setups use both.
Your DAW’s own instrument tracks typically include basic input filtering and MIDI effects: arpeggiators, chord generators, simple transpose. These work fine for single-track jobs. Where they run out of room is cross-track routing, complex MPE handling, and anything that needs to route between multiple hardware ports simultaneously, which is where an external or platform-level router earns its place.
Software instruments and effects downstream of a route inherit whatever that route sends them, including its mistakes. A velocity-scaled signal that clips at the top of its range will make a dynamics-sensitive plugin behave strangely no matter how well the plugin itself is built. Test your routed signal against the actual instrument you’re feeding, not just a generic monitor, before trusting the chain in a mix.
Plugin and hardware control routing, the kind that lets a control surface manipulate parameters bi-directionally, adds another wrinkle: parameter feedback needs its own path, separate from your note data, or you’ll see the same feedback-loop symptoms described earlier applied to automation instead of notes. Keep control-surface routing and instrument routing conceptually separate even when they run through the same physical device.
Keeping Complex Setups Documented and Visible
A routing setup with more than four or five stages is no longer memorable. Write it down, or better, draw it.
A simple signal-flow diagram, even a hand-sketched one, showing each input, filter, transform, and output, saves hours the next time something breaks. Visual patch-graph tools solve this automatically because the graph serves as documentation, which is part of why visual tools reduce debugging overhead compared to a stack of invisible virtual connections you have to remember.
If you’re working command-line, comment your scripts the way you’d comment code. A route with a name like route_kb1_split_60 tells the next person, including future you, exactly what it does without reopening the file to trace it.
Session notes matter just as much as visual diagrams. Note which channel each device occupies, which CC numbers are reserved for routing control, and which filters run before which transforms. When a collaborator opens your session, or when you return to it after three months on a different project, that page of notes is the difference between resuming work in minutes and rebuilding your mental model from scratch.
What Most Guides Get Wrong About MIDI Routing
Most routing tutorials treat MPE as an afterthought, a special case you handle once you’ve mastered the basics. That’s backward. If you’re working with any modern expressive controller, MPE-aware thinking should shape how you build every route from the start, rather than being bolted on later.
The bigger blind spot is order of operations. Producers obsess over which tool to buy and skip the sequencing question entirely, and that sequencing — filter before transform, transform before MPE ops — is what actually determines whether a complex route behaves or falls apart under pressure. A command-line tool and a visual patch graph solve the same problem from different angles; RouteMIDI’s fixed processing model and Midilize’s visible canvas are two views of one discipline, not competing philosophies.
Prioritize the discipline over the tool. Learn to filter system messages before anything else touches your stream, name your routes like you mean it, and treat MPE zones as structured data rather than a pile of channels. Get that right, and it barely matters whether you’re typing commands or dragging cables on a screen.
— Wake
Build Your First Advanced Route Inside SoundBridge
SoundBridge gives you a routing-friendly DAW where the split, filter, and transform patterns above live directly alongside high-fidelity 192kHz audio processing and real-time remote collaboration, so you’re not juggling a separate router app and a separate mixing environment.

Start small: build one note-range split with a channel filter and a velocity scale in a free-tier project, confirm it behaves as this guide describes, then save it as a template for your next session. If you’re still deciding whether a full DAW fits your routing needs, the SoundBridge landing page walks through the platform’s core toolset, and Audio Editing: Essential Techniques for Music Producers is a solid next stop once your route is feeding real instrument tracks.
Sources
- FluidSynth MIDI router API documentation
- gbevin/RouteMIDI
- How to Route MIDI Between Apps on Mac (Midilize guide)
Recommended
MASTER MUSIC PRODUCTION
Expert-led courses designed to take you from fundamentals to finished tracks.

HOUSEFrom bouncy bass and solid kicks, this course teaches you the most modern House music production techniques needed to succeed and stand out.

TRAPQuit sounding like generic Trap and produce something World with hints of the Far East. Create ethnic soundscapes to put your Trap ahead of the curve.

AMBIENTProduce relaxing, sophisticated psy-influenced ambient. Psychedelic and relaxing to listen to, create meditative soundscapes to put your listeners in Zen.