

64–128 Tracking, 512–1024 Mixing: Buffer vs Latency for Producers
Last Edited: Sep 26, 2026
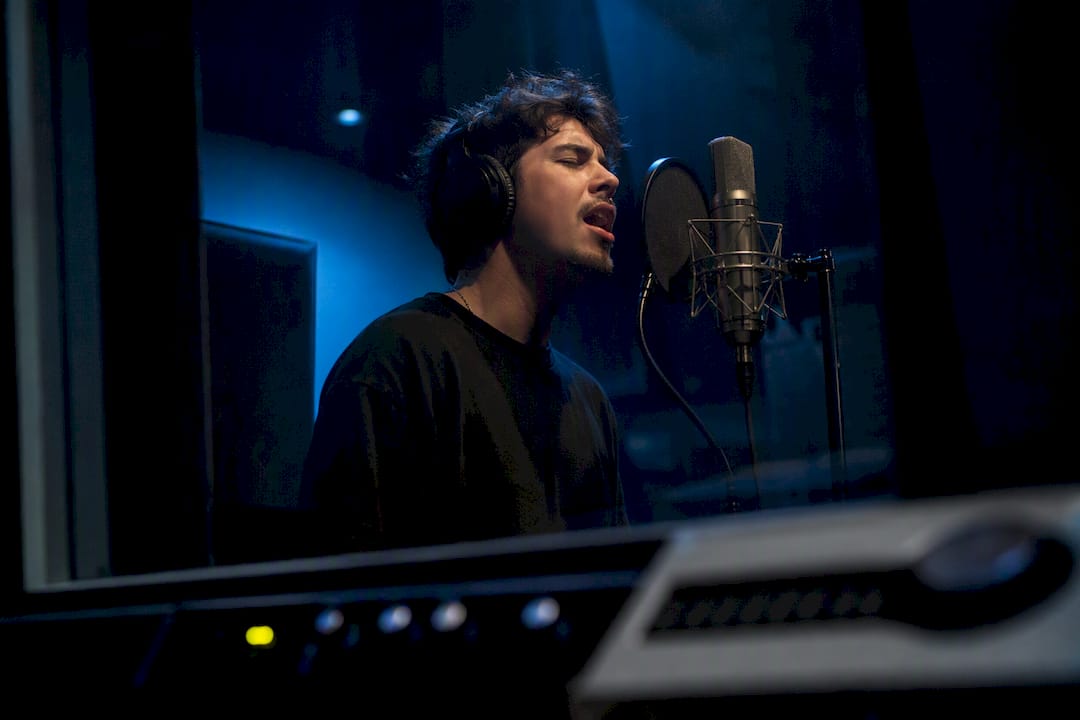
Larger buffer sizes mean higher latency; smaller buffers cut delay but tax your CPU harder. For most sessions, start at 64–128 samples when tracking and jump to 512–1024 when mixing. Beyond the buffer itself, your converters, plugins, and drivers all add their own slice of delay, so the buffer is only part of the equation.
TL;DR:
- Doubling your buffer size roughly doubles your latency, with a 128 sample buffer at 44.1 kHz resulting in about 2.9 milliseconds of one-way delay.
- Lower buffer sizes of 32–64 samples are ideal for tracking, but a stable 128 sample buffer is sufficient for most vocal and instrument overdubs.
- Additional latency comes from converter overhead, plugin processing, driver behavior, and routing, which can significantly increase overall delay felt during recording or mixing.
- Using direct or zero-latency monitoring paths through your interface can eliminate DAW buffer latency during tracking, providing instant feedback to performers.
- For stable sessions, operating at a buffer of 128 samples or higher during mixing ensures system reliability over chasing lower buffer numbers that cause glitches.
Buffer Size vs Latency: The Math Behind the Delay
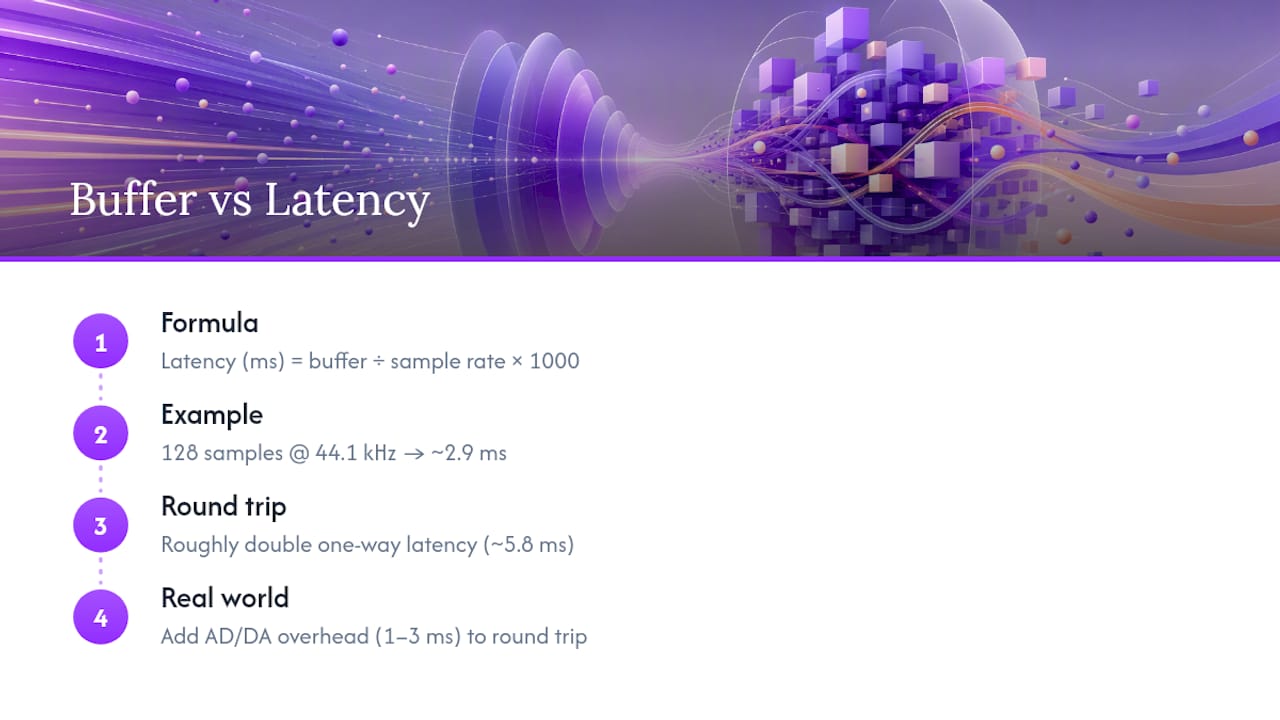
The relationship between buffer size and latency isn’t a mystery. It’s arithmetic. Buffer latency in milliseconds equals your buffer size divided by your sample rate, multiplied by 1,000. A 128-sample buffer at 44.1 kHz gives you roughly 2.9 ms of one-way latency.
Round-trip latency, the delay you actually feel when you sing into a mic and hear yourself through headphones, runs closer to double that number. You’re waiting for the signal to go in, get processed, and come back out. Add the fixed overhead from your AD/DA converters, typically 1 to 3 ms, and you get a real-world figure.
Pro Tip: Bookmark a buffer size and latency calculator so you can punch in your interface’s actual sample rate and buffer setting instead of eyeballing it. Every interface reports slightly different converter overhead, and the calculator saves you from guessing.
Once you see the numbers laid out, the buffer vs delay comparison stops feeling abstract. Doubling your buffer roughly doubles your latency, every time, at every sample rate.
Practical Buffer Size Recommendations for Tracking vs Mixing
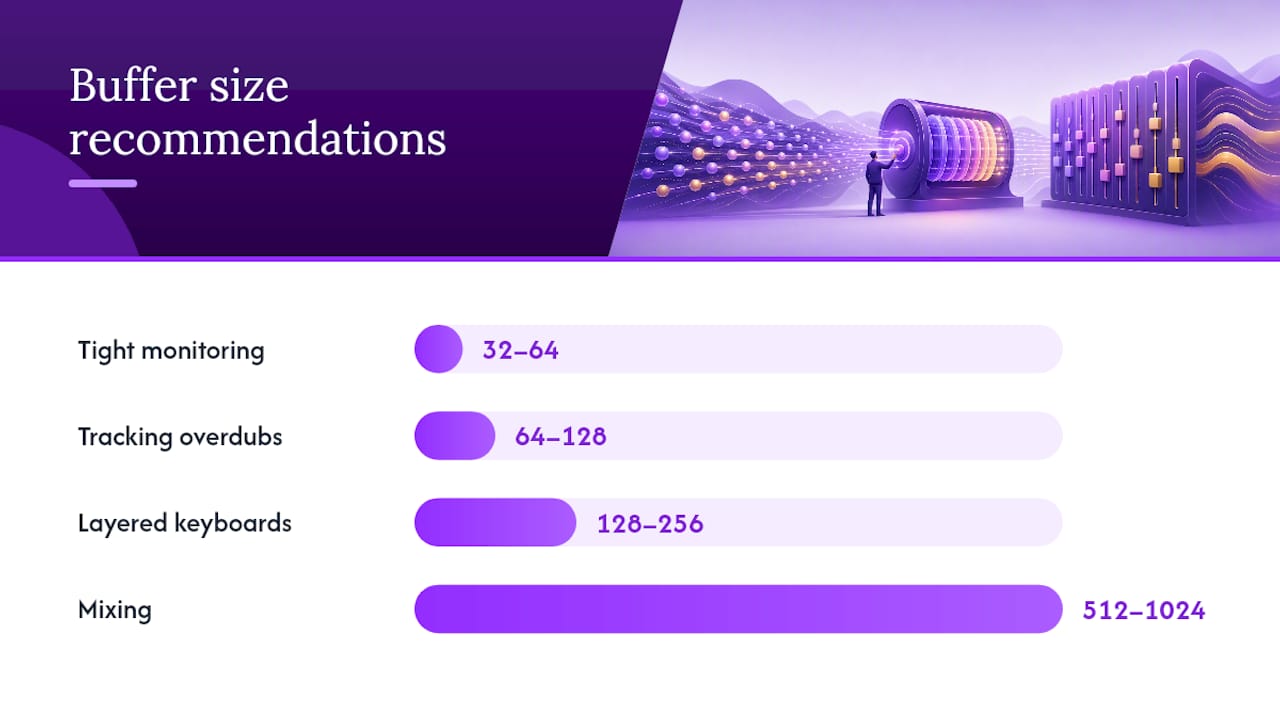
Your buffer size recommendations should shift depending on what you’re doing in a session, not just what your machine can handle. Here’s how the ranges typically break down:
- 32–64 samples: Reserved for the tightest low-latency monitoring scenarios, usually with a light session and a fast interface.
- 64–128 samples: The common starting point for tracking vocals, guitars, and most overdubs.
- 128–256 samples: A safer zone for keyboard players layering over a busier arrangement, where a few extra plugins are already running.
- 512–1024 samples: Standard for mixing, where you need CPU headroom for dense plugin chains rather than split-second responsiveness.
Sample rate changes the math on all of this. A 128-sample buffer at 96 kHz yields roughly half the latency compared to the same buffer size at 48 kHz, because the higher sample rate processes more samples per second. That’s worth remembering if you track at high sample rates for fidelity but still want monitoring with low latency.
Different performers tolerate latency differently. Vocalists generally prefer round-trip latency low enough to feel natural. Keyboardists often prefer slightly lower latency due to timing sensitivity. Drummers and guitarists may tolerate somewhat higher latency, with distance from monitors also affecting perception.
When even a fast buffer setting doesn’t feel immediate enough, skip the DAW’s monitoring path entirely. Most interfaces include a direct or zero-latency monitoring option through their own mixer utility, which lets the performer hear the input signal before it ever reaches the buffer.
What Else Adds Latency Besides the Buffer
A tiny buffer setting doesn’t guarantee an instant-feeling session. Several other factors stack on top of buffer latency, and ignoring them leads to confusion when a “low latency” setup still feels sluggish.
- Converter overhead: Every AD/DA converter adds a fixed 1 to 3 ms of delay that exists no matter how low you set the buffer.
- Driver behavior: ASIO on Windows and Core Audio on Mac handle buffering differently, and aggregated or multi-device setups often add extra delay on top of the driver’s baseline.
- Plugin latency: Look-ahead compressors, linear-phase EQs, and convolution reverbs all introduce their own processing delay, sometimes measured in dozens of milliseconds.
- Routing and compensation: How your DAW handles automatic delay compensation and whether a performer is monitoring through the main bus or a separate monitor bus change what they actually hear in real time.
This is why two producers running identical buffer settings can report completely different monitoring experiences. The buffer is one variable in a longer chain.
How to Choose a Buffer and Fix Clicks, Pops, or Dropouts
Picking the right setting is less about finding a magic number and more about running a quick process every time you sit down to record or mix.
- Set your sample rate first. Everything else follows from this, since it changes what a given buffer size actually means in milliseconds.
- Pick a task-appropriate starting buffer. Use 64–128 for tracking, 512 or higher for mixing.
- Test round-trip responsiveness. Play or sing something rhythmic and listen for any lag between the input and what you hear back.
- Lower the buffer step by step until you hear glitches, then raise it one increment above that point. That’s your stable floor.
- Raise the buffer for mixing sessions once you start stacking plugins, since CPU headroom matters more than instant response at that stage.
If clicks, pops, or dropouts show up before you’ve even pushed the buffer that low, work through a short checklist before assuming you need new hardware:
- Freeze or print CPU-heavy tracks to free up processing power.
- Disable non-essential plugins sitting on the monitor path.
- Swap to ‘lite’ monitoring plugins instead of full-featured ones during tracking.
- Update your audio drivers and interface firmware.
- Check your laptop’s power settings and switch to a high-performance mode.
- Close background applications competing for CPU cycles.
If you’ve worked through all of that and still can’t get a stable low buffer, it might genuinely be time for new hardware or switching to your interface’s direct monitoring path instead of fighting your DAW’s buffer for every session.
Pro Tip: For live tracking where any delay would throw off a performer, route monitoring through your interface’s direct or zero-latency path rather than the DAW. The performer hears themselves before the signal ever touches your buffer, so it feels instant regardless of what buffer size you’ve set for recording.
DAW Features That Reduce the Need to Chase Extreme Buffer Numbers
Some of the pressure to run absurdly low buffers disappears when your DAW handles monitoring differently from the start. Soundbridge builds in a few capabilities aimed at exactly this problem:
- Zero-latency remote tracking, which lets collaborators record together without fighting round-trip delay across a network connection.
- High-fidelity processing up to 192 kHz, delivering lower buffer latency at high sample rates without sacrificing audio quality.
- Integrated talkback and video, useful for remote sessions where clear communication matters as much as clean signal.
- Mac and Windows support, so your buffer strategy doesn’t have to change when you switch machines.
These features don’t replace good buffer discipline, but they take some of the burden off finding the absolute lowest number your system can survive.
Chase Stability, Not the Smallest Number
A stable 128 sample buffer beats an unstable 32 sample setting every single time. Glitches during a take cost you more than a few extra milliseconds of latency ever will. Document your working buffer settings per session type, lean on direct monitoring when you need it, and measure your actual round-trip latency instead of guessing based on what sounds fast.
— Wake
Try Soundbridge for Sessions Where Latency Can’t Slow You Down
Some digital audio workstations offer remote collaborators zero-latency tracking without the usual guesswork over buffer settings, allowing a vocalist in one city and a producer in another to record together in real time. That matters most when you’re tracking with heavy plugin chains active or running sessions across a network connection, where standard buffer math starts working against you. If your current workflow keeps forcing you to choose between a livable buffer and a stable session, it’s worth seeing how a DAW built around zero-latency remote recording handles the same problem.

Curious how a modern DAW architecture supports this kind of workflow? Read through the complete guide to digital audio workstations and see how Soundbridge’s approach to monitoring and processing fits into your setup, then start a session and test it against your own hardware.
Sources
For deeper technical detail, check the Gera Tools latency calculator, PCAudioLabs’ buffer size guide, Sweetwater’s buffer primer, and Sound On Sound’s buffer Q&A.
- Which Buffer Size Setting Should I Use in My DAW? | Sweetwater
- Audio Buffer Size & Latency Calculator — Gera Tools
FAQ
Does Buffer Size Affect Latency?
Yes. Buffer size and latency are directly related: a smaller buffer produces lower latency, while a larger buffer increases the delay between input and output.
Is 256 Samples a Good Buffer Size?
It’s a solid middle ground, often used for overdubs or sessions with a moderate plugin load, though most vocalists and keyboardists prefer 64–128 for tighter monitoring during tracking.
Is 128 Samples a Good Buffer Size?
For most tracking situations at 44.1 or 48 kHz, 128 samples delivers round-trip latency low enough to feel responsive while still giving your CPU some breathing room.
Is 40 to 60 ms of Latency Bad?
Yes, such latency is usually unacceptable for tracking, as performers generally require latency below around 10 ms to feel in sync. However, it can be acceptable during mixing when live monitoring is not needed.
Recommended
MASTER MUSIC PRODUCTION
Expert-led courses designed to take you from fundamentals to finished tracks.

HOUSEFrom bouncy bass and solid kicks, this course teaches you the most modern House music production techniques needed to succeed and stand out.

TRAPQuit sounding like generic Trap and produce something World with hints of the Far East. Create ethnic soundscapes to put your Trap ahead of the curve.

AMBIENTProduce relaxing, sophisticated psy-influenced ambient. Psychedelic and relaxing to listen to, create meditative soundscapes to put your listeners in Zen.