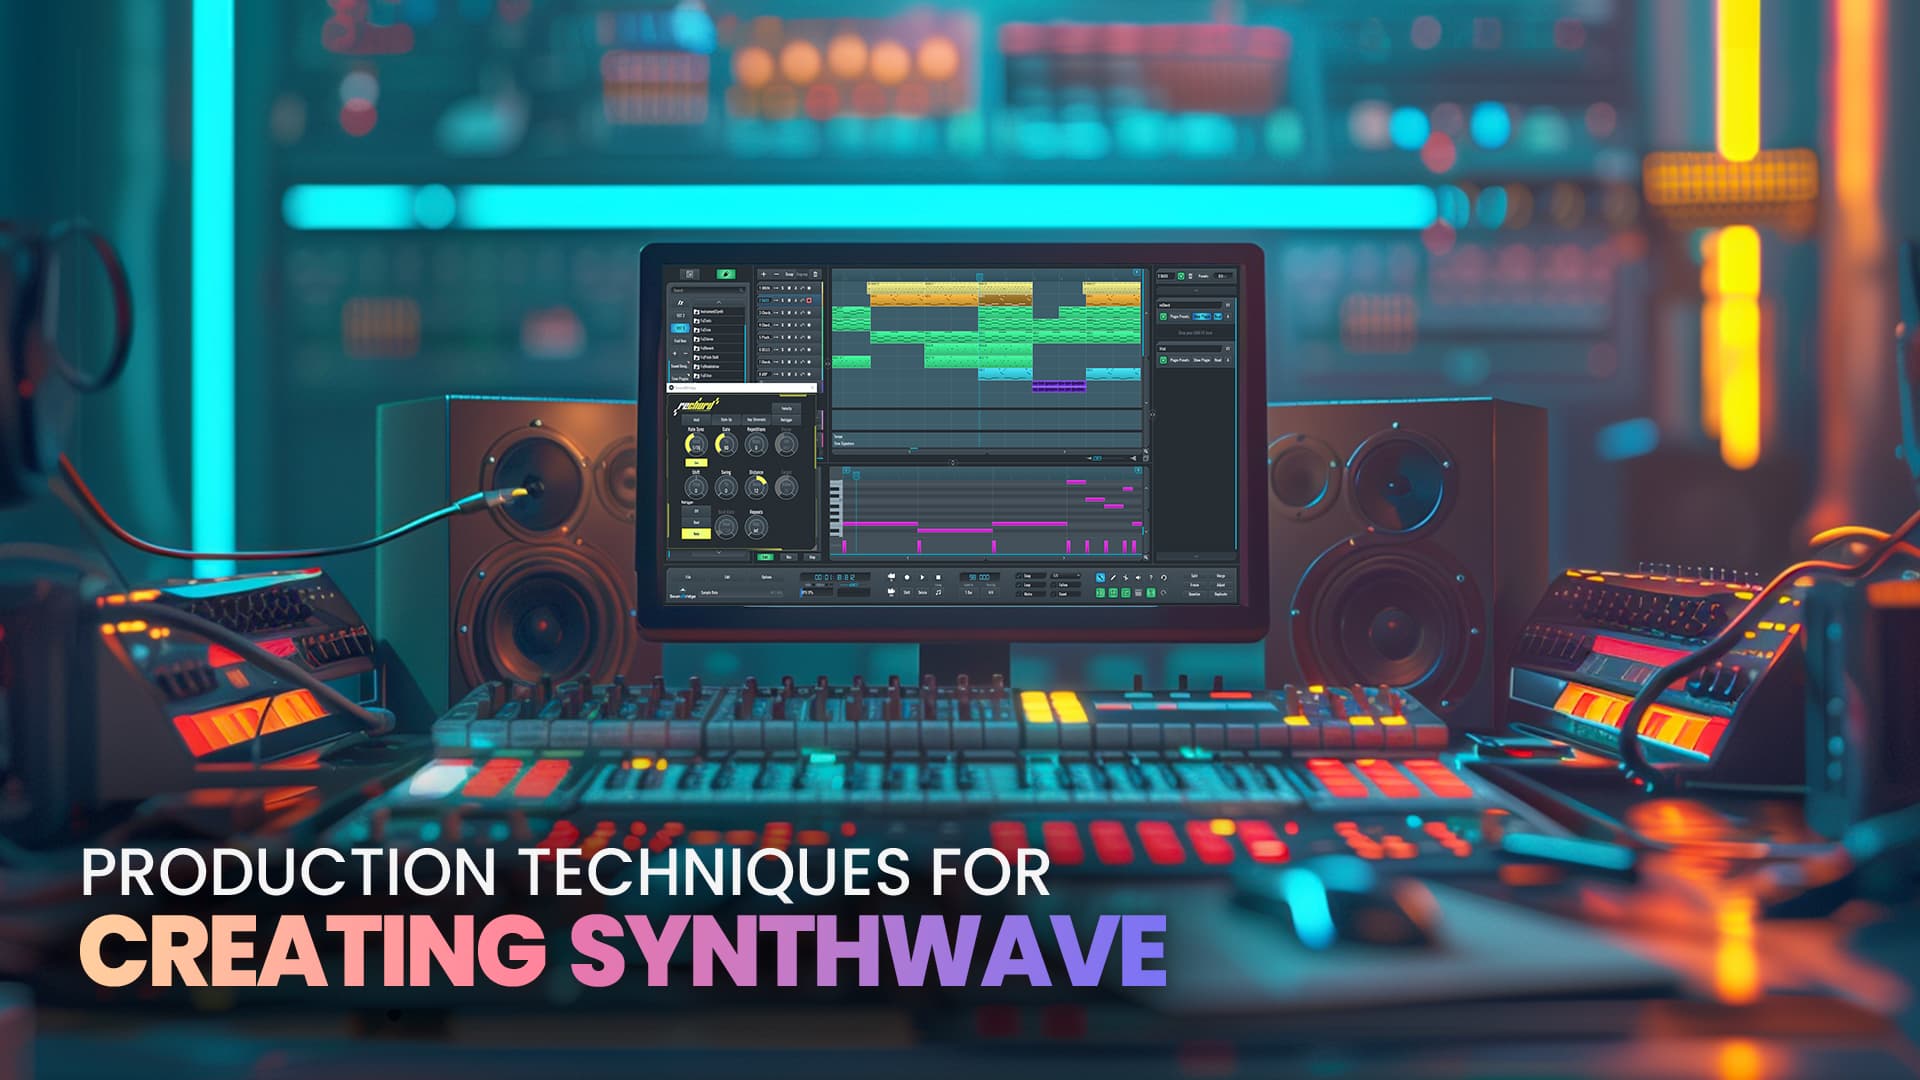
Production Techniques for Creating Synthwave
Last Edited: Jun 10, 2024
Dive into the captivating world of Synthwave, a genre that has made a massive comeback with its nostalgic nod to the '80s and futuristic vibes. In this post, we will explore step-by-step techniques using drum machines, arpeggiators, and synthesizers to create a powerful and catchy Synthwave track.
Get Ready to Add Some Serious Groove to Your Music Production Toolkit!
A crucial element of Synthwave is its disco music influence, especially retro synths that provide a unique color to the genre. One of the most popular sounds is the Italo bassline, often used in Italo Disco music, which was trendy in Italy in the late '70s and early '80s.
To instantly give your track that retro disco feeling, find a drum kit from '80s drum machines. For example, Roland drum machines are a great choice. Load samples into your sampler or step sequencer, such as RitMix.
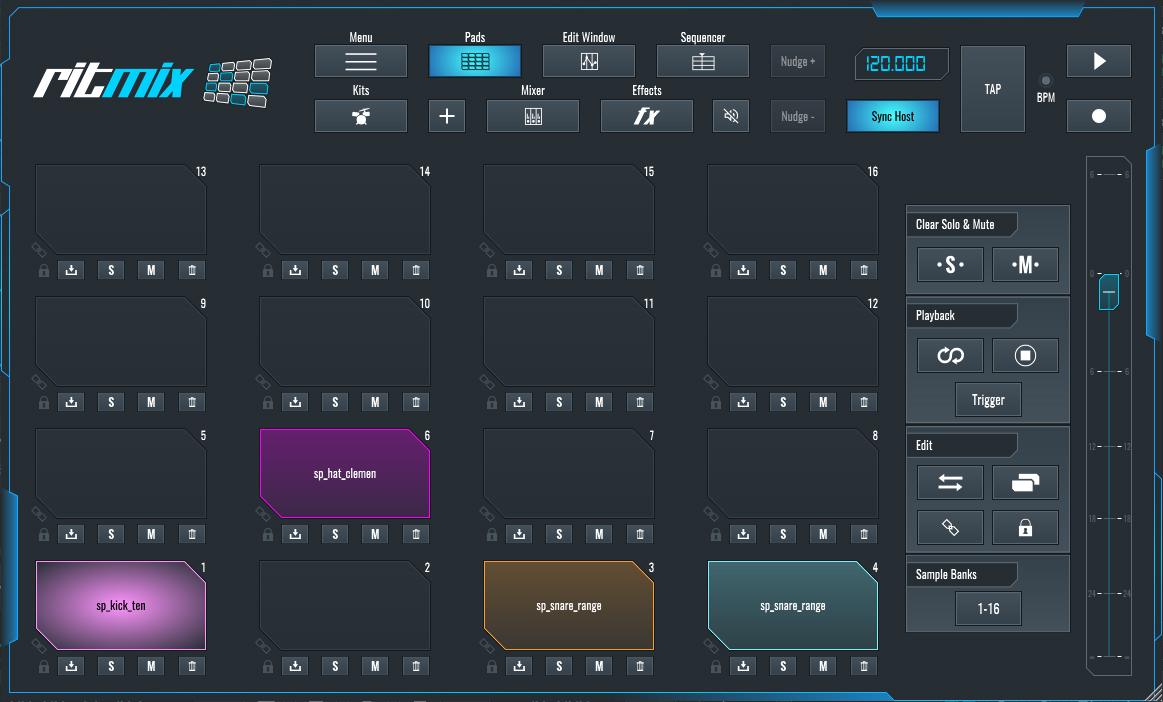
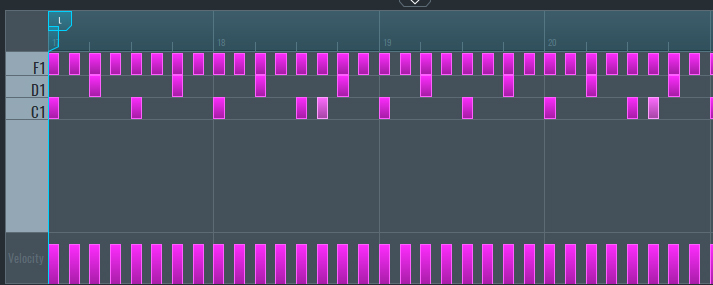
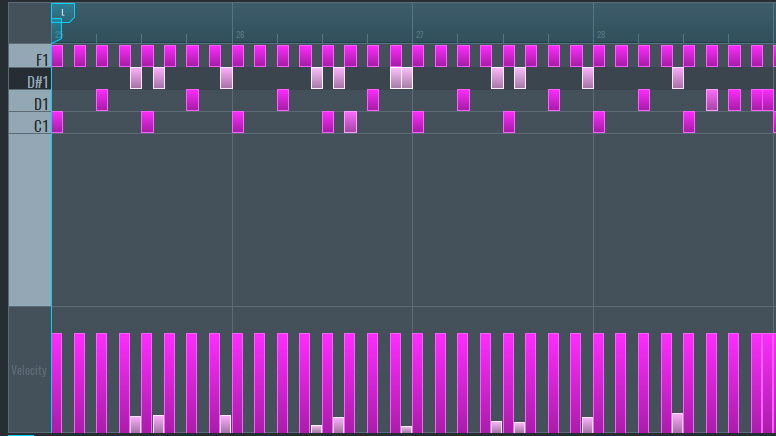
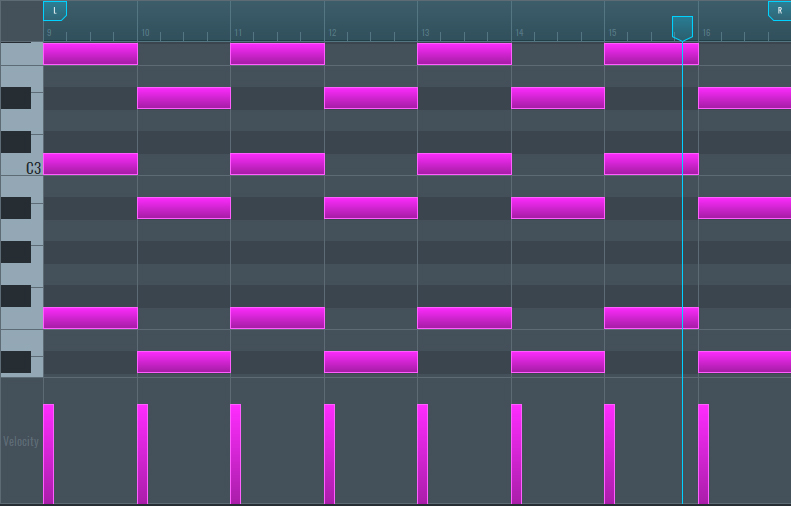
Now, create the drum beat inside the sequencer or MIDI file. (C1 - Kick, D1 - Snare, F1 - Hi-Hat )
~Drum Track - Solo
Now Let's Enhance Your Drum Patterns:
- Add the same snare to the D1 pad and the D# pad to create a variation of the drum hit.
- In the edit window, use the envelope to shorten the snare by decreasing the decay and reducing the filter cutoff to make it less bright. This simulates a less powerful snare hit and increases the groove.
- Duplicate the first drum MIDI block and add the extra snare shots.
~Drum Track - Solo (Processed with Envelope Filter)
Let's Create a Synthwave Bassline
The bassline is key in almost every genre of music, especially electronic music, as it forms the backbone. We'll use Vital to synthesize the Synthwave bassline:
- Open Vital.
- In Oscillator one, choose "Basic Shapes" and scroll to find the asymmetrical square waveform.
- Set 4 voices and 3% detune.
- Turn on the filter, select 12db LP, and reduce the resonance.
- Connect Envelope 2 to the filter's cutoff and set it to a value of 44.71.
- Set the envelope decay to 0.100 seconds and make a slight curve.
- Connect LFO2 to the master level in Vital and set it to 0.150.
- Set LFO2 to sync and 1/4.
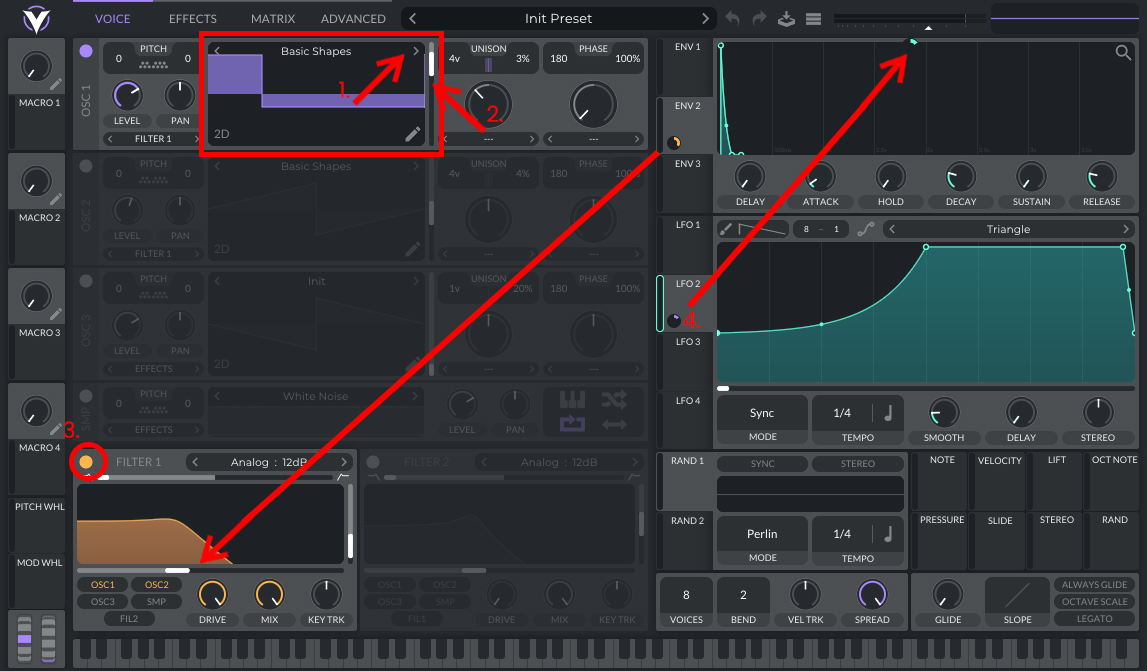
In the FX section select:
- Turn on Distortion and choose Linear Fold.
- Set drive to around 60% and mix to 50%.

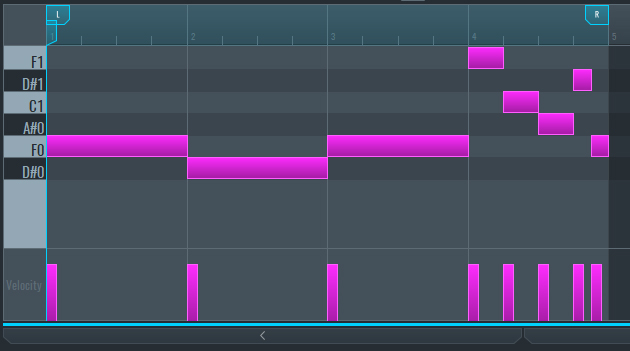
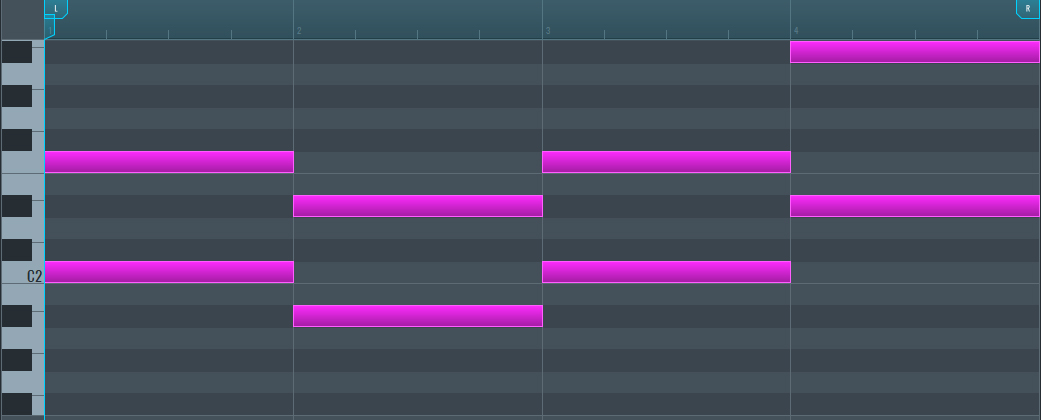
Create the MIDI for the bassline, using the F and D# notes, and add melody content at the end of the loop with F1, C1, A#, D#1, and back to F.
~Bassline - Solo
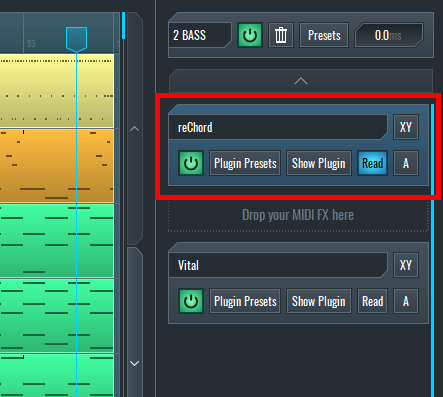
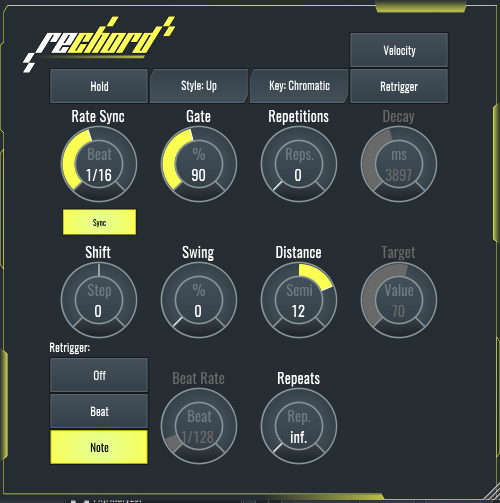
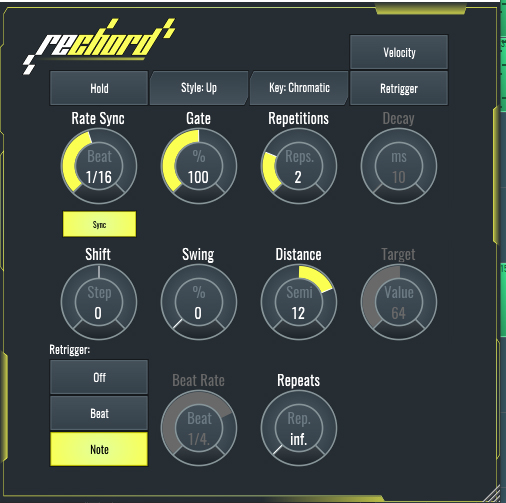
Add an Arpeggiator to the MIDI effect slot before Vital on the right side panel and set reChord to the same parameters shown in the images below.
~Bassline - Solo (Processed with reChord)
Adding Chords and Pads to the Track
Next, create two MIDI tracks using any analog emulation VST instrument for the chords. On the first track, draw the MIDI as shown in the photo and choose any E-Piano preset.

~E-Piano Chords Track 1 - Solo (Unprocessed)
On the second track, do the same but find another preset. Copy all lower notes in the MIDI and move them to the upper octave to change the notes as shown below.
~E-Piano Chords Track 2 - Solo (Unprocessed)
Create another MIDI track, add analog-sounding pads, and draw the MIDI as shown below.
~E-Piano Pads Track 3 - Solo (Unprocessed)
Adding Some Final Details with Analog Bells
For the next channel, use analog bells to create a Disco vibe and make the Synthwave track stand out. Use the same notes as shown below.
~Analog Bells- Solo (Unprocessed)
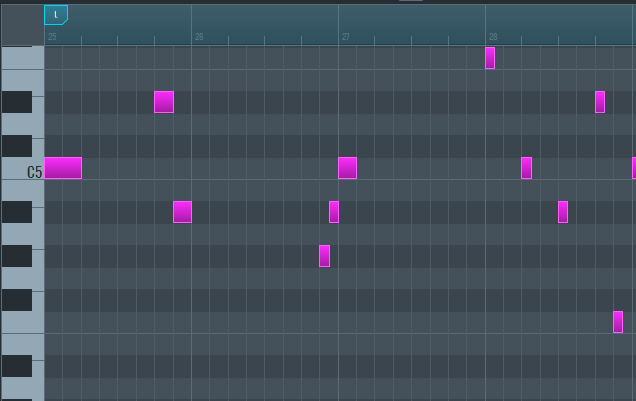
For the melody, choose any pluck sound to your taste and create the MIDI as shown in the image below.

~Pluck Sound - Solo (Unprocessed)
Now Let’s Use reChord to Add Movement to the Lead Sounds
- Use any lead sound that suits the Synthwave style and copy the MIDI from the bassline.
- Add reChord to the MIDI effects slot and set it as shown in the image. The reChord will play the triggered notes and add octaves, set to play in 3 octaves with repetitions set to 2.
~Lead Sound with Arpeggiator - Solo (Unprocessed)
Now that we have covered all of the techniques, let's listen to the result of the Synthwave track:
~Synthwave Track by E-Clip
If you liked this article on sound design, here are some more on the same subject:
- Crafting a Dub Reggae Vibe
- Create a Tech House Bassline in SoundBridge Using Vital
- Color Your Track With a Lo-Fi Sound
- Make Your Kick and Bass Sound Tight
MASTER MUSIC PRODUCTION
Expert-led Kurse, die dich von den Basics bis zu fertigen Tracks bringen.

HOUSEVon bouncy Bass und solid Kicks: Dieser Kurs zeigt dir die modernsten House-Production-Techniken, um zu gewinnen und herauszustechen.

TRAPKling nicht nach 08/15-Trap, sondern produziere etwas World mit Far-East-Vibes. Erstelle ethnische Soundscapes, damit dein Trap der Konkurrenz voraus ist.

AMBIENTProduziere entspannte, sofisticierte psy-influenced Ambient. Psychedelisch und relaxed zum Hören – erschaffe meditative Soundscapes für Zen.