
How to Build Driving Tom Rhythms in Afro House
Last Edited: May 29, 2026
In Afro house production, rhythm is the driving force that shapes the track's groove. While the kick drum establishes the main pulse, the surrounding percussion elements create movement, energy, and rhythmic complexity. In this tutorial, we will look at a practical method for building a driving tom rhythm suitable for Afro house tracks. The focus will be on selecting appropriate tom sounds, programming a rhythmic pattern that fits the genre, and shaping the groove so it interacts naturally with the rest of the drum elements.
Tom drums often add a tribal, organic character that defines much of this genre's rhythmic identity. Unlike traditional drum fills, where toms appear only occasionally, Afro house productions frequently use tom patterns as part of the main groove. These repeating rhythmic figures can create a rolling momentum that complements the kick drum and other percussion layers. When programmed carefully, tom grooves help establish a hypnotic rhythmic flow that supports the track's rhythmic foundation.
Listening to the Groove and Finding the Right Placement
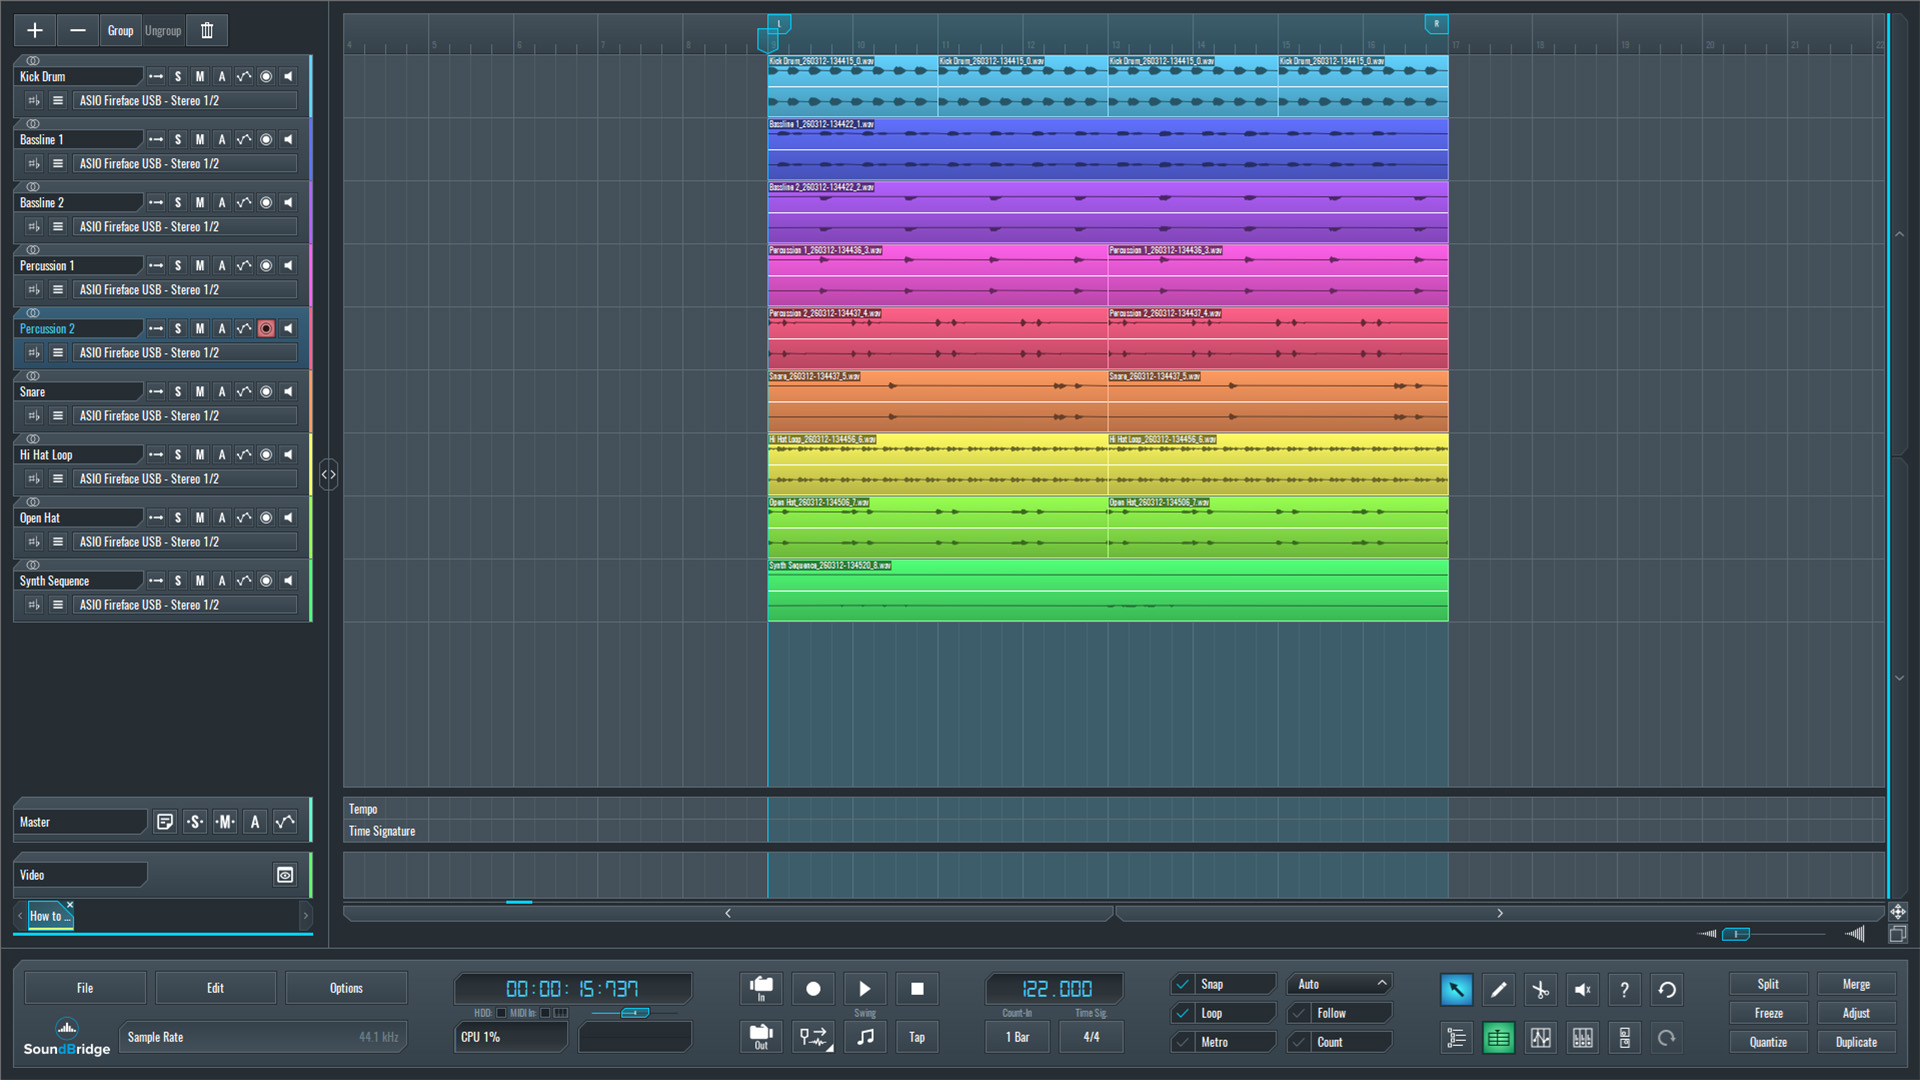
Before programming a tom pattern, it is important to listen carefully to the track's rhythmic context. In Afro house production, percussion elements rarely work in isolation. The kick drum, shakers, claps, and other rhythmic layers interact constantly to form the groove.
The first step is to play the existing drum loop and analyze the rhythmic spaces. In this example, we listen to a short groove from the track's bridge section. Even though we have already established the basic pulse, there are still gaps in the rhythm we can fill.
The goal is to identify those areas where tom hits can add movement without overcrowding the pattern. By placing toms between existing percussion elements, the groove can become richer and more dynamic while remaining clear and balanced.
~Full Mix - Without The Tom Groove.
Selecting Tom Sounds for Building a Driving Rhythm
Our next step is choosing the tom sounds that will form the pattern. In this example, we will use RitMix by SoundBridge to load the tom samples. RitMix helps shape the sound so it fits naturally within the drum groove.
One advantage of using Ritmix is the ability to quickly tune each tom sample. Adjusting the pitch helps the toms sit better with the track's tonal center and prevents them from sounding disconnected from the rest of the mix. In addition to tuning, the envelope controls allow us to shorten the decay, sustain, and release times, which is often necessary for percussive patterns. Shorter envelopes help the tom hits stay tight and rhythmic rather than ringing too long and cluttering the groove.
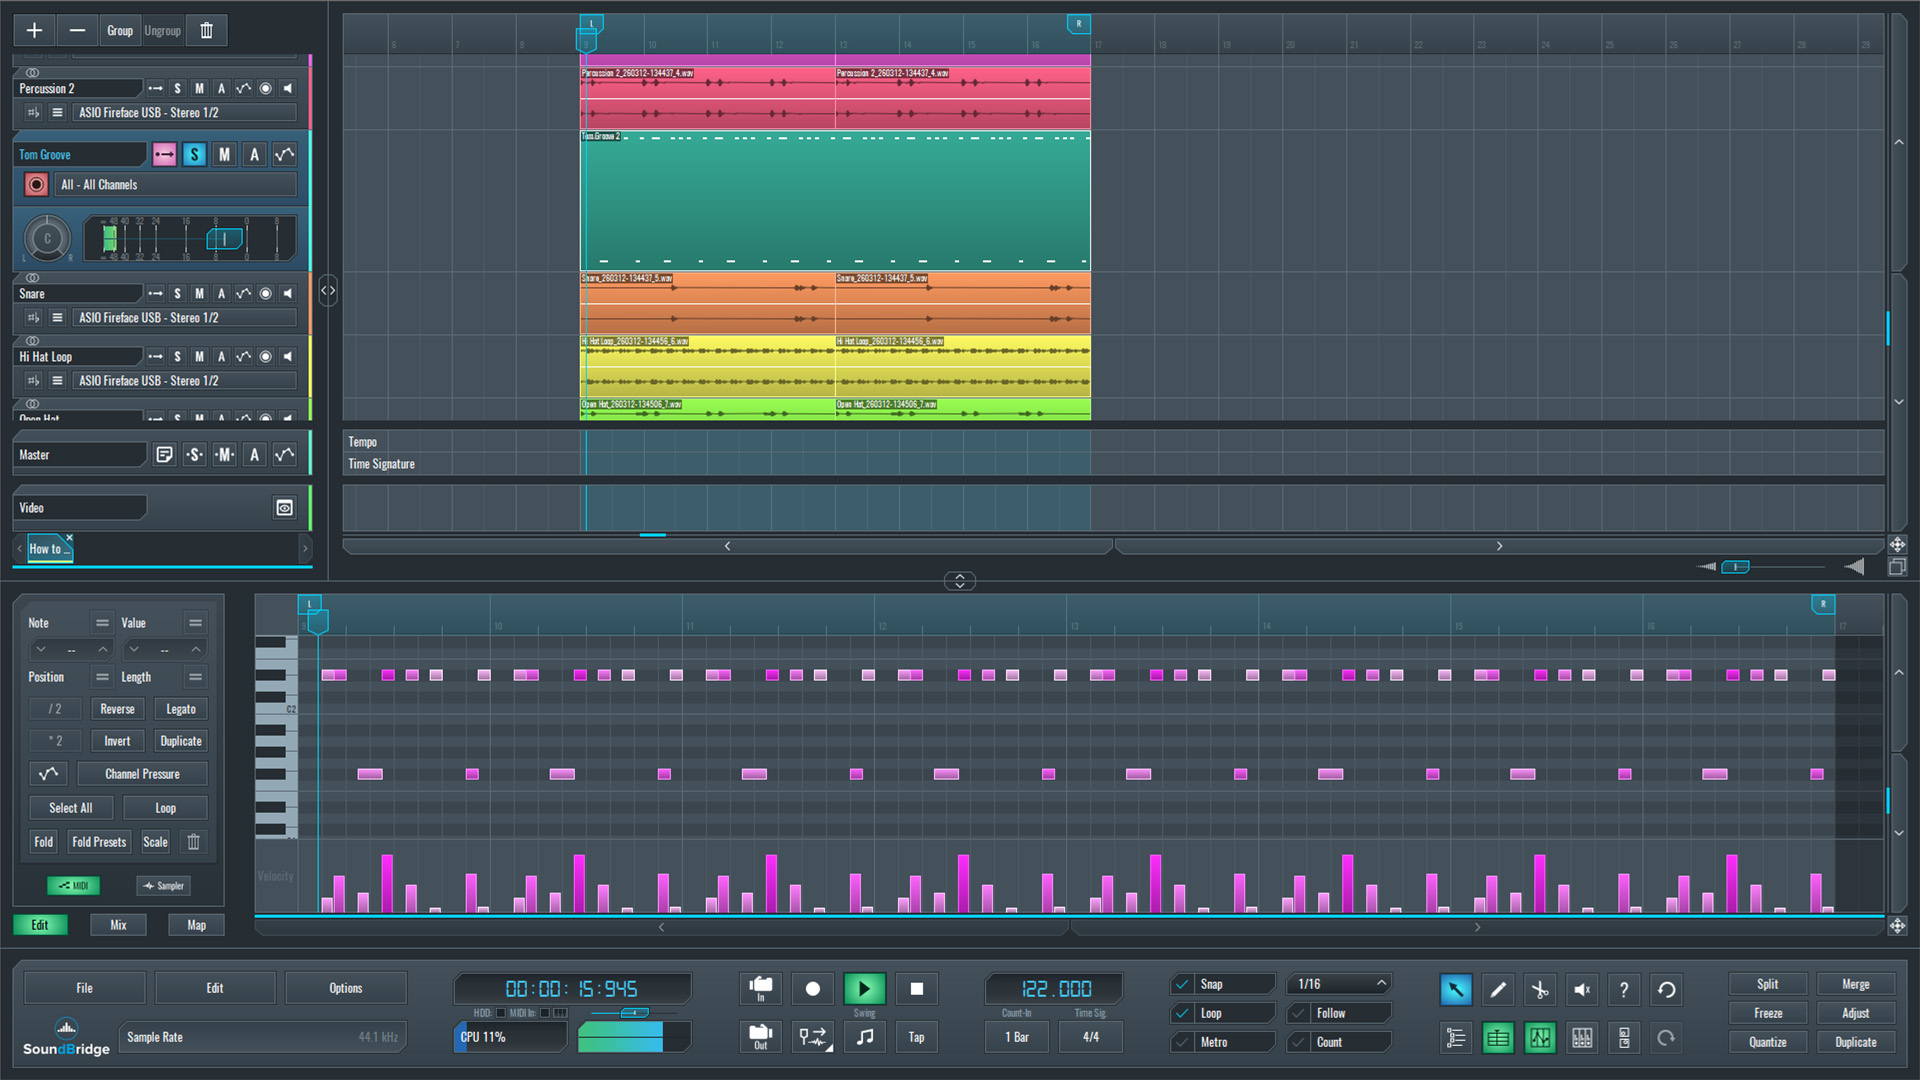
Before applying these adjustments, however, we first build the driving tom rhythm on a MIDI track. At this stage, the focus is purely rhythmic. The MIDI notes are in areas of the pattern where the groove feels slightly empty and could use additional movement. After establishing this basic structure, we can visualize the pattern more clearly. In the tutorial, an image will illustrate how the tom notes are positioned within the MIDI grid. For a start, let's listen to it with just a kick drum.
~Kick Drum & Tom Groove - Solo (Unprocessed).
Tuning the Tom Sounds to the Key of the Track
In the previous audio example, we can see that the selected toms are not perfectly aligned with the track's tonal center. Since the track is written in E, the tom samples should also be tuned to that note to drive the groove consistently.
To determine the fundamental note of the tom samples, we can use a spectrum analyzer such as Voxengo SPAN. This method was explained in a previous tutorial, so we will not repeat the full process here.
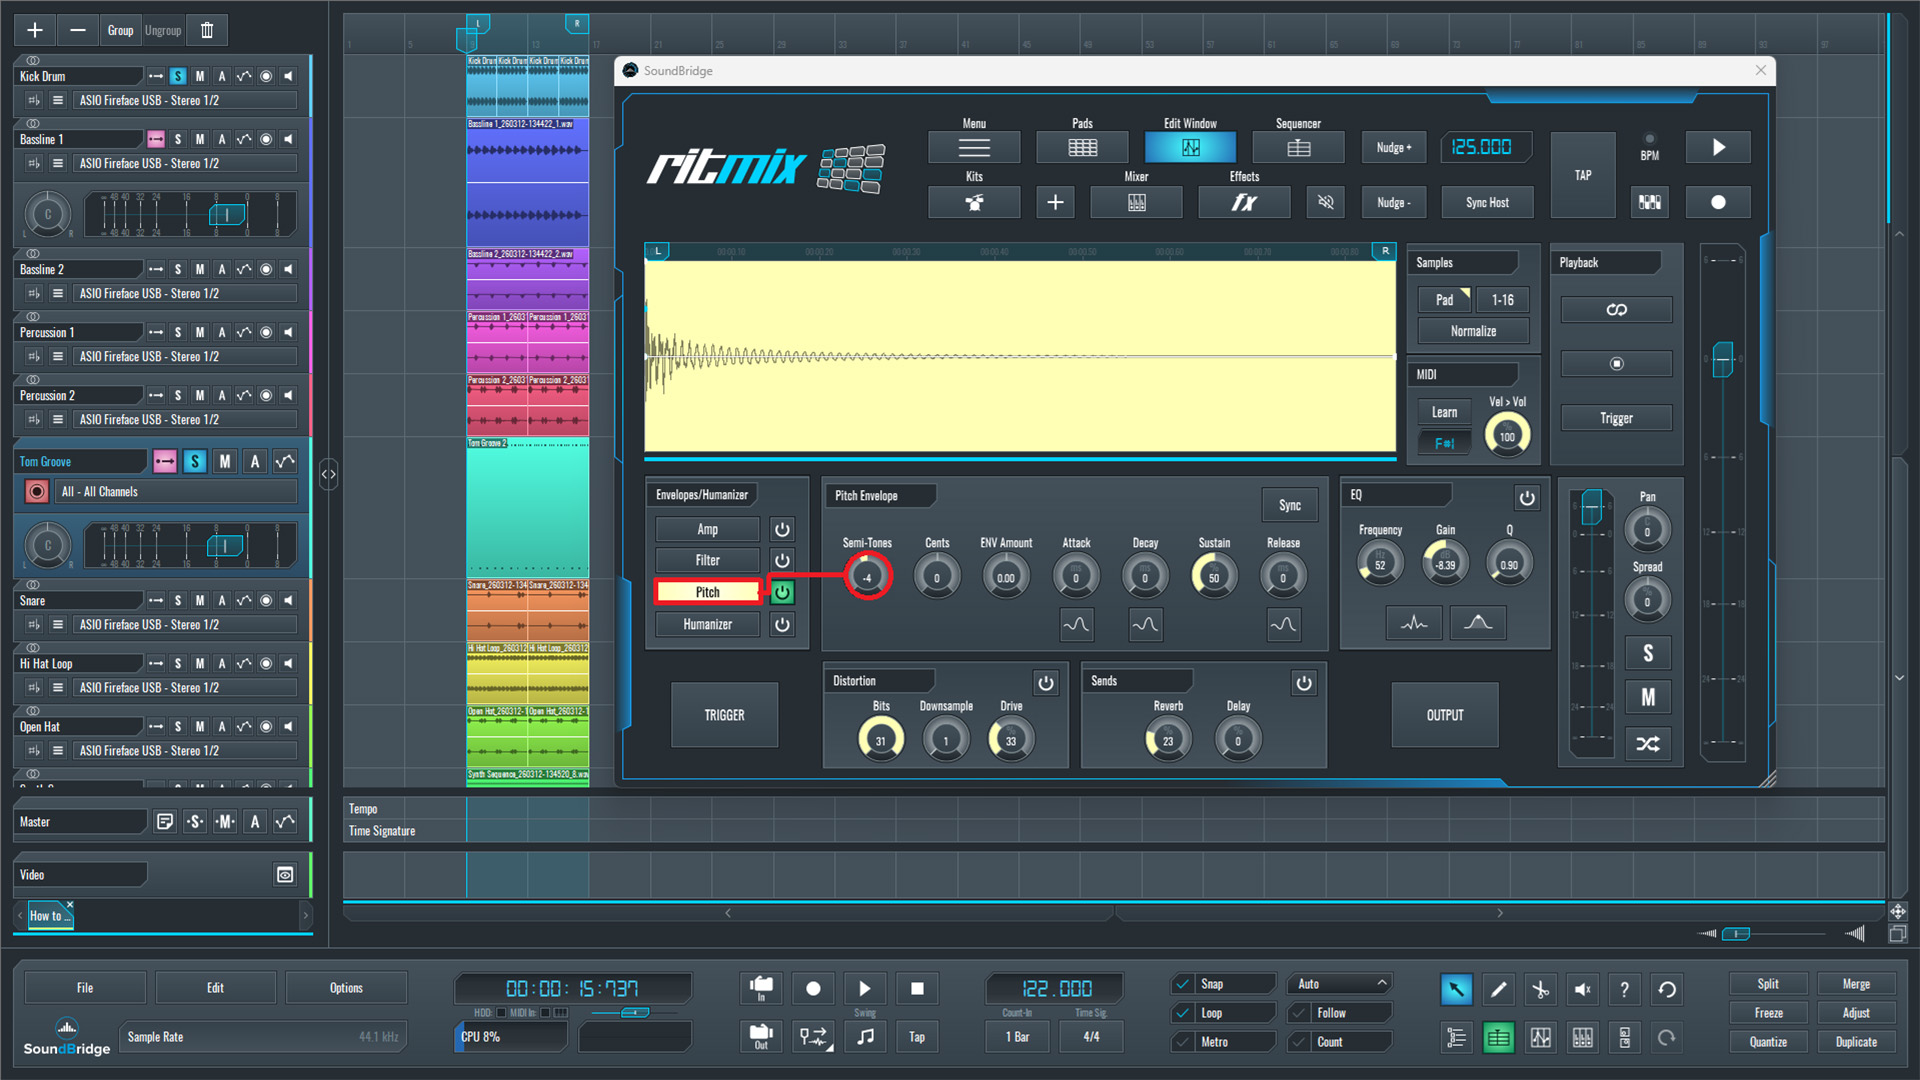
After identifying the fundamental pitch, we open the sample edit window in Ritmix (SoundBridge) and adjust the pitch control of each pad. By increasing or decreasing the pitch by semitones, we tune the tom samples to match the track's key. This small adjustment helps the groove blend more naturally with the rest of the musical elements.
~Kick Drum & Tom Groove - Solo (Tuned).
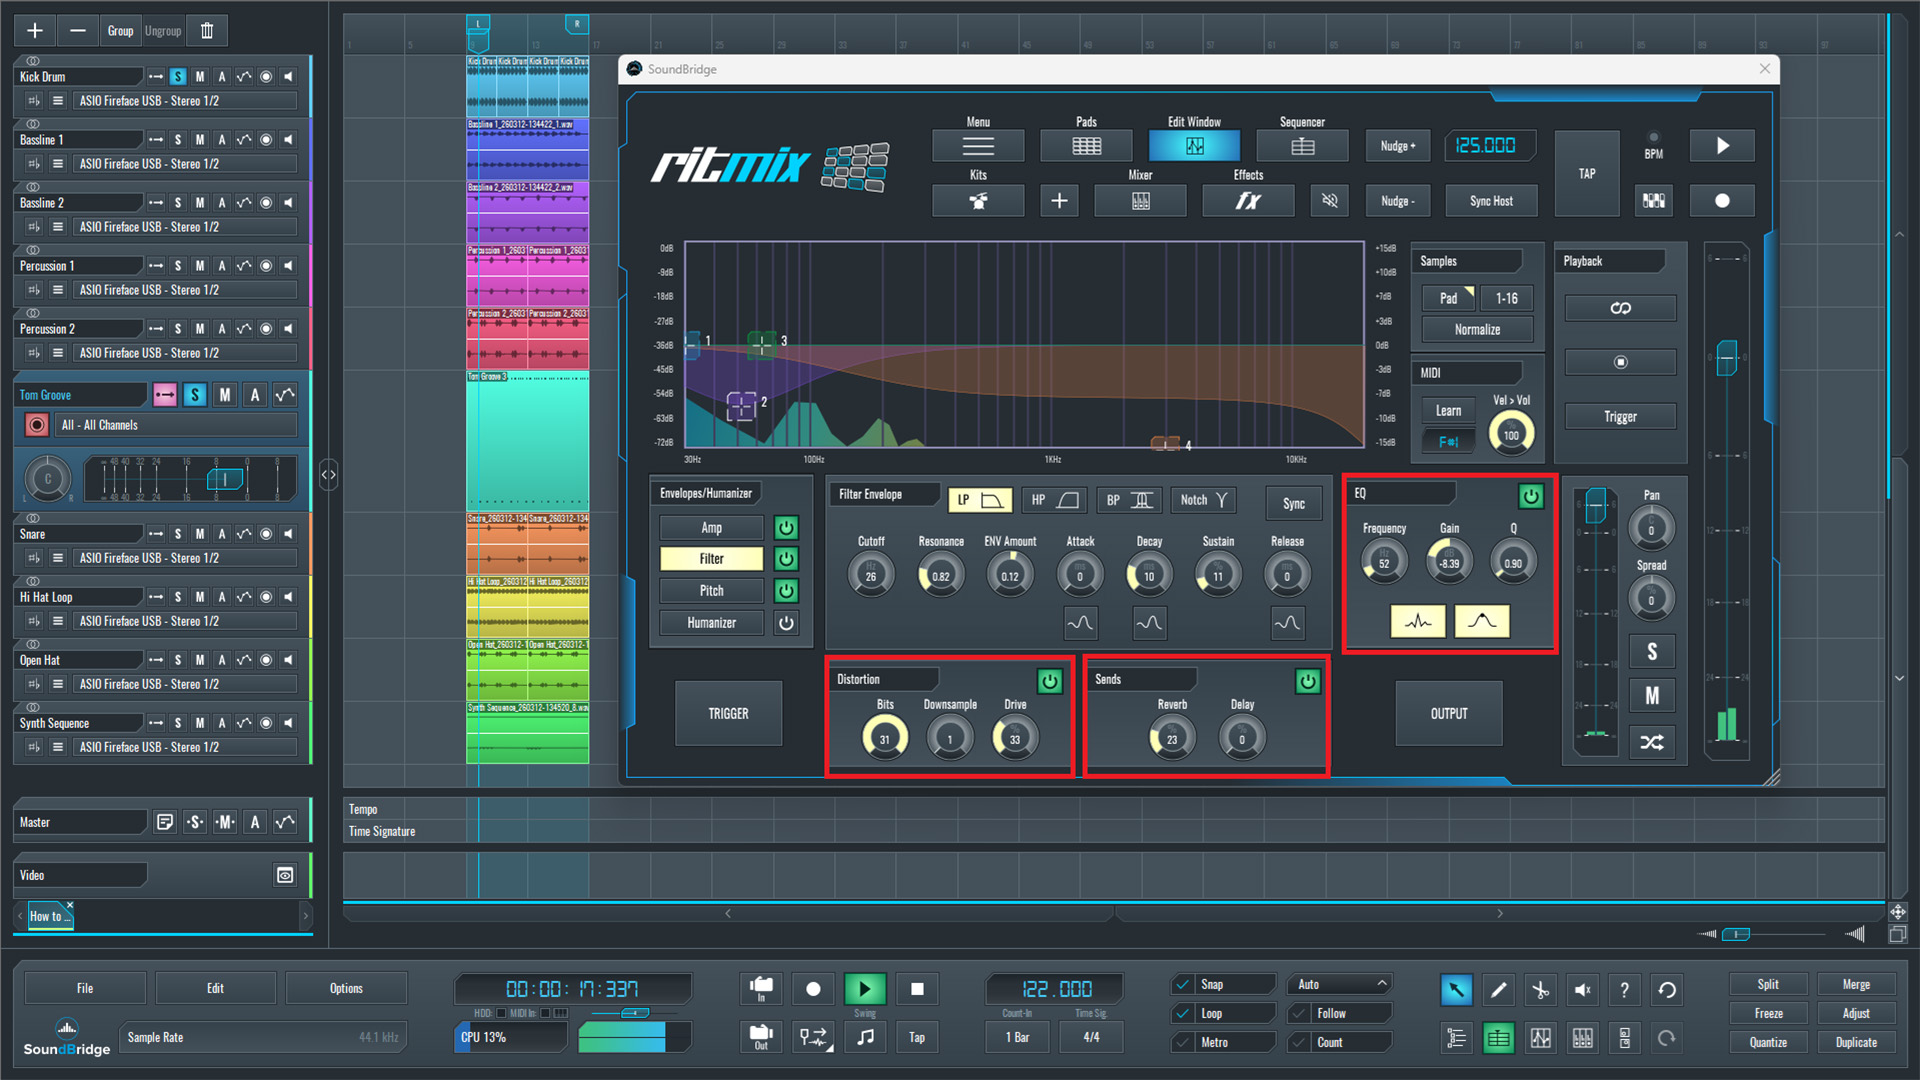
Tightening the Tom Groove With Envelope and Filtering
After tuning the tom samples, the groove already sounds more coherent. However, the tom sounds still need additional processing to sit properly in the rhythm. In this case, we are working with two toms: a higher and a lower one, both of which were pitch-adjusted.
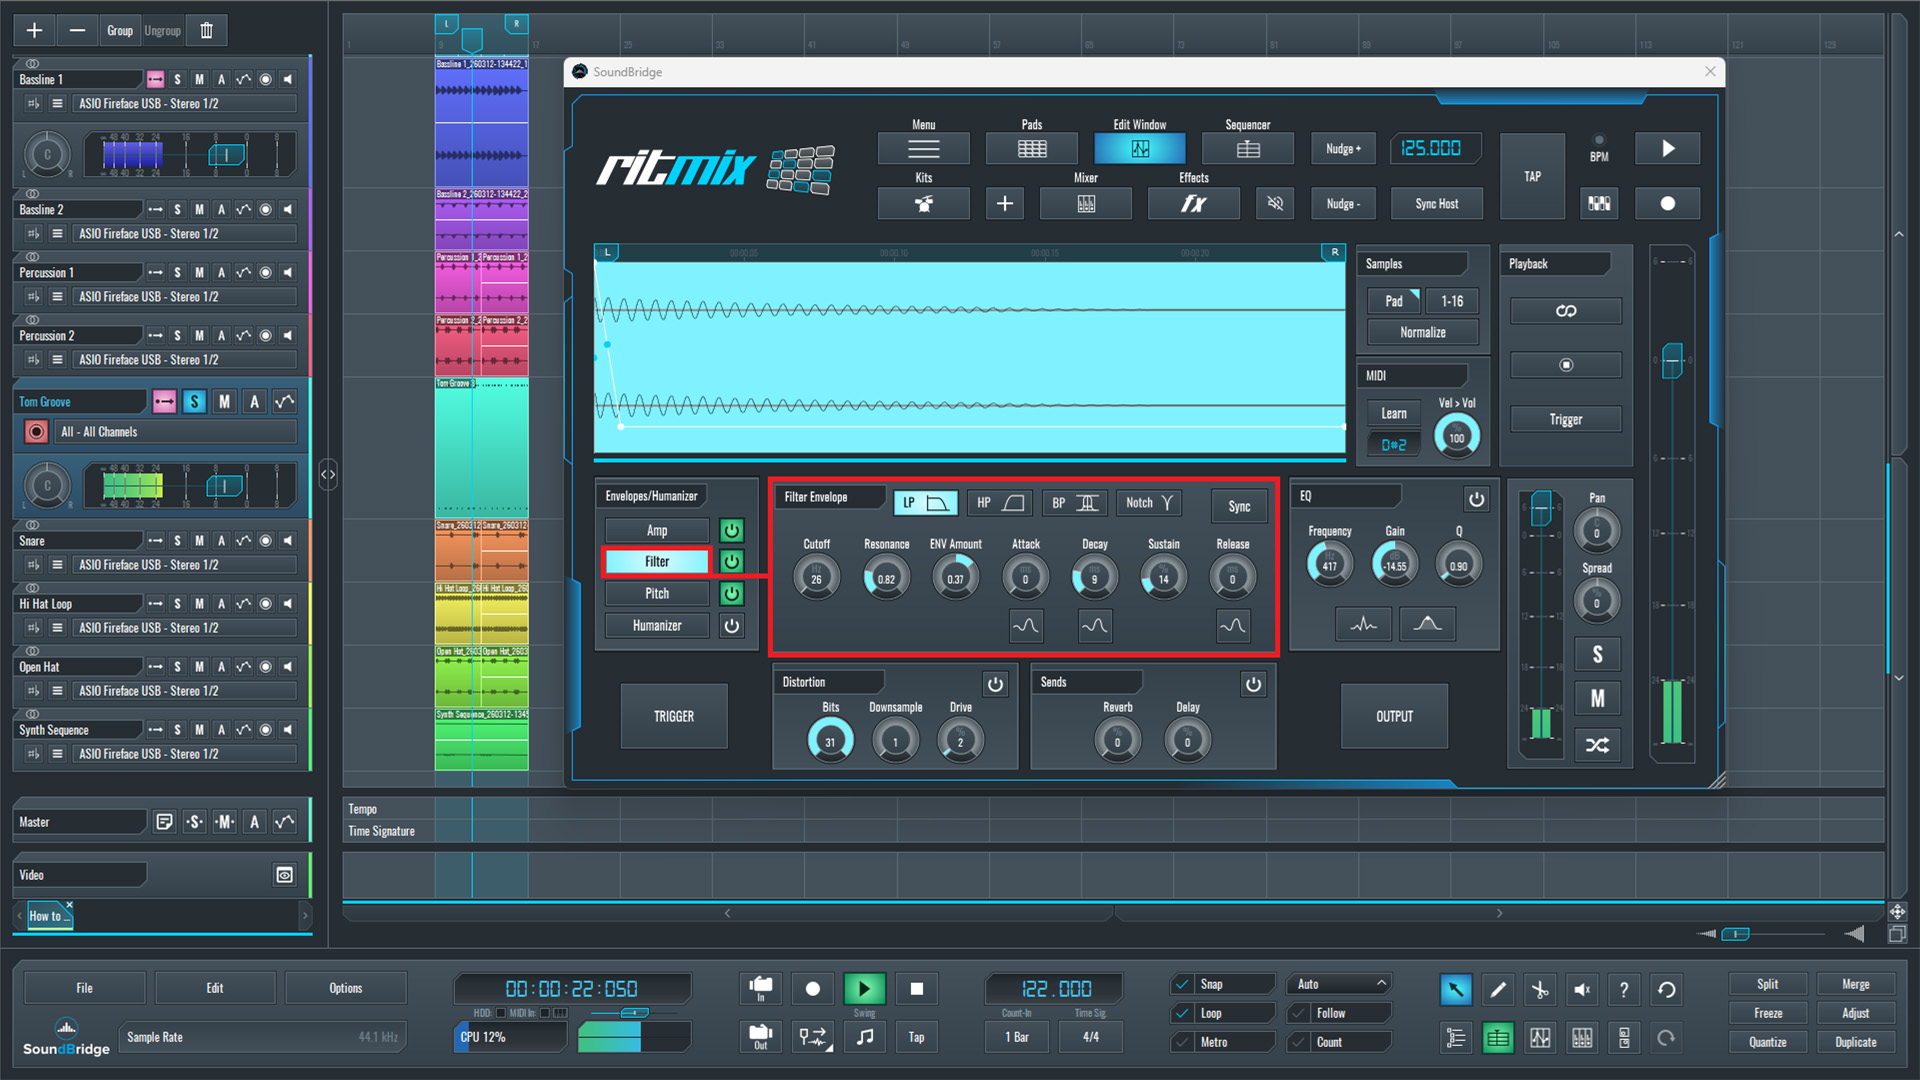
To make the groove tighter, the next step is shaping the amp envelope of each sound. By reducing the decay and release times, the tom hits become shorter and more controlled. This step helps them fit more precisely into the rhythmic pattern.
We can also apply a filter to shape each tom's tone slightly. Shorter and more focused sounds prevent the groove from becoming muddy and allow the tom pattern to support the rhythm without overwhelming the rest of the percussion.
~Kick Drum & Tom Groove - Solo (Tuned + Amp & Filter Settings).
Completing the Driving Tom Rhythm We Have Built
To finalize the tom groove, a few additional processing steps can help the sounds sit more naturally within the mix. At this stage, the tom pattern is already programmed and tuned to the track's key, so the goal is no longer structural changes but rather improving how the sounds interact with the rest of the drum section.
The first step is adding a small amount of distortion to each tom sound. The distortion does not need to be heavy or aggressive. A subtle amount is usually enough to enhance the upper harmonics of the tom samples, making them slightly brighter and more audible in the mix. This type of harmonic enhancement can help the tom hits cut through the groove without requiring a large increase in volume.
Next, the lower tom can be routed to a reverb send effect. Instead of inserting reverb directly on the channel, using a send allows better control over the amount of space added to the sound. The goal here is not to create a long or noticeable reverb tail, but rather to introduce a small sense of depth so the tom sits more comfortably within the overall drum environment.
Finally, both tom sounds can be shaped using a low-shelf EQ. By slightly boosting the lower frequencies, we reinforce the body of the toms and make them feel more grounded in the groove. This EQ boost helps the tom pattern remain present in the lower frequency range while still supporting the track's rhythmic foundation.
Together, these small processing steps help the tom groove feel more polished and integrated with the rest of the percussion elements.
~Kick Drum & Tom Groove - Solo (Final Processing).
Final Thoughts
At this stage, it is important to listen to the tom groove within the full mix. Hearing the pattern together with the kick, percussion, bass, and other rhythmic elements helps determine whether the toms are sitting correctly in the groove. Sometimes a pattern that sounds strong on its own can feel too dominant once the entire drum section is playing.
In Afro house production, tom grooves usually work best as a supporting rhythmic layer rather than the main element of the pattern. Their role is to reinforce movement between the kick and percussion, adding a rolling or tribal character to the rhythm without taking attention away from the core groove.
This balance is important for maintaining clarity in the arrangement. If toms are too loud or too long, they can easily overcrowd the rhythm and compete with other percussive elements. By keeping the sounds relatively short, properly tuned, and carefully processed, the tom groove can remain present while still leaving space for the rest of the drum section.
With these techniques in place, tom grooves can become a subtle but powerful part of an Afro house track. When used correctly, they add energy and rhythmic flow while helping the entire percussion section feel more cohesive and dynamic.
~Full Mix - With Processed tom Groove.
If you liked this article, here are some more on the same subject:
MASTER MUSIC PRODUCTION
Expert-led courses designed to take you from fundamentals to finished tracks.

HOUSEFrom bouncy bass and solid kicks, this course teaches you the most modern House music production techniques needed to succeed and stand out.

TRAPQuit sounding like generic Trap and produce something World with hints of the Far East. Create ethnic soundscapes to put your Trap ahead of the curve.

AMBIENTProduce relaxing, sophisticated psy-influenced ambient. Psychedelic and relaxing to listen to, create meditative soundscapes to put your listeners in Zen.