
How to Create a Unique Vocal Lead
Last Edited: Jun 12, 2026
While raw vocals can work well in many situations, flexibility is often the biggest limitation to creating a unique vocal lead. We often need to go beyond simply using recorded vocals or standard sample packs. Because of that, many producers look for ways to transform short vocal phrases into something more expressive and adaptable. One effective method is to treat the sample as a synthesizer sound source rather than as a fixed audio file. This approach allows deeper control over the sound.
By reshaping the vocal at the synthesis level, it becomes possible to create entirely new textures while still preserving a recognizable human quality. In this tutorial, we will use Vital as the main tool for this process. Vital allows us to import a vocal sample directly into its wavetable engine. With that, we can manipulate the sample in ways that are not possible in a standard audio track. Parameters such as formants, envelopes, filters, and modulation sources can all be used to reshape the vocal tract into a playable instrument.
The goal of this technique is not just to process a vocal, but to design a unique vocal lead that fits naturally into the track. By combining sampling and synthesis, we can create sounds that feel both organic and controlled. We want to create a lead with a distinct identity while maintaining musical coherence.
Listening to the Context and Preparing the Sound
Before creating the unique vocal lead, the first step is to listen to the track's musical context. In this example, we will play a short pattern created inside SoundBridge: DAW. This pattern already contains the track's core elements, giving us a clear idea of the groove, harmony, and overall atmosphere.
By listening to this loop, we can better understand where the vocal lead should sit and what kind of character it should have. Instead of designing the sound in isolation, this approach ensures that the final result fits naturally within the mix.
Once we are familiar with the pattern, we can move on to creating the vocal lead itself and begin shaping the sound inside Vital.

~Full Mix - Without Vocal Lead
Importing the Unique Vocal Lead Sample We Will Use in Vital to Create
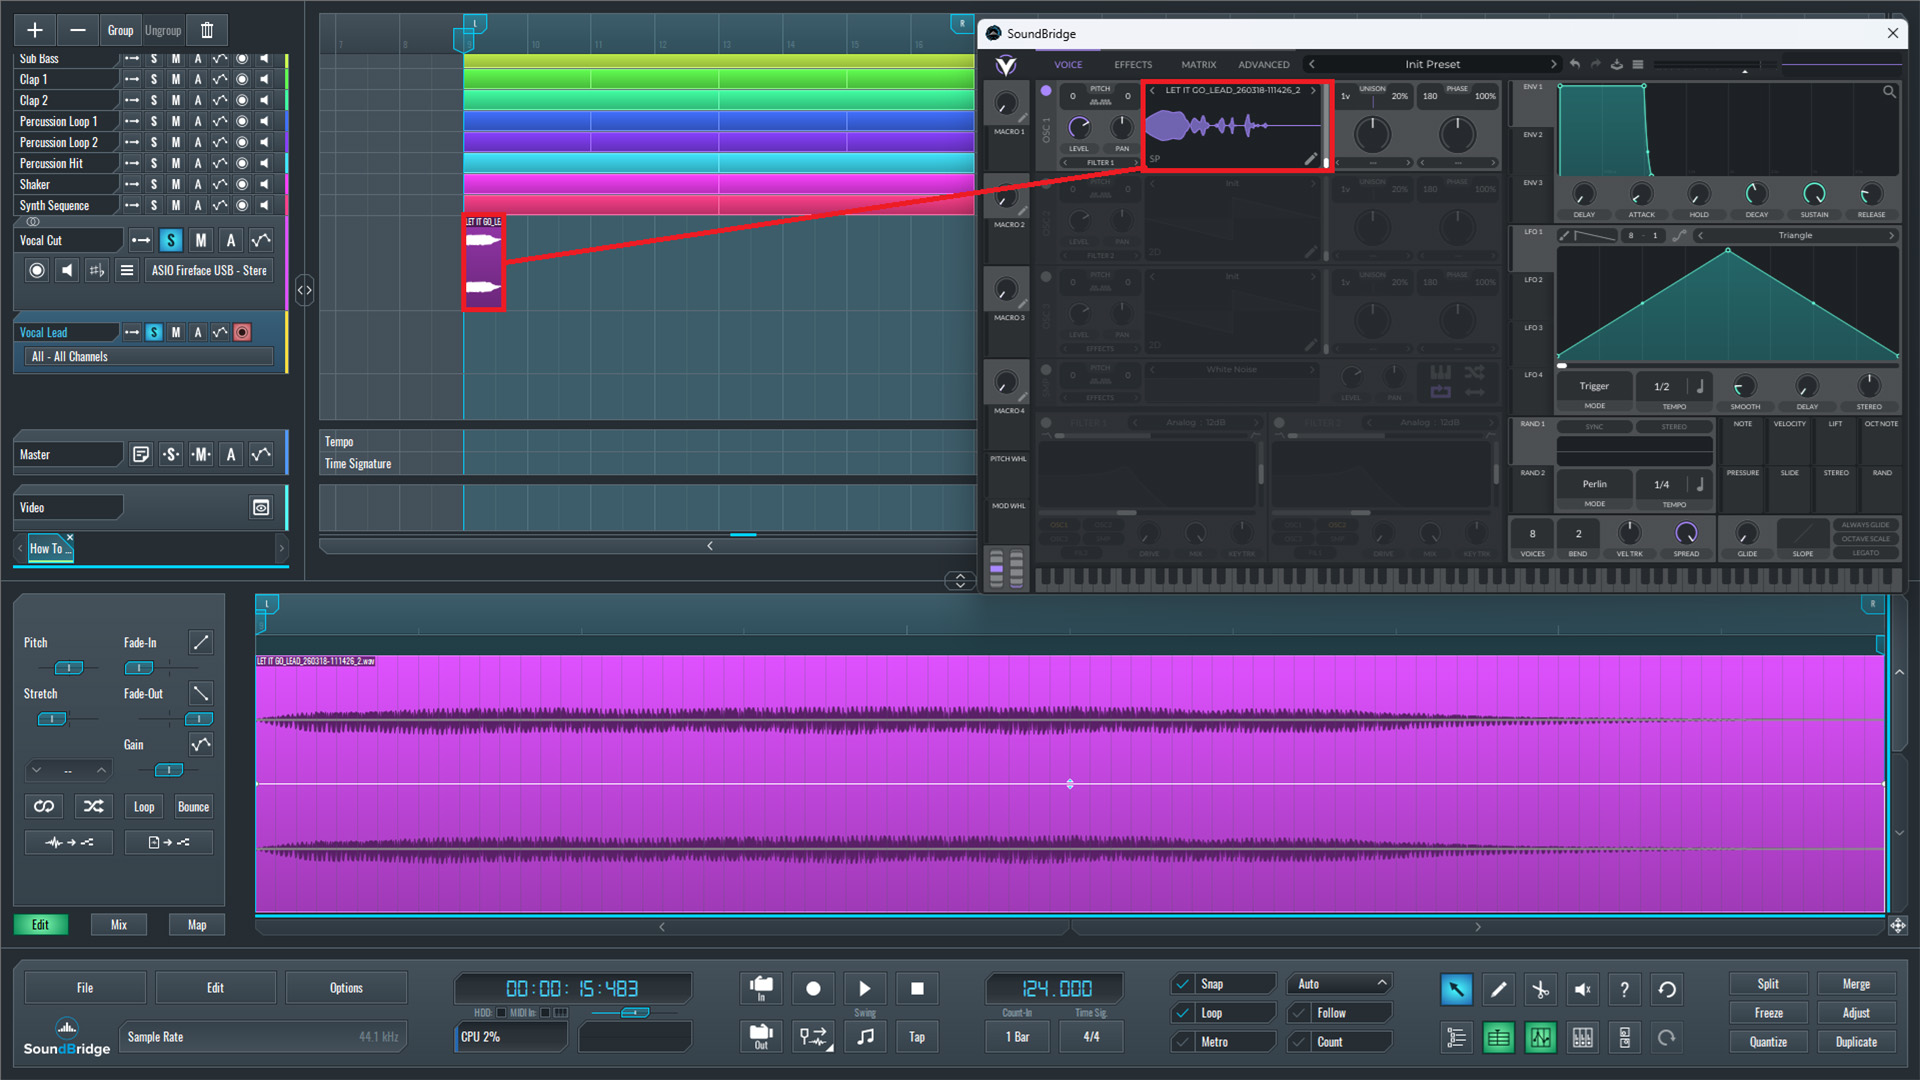
In the next step, we prepare the vocal source inside the project. We place a short vocal sample on an audio track, which we will use as the base material for our lead sound. This sample should be clean, clearly defined, and not too long, since shorter phrases usually work better for this type of processing.
Below that channel, we open a new Vital instance on a MIDI track. Inside Vital, we navigate to the first oscillator and switch it to sample or wavetable mode. From there, we drag and drop the vocal sample directly into Oscillator 1.
When dragging the sample into Vital, three options will appear: Wavetable, Vocode, and Pitch-Splice. Each mode processes the vocal differently, but in this case, we select Pitch-Splice because it preserves the vocal's natural tonal character while making it more playable across the keyboard.
Once loaded, the vocal is no longer just an audio clip. It becomes a playable sound source that can be triggered via MIDI, allowing us to reshape and control it like a synthesizer. This key step is where the vocal transitions from a static recording into a flexible instrument.
~Vocal Sample - Solo (Audio Channel)
Setting up Playback and LFO Control
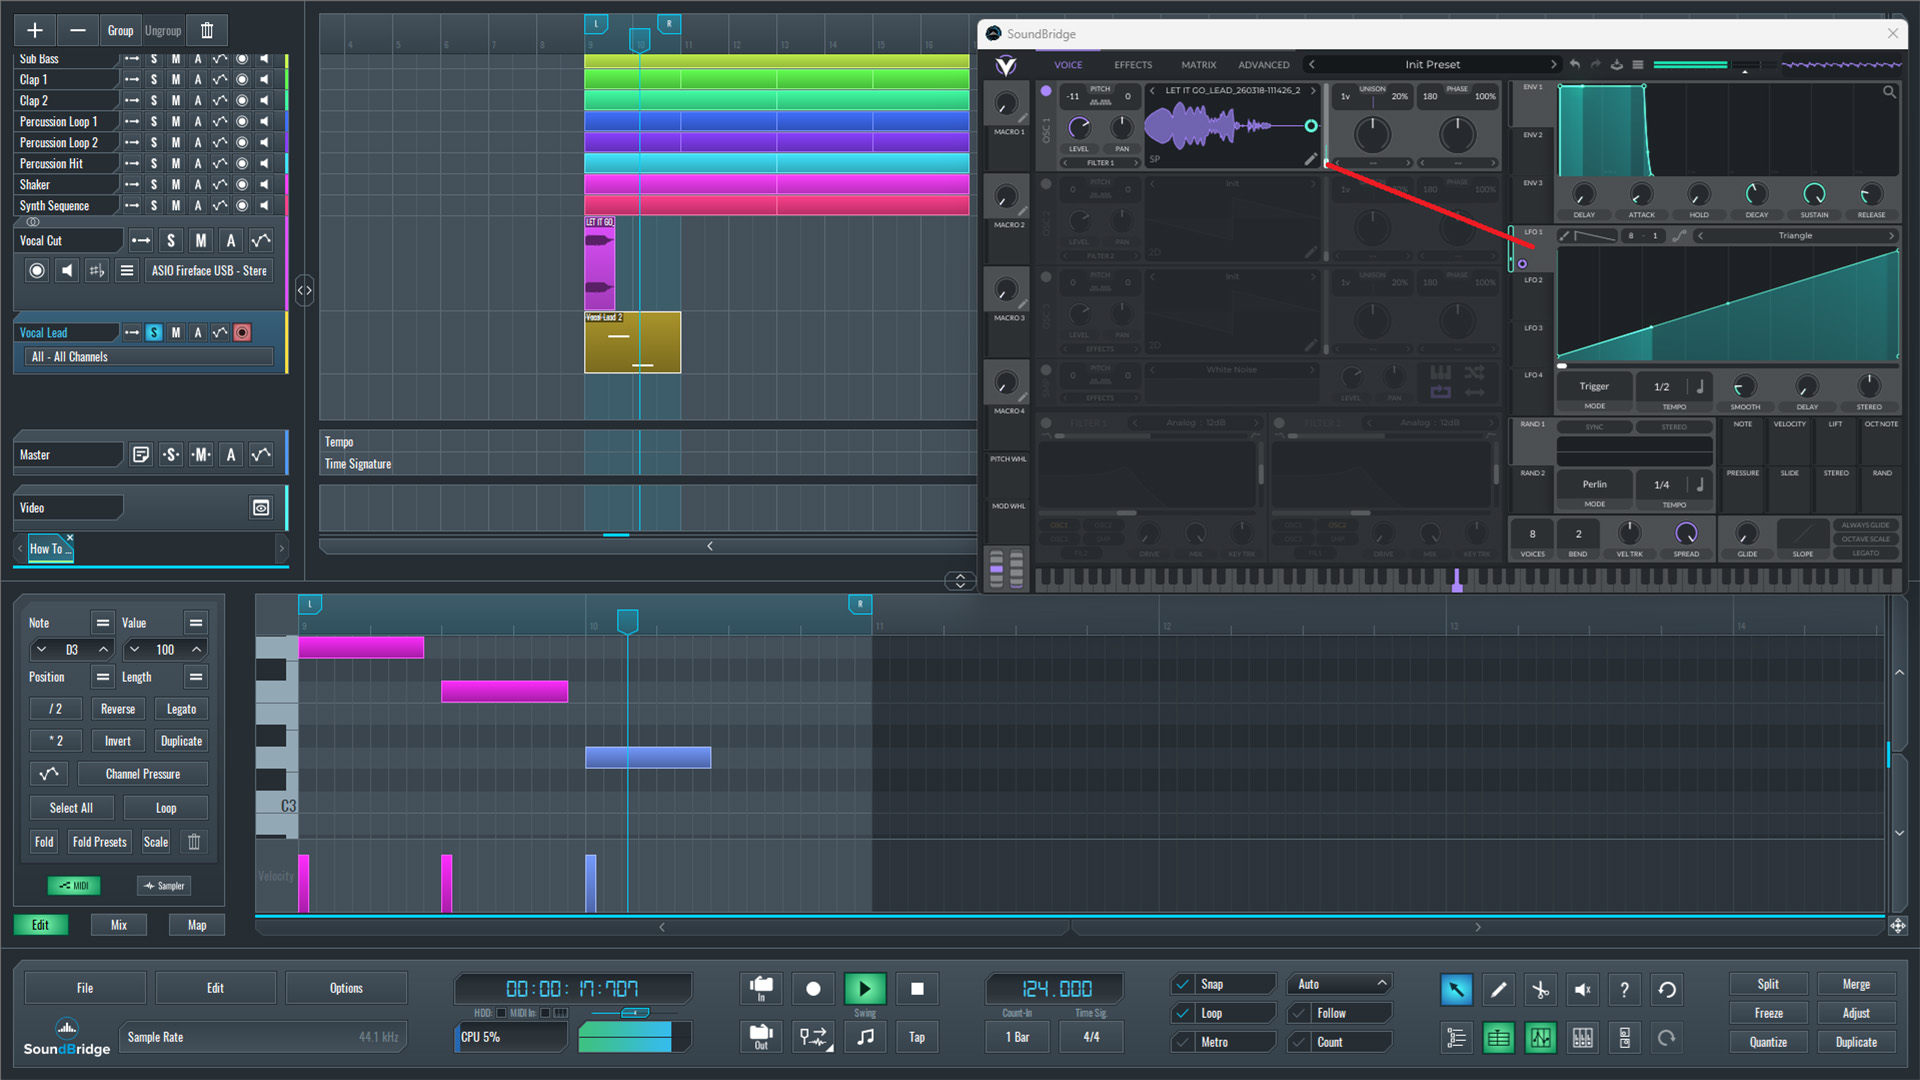
To ensure the vocal sample plays correctly in Vital, we first need to ensure the entire sample is heard from start to finish when triggered by a MIDI note. For this, it is important to know the exact length of the sample.
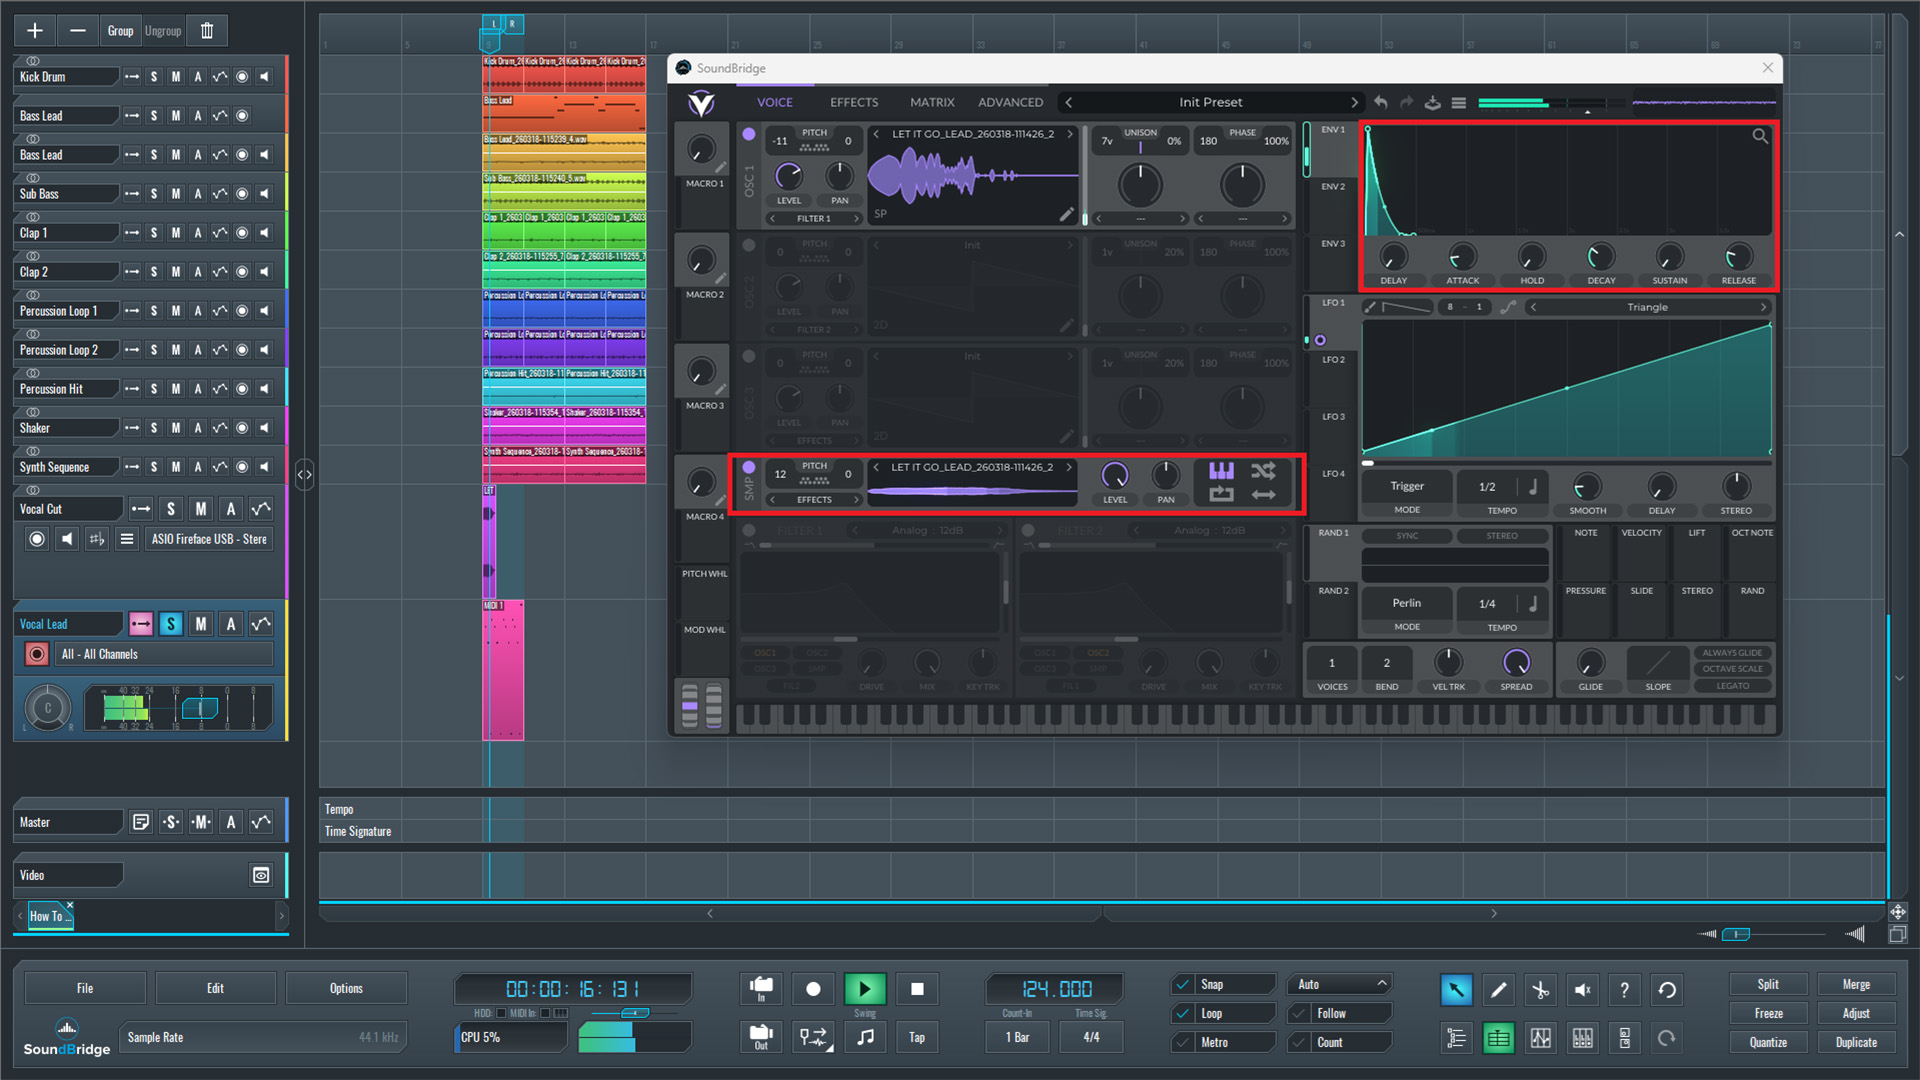
The easiest way to determine this is to place the vocal sample at the beginning of the arrangement in SoundBridge, then move the cursor to the end of the clip. By checking the time display (timecode meter), we can see the exact duration of the sample. In this case, the sample length is approximately 1.209 seconds.
Once we know the duration, we return to Vital and use LFO 1 to control the sample's playback. We assign LFO 1 to the oscillator's frame position. The default triangle shape works well here because it moves smoothly across the sample from start to end.
By adjusting the LFO rate to match the sample length, we ensure that each time a note is triggered, the entire vocal plays consistently. This setting allows every MIDI note to replay the full vocal while pitched accordingly.
~Vocal Sample in Vital - Solo (LFO 1 to Frame Modulation)
Layering and Shaping to Create a Unique Vocal Lead
To further shape the vocal lead, we can layer the sound inside Vital for a richer result. We do this by enabling the Sample section and loading the same vocal sample again. We effectively duplicated the source to give us more control over how the sound behaves.
To make the vocal playable across notes and octaves, we enable keyboard tracking in the sample section and turn off the loop option. This step ensures that each note triggers the sample correctly without repeating or looping unnaturally.
Next, we refine the main oscillator. We reduce the detune to keep the sound focused, and increase the unison voices to around 7. At this point, we add width and depth to the vocal while still keeping it controlled.
Since we want the sound to behave like a lead, we also set the patch to mono by reducing the global voices to 1. We set the patch like this to ensure that only one note plays at a time, which is typical for lead sounds.
To make the sound more pluck-like, we adjust the Amp Envelope 1. We set a short decay, remove sustain completely, and use a short release. A small amount of attack is added to avoid unwanted clicking at the start of each note.
At this point, we can play the MIDI pattern and hear how the vocal behaves as a melodic element within the track.
~Vocal Sample in Vital - Solo (Sample Section Layer and ENV. 1 Settings)
Final Processing and Effects
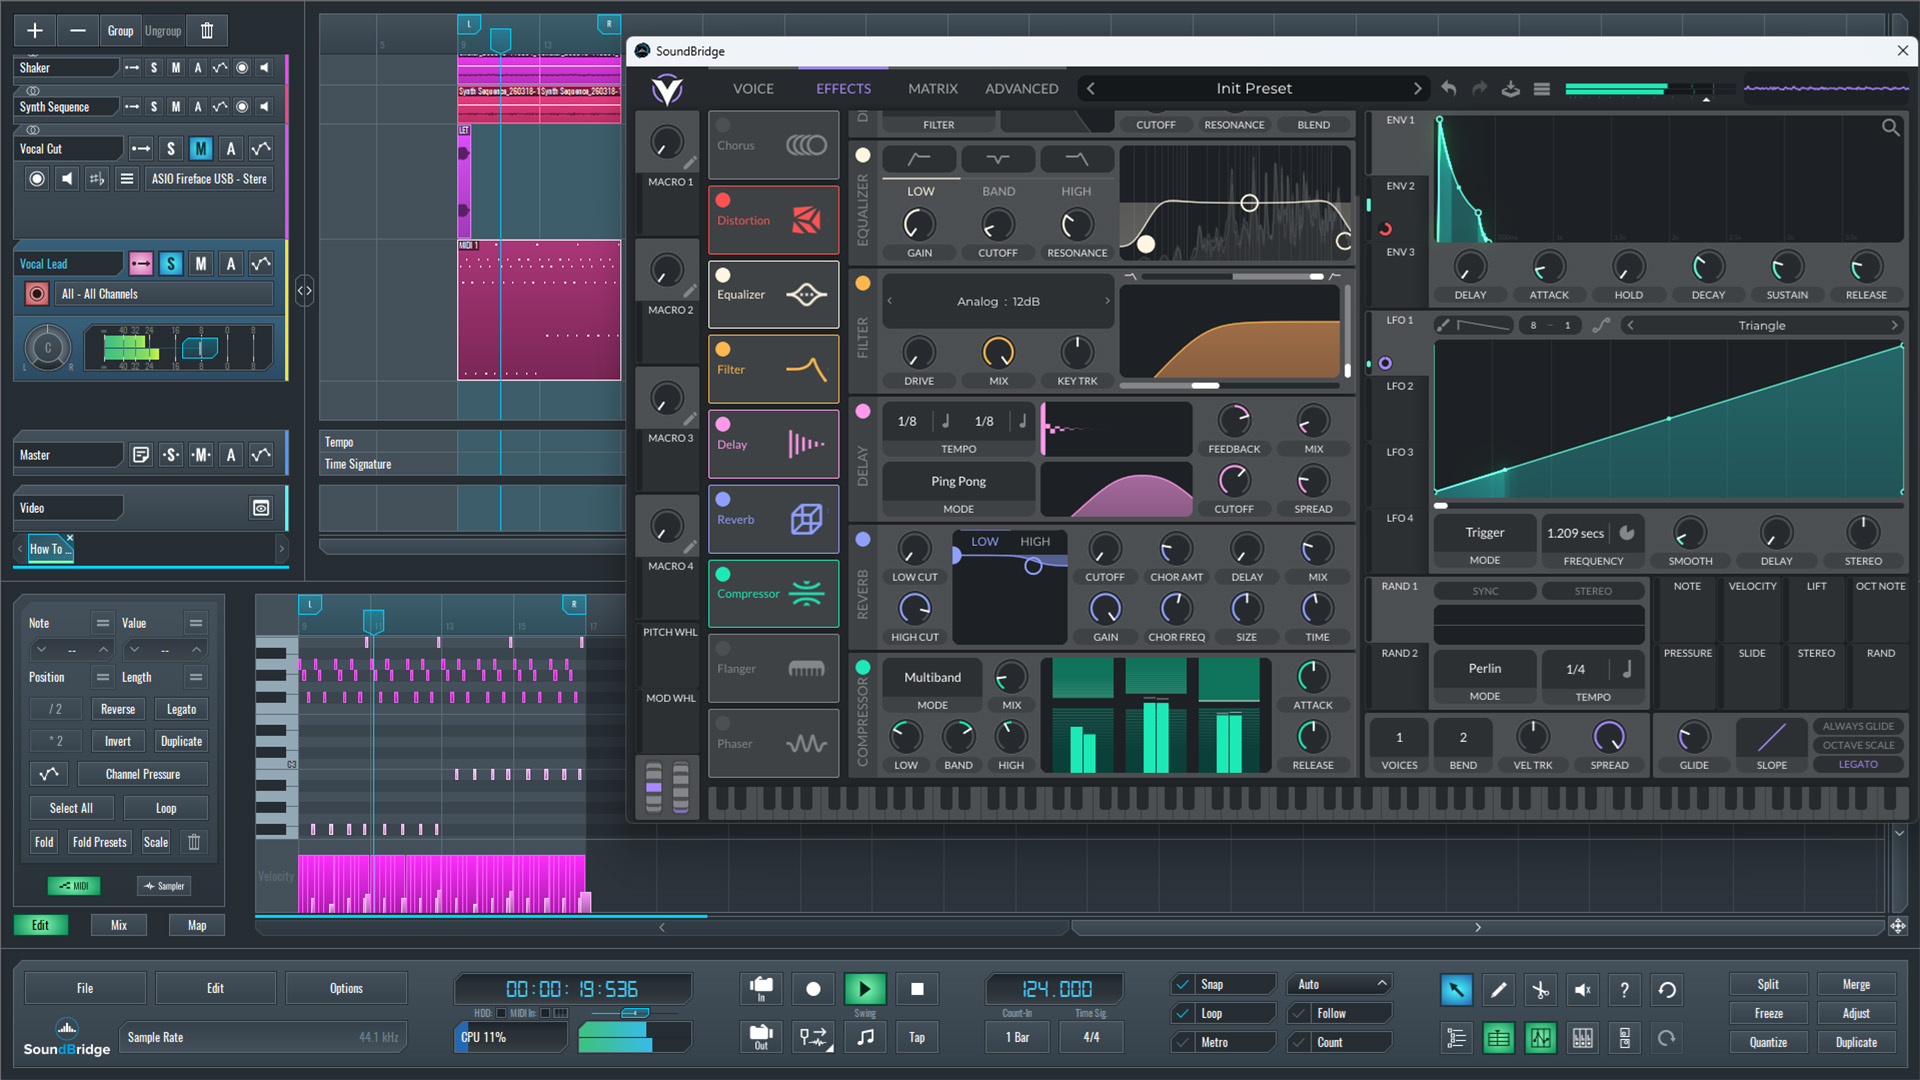
In the final step, we shape the sound using effects inside Vital. We use Envelope 2 to modulate the distortion drive, with a short decay, no sustain, a short release, and a small attack. This step keeps the distortion dynamic and controlled.
We then add an EQ to slightly reduce high frequencies, followed by a filter to cut unnecessary low end. To create space and depth, we include delay and reverb.
At this point, the sound is complete. We first listen to the melody in solo, then add filter-cutoff automation to create movement. Finally, we check how the vocal lead sits in the full mix.
~Vocal Lead - Solo (Full Processed)
~Full Mix - Vocal Lead (Filter Cutoff Automation)
Final Thoughts
This technique demonstrates how a simple vocal sample can be transformed into a fully playable and unique lead sound. Instead of relying on traditional vocal processing, using a synthesizer like Vital allows much deeper control over the sound, including pitch behavior, dynamics, and modulation.
The key idea is not just layering effects, but understanding how the vocal behaves as an instrument. By controlling playback with LFOs, shaping the envelope for a pluck-like response, and carefully applying modulation and effects, the vocal becomes more than just a sample—it becomes part of the musical structure.
It is also important to keep the balance between creativity and control. Small adjustments, such as tuning, envelope shaping, and subtle modulation, often make a bigger difference than heavy processing. When used correctly, this approach can help create lead sounds that feel organic, expressive, and fully integrated into the track, while still standing out with a unique character.
If you liked this article, here are some more on the same subject:
MASTER MUSIC PRODUCTION
Expert-led courses designed to take you from fundamentals to finished tracks.

HOUSEFrom bouncy bass and solid kicks, this course teaches you the most modern House music production techniques needed to succeed and stand out.

TRAPQuit sounding like generic Trap and produce something World with hints of the Far East. Create ethnic soundscapes to put your Trap ahead of the curve.

AMBIENTProduce relaxing, sophisticated psy-influenced ambient. Psychedelic and relaxing to listen to, create meditative soundscapes to put your listeners in Zen.