How to Make Instruments Punch Through the Mix
Last Edited: May 15, 2026
One of the most common challenges in mixing is maintaining clarity when multiple instruments share the same frequency space. In this article, we will build a workflow in which the dry instrument triggers dynamic EQ bands on the reverb bus. This process allows the reverb to reduce overlapping frequencies whenever the instrument plays temporarily. The reverb ducking makes the instruments punch through the mix while still retaining spacious, natural reverb tails. This approach works particularly well for elements such as synth chords, snare drums, and stabs. It's ideal for midrange-focused sounds that often compete with reverb energy.
While reverb adds depth and atmosphere, it can also blur the transients and presence of important instruments. Engineers often cut frequencies from the reverb return to reduce masking. However, this method has a limitation: the EQ cut remains constant even when the instrument is not playing. As a result, the reverb may sound thinner than necessary, and valuable harmonic content would be missing from the effect.
A more advanced solution is to allow the EQ to react dynamically to the source signal. Instead of permanently removing frequencies, we only attenuate the reverb when the original instrument is present. When the instrument stops playing, the reverb regains its full frequency spectrum. This technique preserves both clarity and richness in the mix. Throughout this guide, we will walk step-by-step through the routing, setup, and parameter adjustments needed to implement this technique in a practical mixing scenario.
Creating Context Before We Make Instruments Punch Through the Mix
Before applying any mixing technique, it is important to hear how the elements interact within the arrangement. You should always make mixing decisions in context rather than in isolation, because sounds that appear balanced on their own may behave very differently once you introduce other instruments and spatial effects.
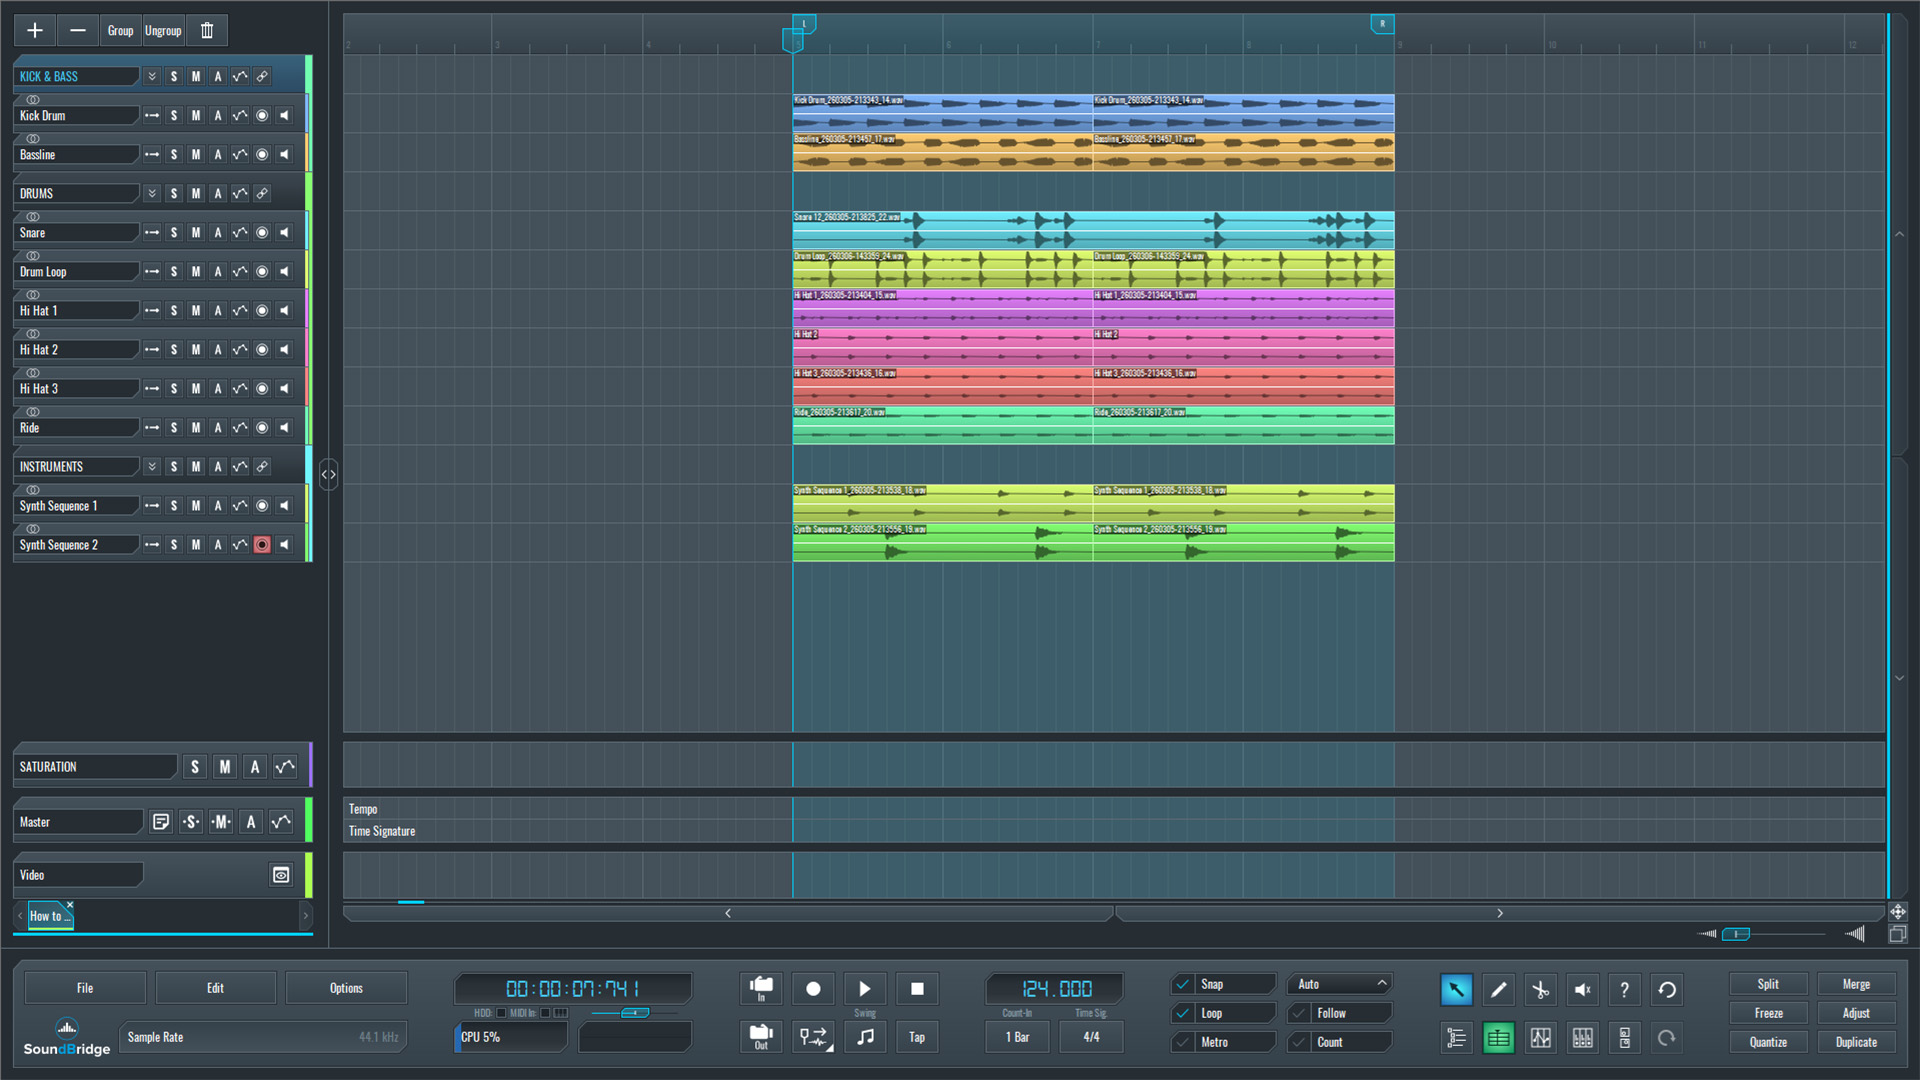
To demonstrate the technique in this article, we created a short context pattern in SoundBridge: DAW. This pattern contains several instruments that occupy overlapping frequency ranges and share the same spatial environment.
When listening to the pattern, the overall groove and interaction between the instruments become clear. Each sound contributes to the rhythmic and harmonic structure, while the reverb adds depth and cohesion to the mix. However, once we route multiple elements through the same reverb space, it is common for certain frequency areas to begin competing with one another.
This type of masking is especially noticeable in the midrange, where many instruments naturally sit. The energy from the reverb tail can overlap with the direct signal of different elements, slightly softening their presence in the mix. While the reverb provides a desirable sense of space, it can also reduce the perceived clarity and impact of important sounds if left uncontrolled.
At this stage, we have not applied any corrective processing. The purpose of this step is to listen to the pattern and observe how the instruments interact with the shared reverb environment. By understanding the mix's natural behavior, it becomes easier to identify situations where dynamic processing techniques can help preserve clarity while maintaining the reverb's spacious character.
~Full Mix - Without Synth Stab Sequence.
Creating a Simple Techno/Tech-House Synth Stab
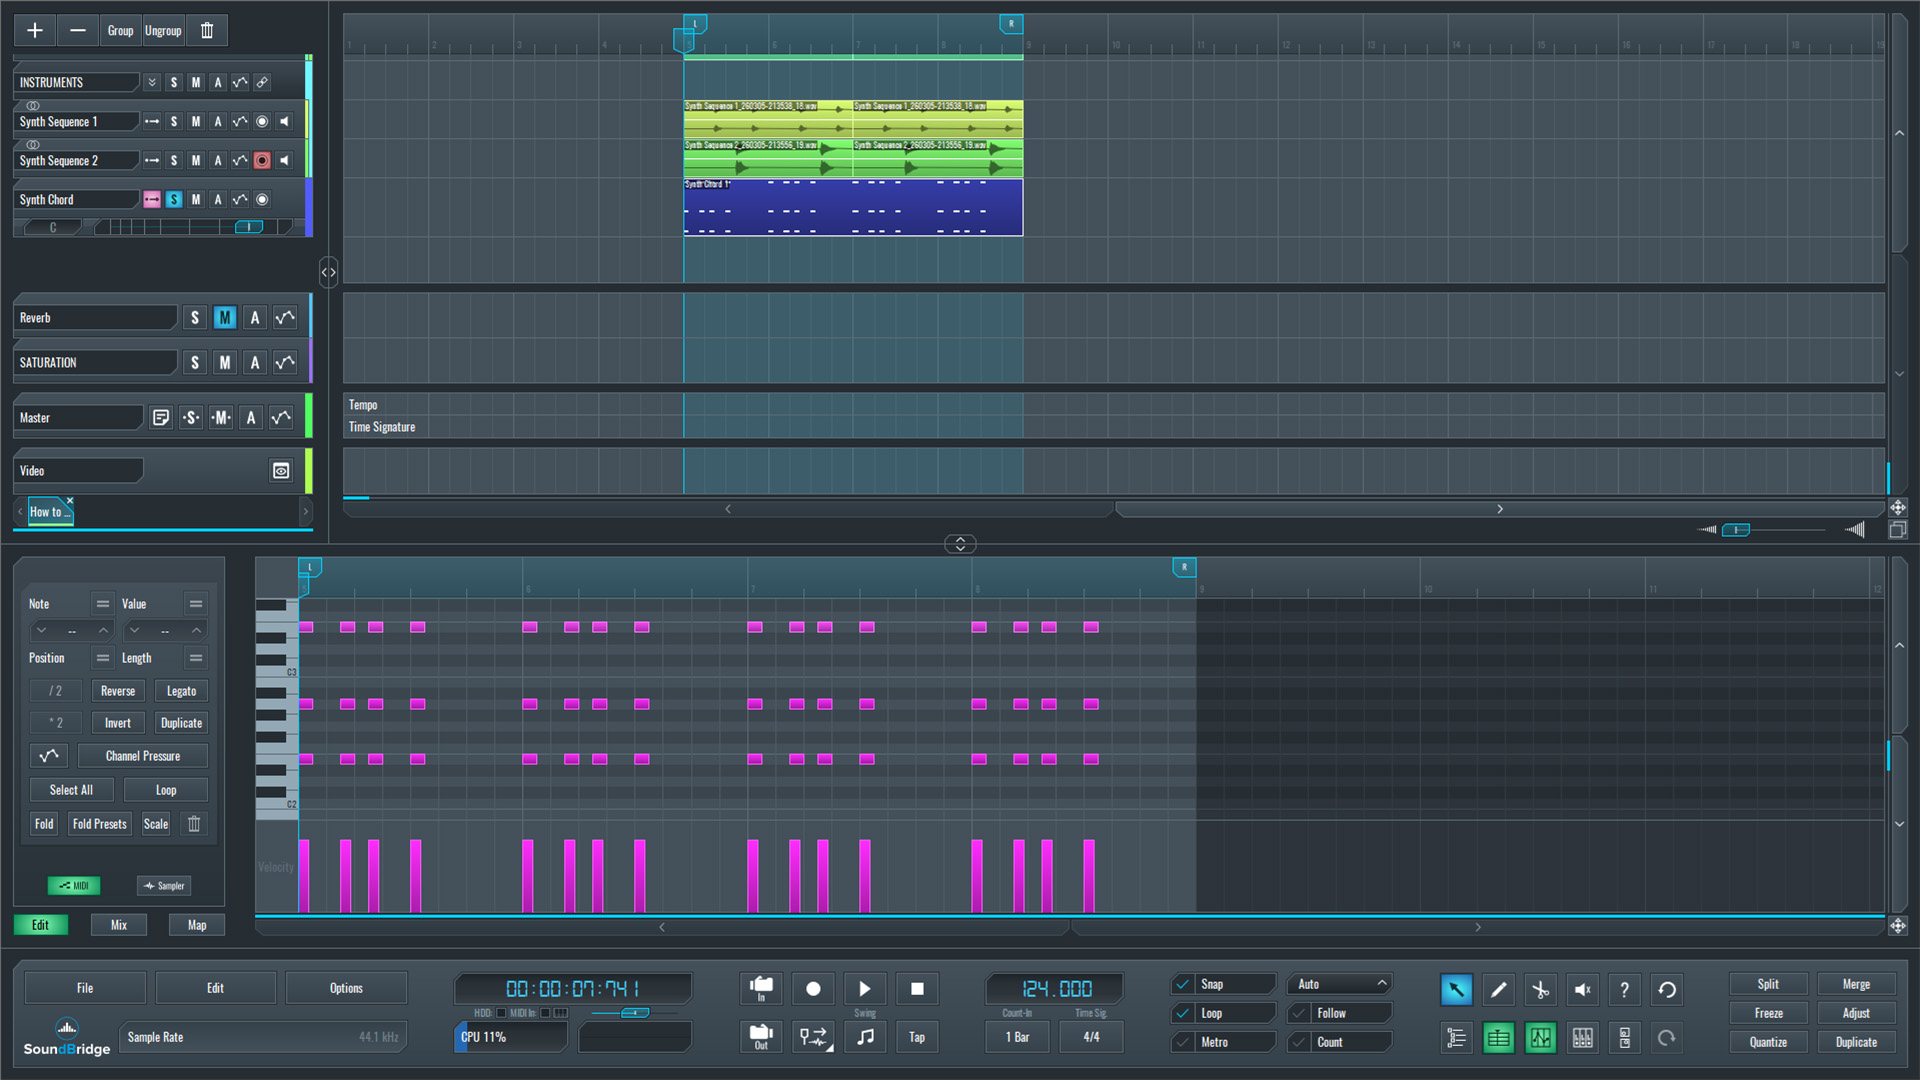
Next, we created a simple Techno/Tech-House style synth stab in Vital. We made the instrument have a punch, but it is not heavily designed or processed, since the goal of this article is not sound design but rather the mixing technique that will be applied later.
The stab is programmed using a short MIDI pattern, which defines the rhythmic placement of the hits in the groove. This pattern will serve as the main musical element, interacting with the reverb and the other instruments in the context pattern.
Before adding any processing, we first listen to the stab in solo. At this stage, the sound remains completely dry; no reverb, EQ, compression, or additional effects are applied. This step allows us to clearly hear the instrument's raw tonal balance and transient character.
Establishing this dry reference is important because it gives us a clear comparison point for later stages of the mix. Once spatial effects and dynamic processing are introduced, we will be able to evaluate how the technique affects the sound's impact.
~Synth Stab Sequence - Solo (Unprocessed).
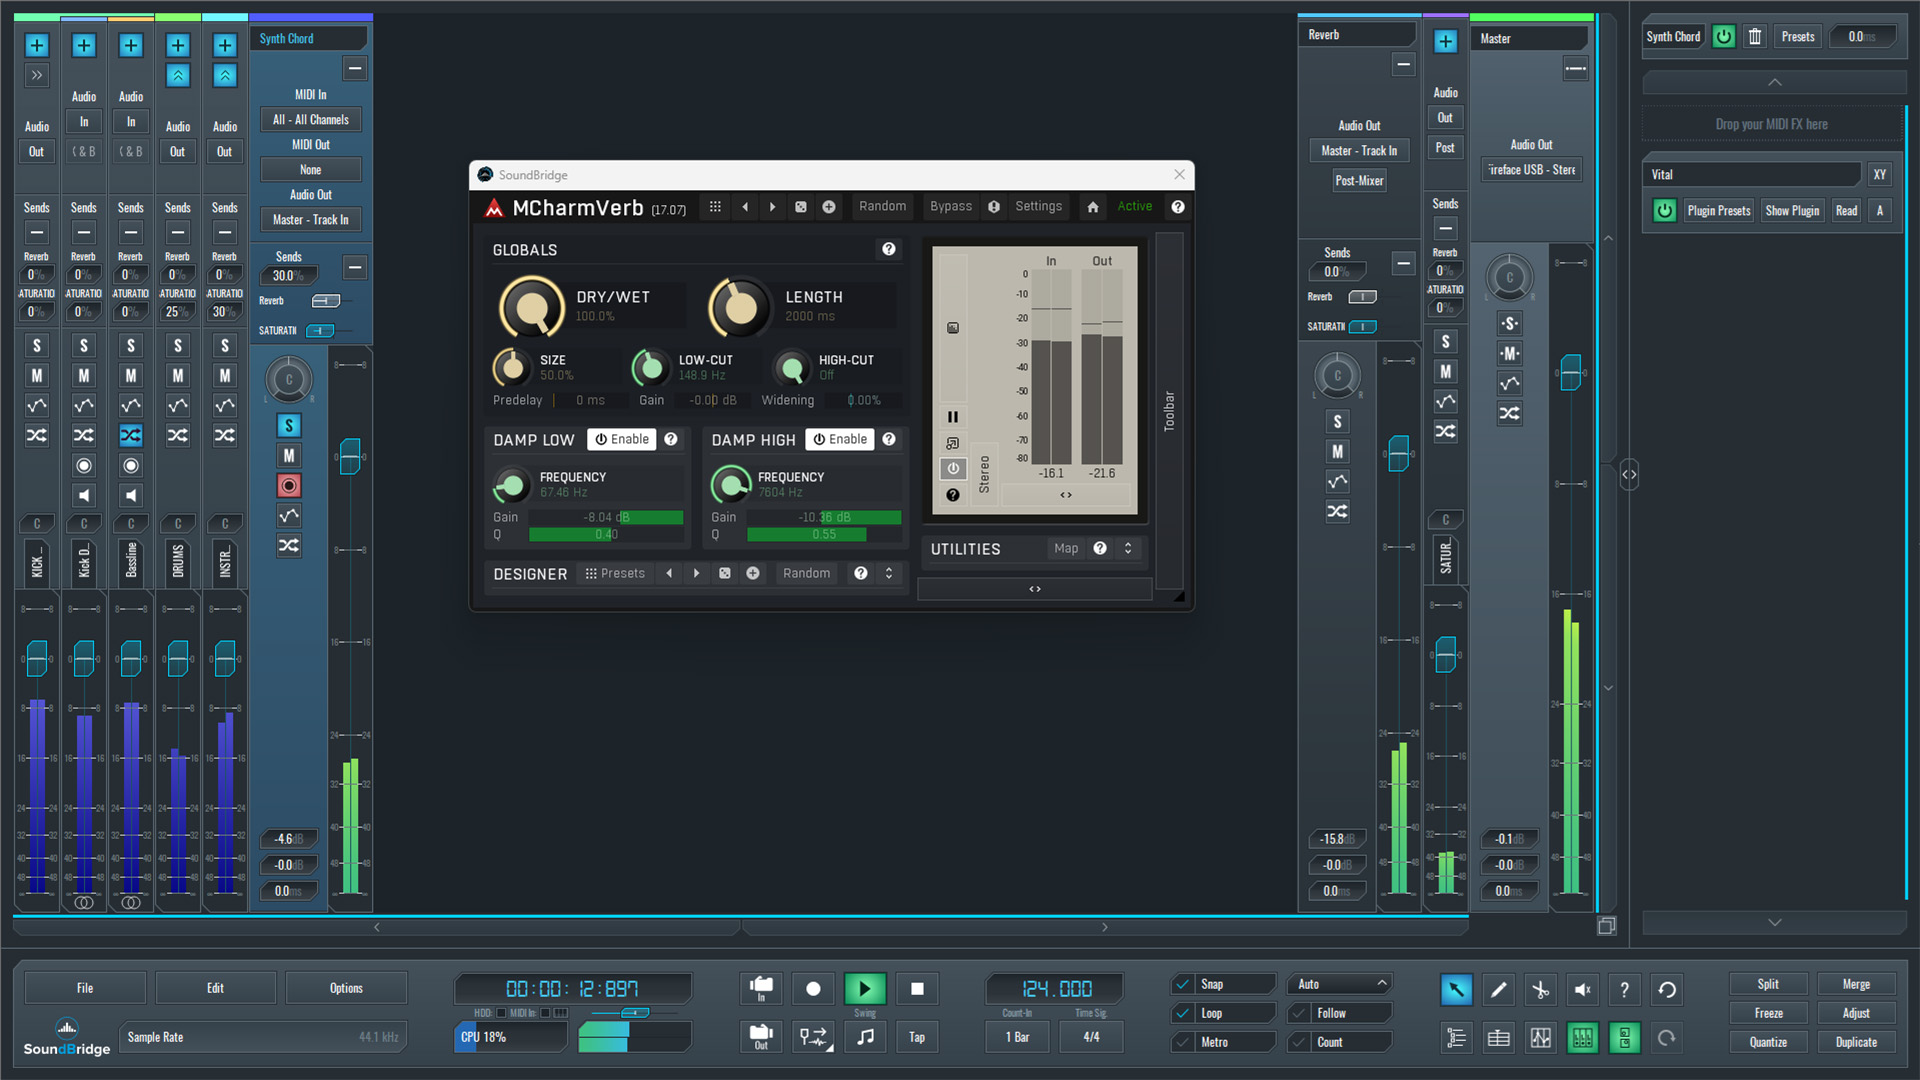
Creating the Reverb Return Track
Next, we create a new return track in SoundBridge: DAW and name it reverb. This track will host the reverb effect that will make our instruments punch through the mix.
On the return channel, we insert Melda MCharmVerb. Since the effect is used on a send/return configuration, the wet signal is set to 100%, ensuring that only the reverb tail is present on this channel.
For the space itself, we choose a decay time of around 2 seconds, creating a moderately long reverb that adds depth without becoming excessively ambient. To shape the reverb's character, we also apply gentle low- and high-cut filters, removing unnecessary low-end buildup and slightly softening the high frequencies. Then, at the Mixer stage, we will set the send amount of the reverb signal at 30%
At this point, the reverb bus is ready to receive signals from the instruments in the mix.
~Synth Stab Sequence - Solo (Processed With Reverb over Return Track).
Ducking the Reverb Tail to Make Instruments Punch Through the Mix
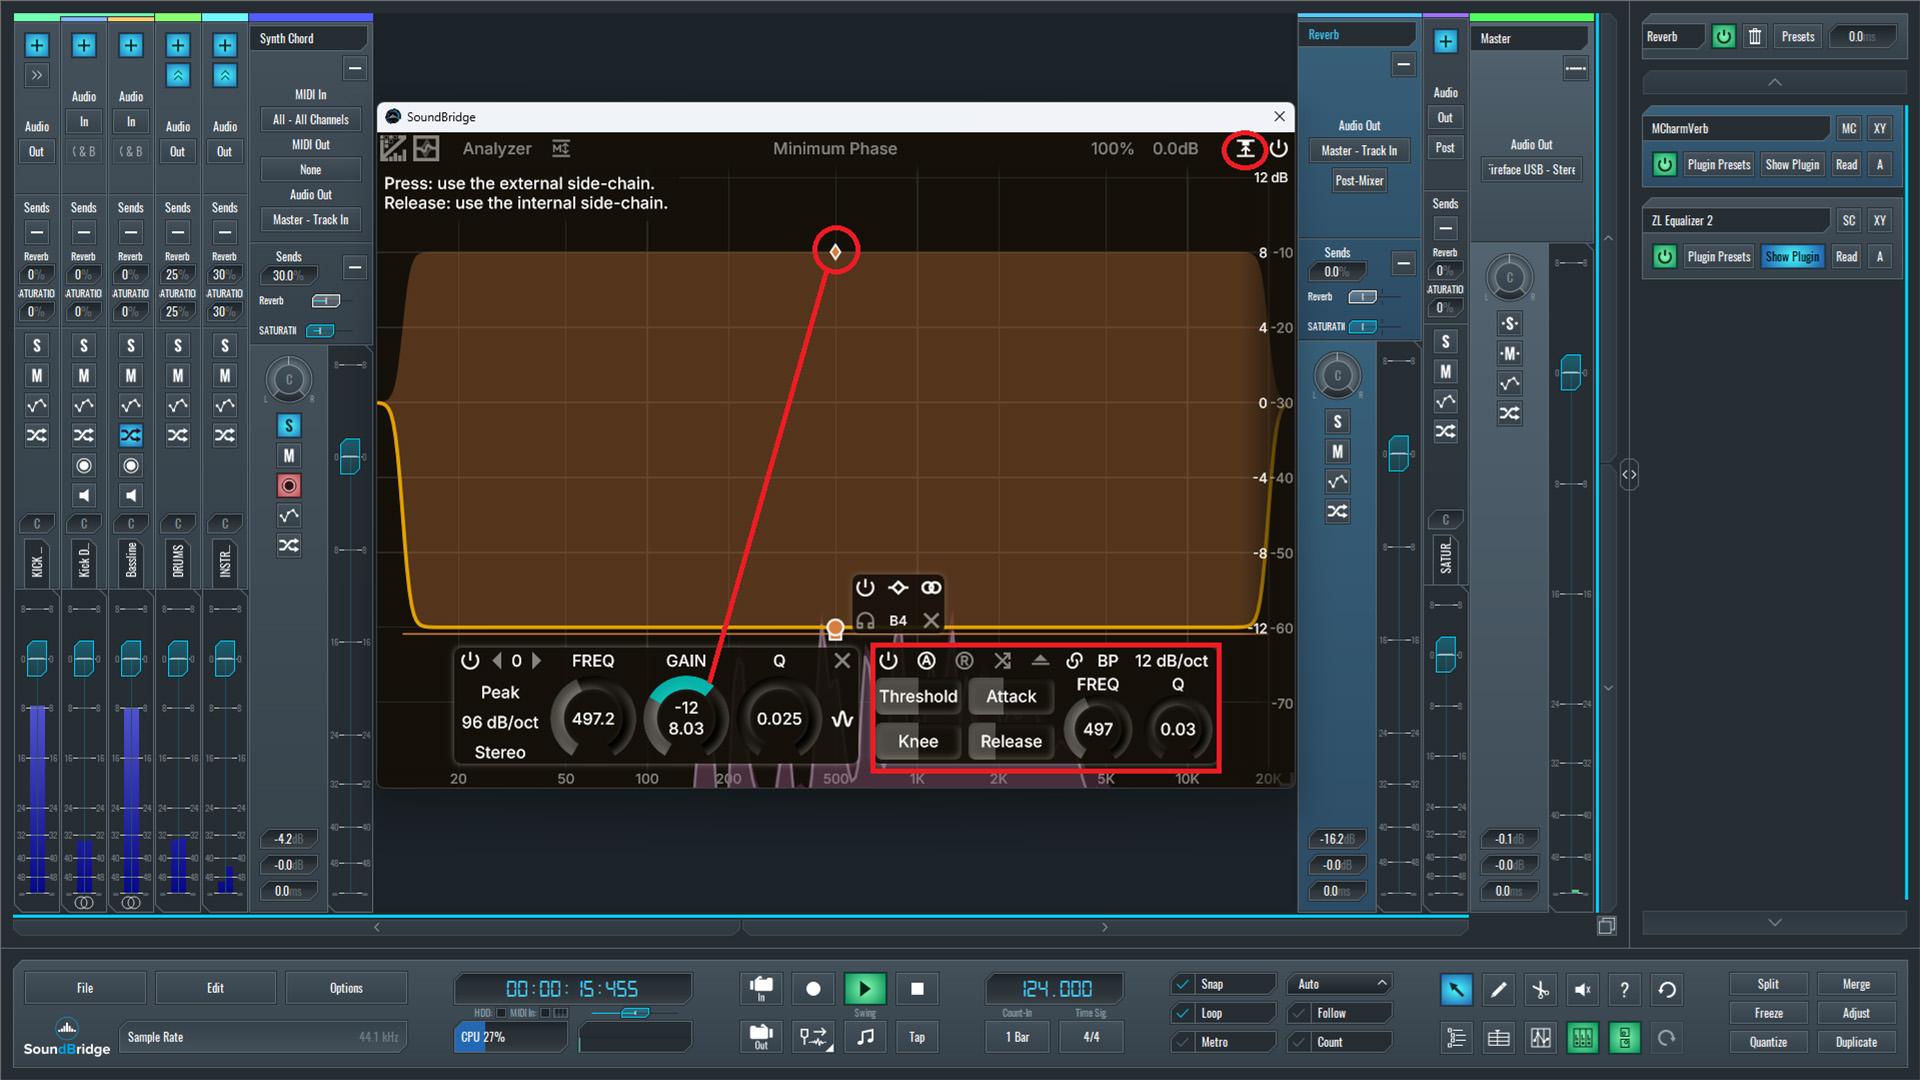
With the reverb bus prepared, the next step is to control how the reverb interacts with the instruments in the mix. To achieve this, we insert ZL Equalizer 2 directly after the reverb plugin on the return track. The purpose of this EQ is not traditional tonal shaping, but rather automatic ducking of the reverb tail.
In ZL Equalizer 2, we create a very wide notch band that covers most of the frequency spectrum. As shown in the plugin interface, the band spans nearly the entire audible range. This range allows the EQ to dynamically reduce the reverb's energy whenever the triggering signal appears.
Next, we enable external sidechain detection. In the upper-right corner of ZL Equalizer 2, we activate the "Use External Sidechain" option. This feature makes the plugin listen to an external signal rather than just the reverb.
After routing the sidechain, we adjust the threshold, attack, ratio, and release parameters to ensure the EQ responds smoothly to incoming notes. These settings determine how quickly the reverb is attenuated when the trigger signal appears and how naturally it returns afterward.
Finally, we increase the post-gain control in ZL Equalizer 2 in the opposite direction of the gain reduction applied by the notch band. As visible in the interface, this compensates for the attenuation and restores the perceived loudness of the reverb tail.
The result is that the instrument's initial transients remain clean and dry. However, the reverb tail expands in the spaces between the notes. The mix thus becomes clear and punchy, while still preserving the sense of depth and atmosphere created by the reverb.
~Synth Stab Sequence - Solo (Processed With Reverb & EQ over Return Track).
Final Thoughts
This technique is not limited to a single instrument. The same dynamic approach can be applied to many different elements in a mix. Sounds such as snare drums, claps, or additional synth parts often share the same frequency space as the reverb bus and can benefit from the same type of dynamic control.
By routing these elements to the reverb and allowing their signal to trigger the sidechain dynamic EQ, the reverb tail automatically makes space for important transients. This process preserves the punch and clarity of the instruments while still maintaining a cohesive sense of space in the mix.
Because the attenuation happens only when necessary, the reverb remains full and natural during the gaps between notes. The mix thus feels both clear and spacious, avoiding the thinness that can result from static EQ cuts.
To conclude the demonstration, we listen to the full mix, where multiple elements interact with the dynamically controlled reverb bus. This final example illustrates how the technique helps instruments remain present and defined while the reverb continues to provide depth and atmosphere.
~Full Mix - Processed With Dynamic Reverb.
If you liked this article on sound design, here are some more on the same subject:
MASTER MUSIC PRODUCTION
Expert-led courses designed to take you from fundamentals to finished tracks.

HOUSEFrom bouncy bass and solid kicks, this course teaches you the most modern House music production techniques needed to succeed and stand out.

TRAPQuit sounding like generic Trap and produce something World with hints of the Far East. Create ethnic soundscapes to put your Trap ahead of the curve.

AMBIENTProduce relaxing, sophisticated psy-influenced ambient. Psychedelic and relaxing to listen to, create meditative soundscapes to put your listeners in Zen.