

How to Master Parallel Compression in SoundBridge
Last Edited: Aug 7, 2025
Parallel Compression in SoundBridge is a powerful mixing trick that blends a heavily compressed signal with your original track. This technique boosts density and punch without sacrificing transients or character. In this guide, you’ll learn exactly how to set up, tweak, and blend parallel compression to make your mixes sound full and professional.
What Is Parallel Compression?
Parallel compression—also called New York compression—involves mixing a compressed copy of your audio with the dry version. This approach:
- Preserves the natural attack and release, adds body and sustain, maintains dynamics and clarity.
As a result, drums hit harder, vocals cut through, and guitars feel thicker without sounding over-squashed.
Why Use Parallel Compression in SoundBridge?
Unlike serial compression, parallel compression lets you dial in extreme settings on the compressed channel while retaining the original’s dynamics. In SoundBridge DAW, you can route signals to a dedicated return track. Then you can fine-tune the balance between dry and wet to taste.
1. Setting Up the Return Track
-
Drag and drop your audio stems into SoundBridge.
-
Click the + button at the top menu.
-
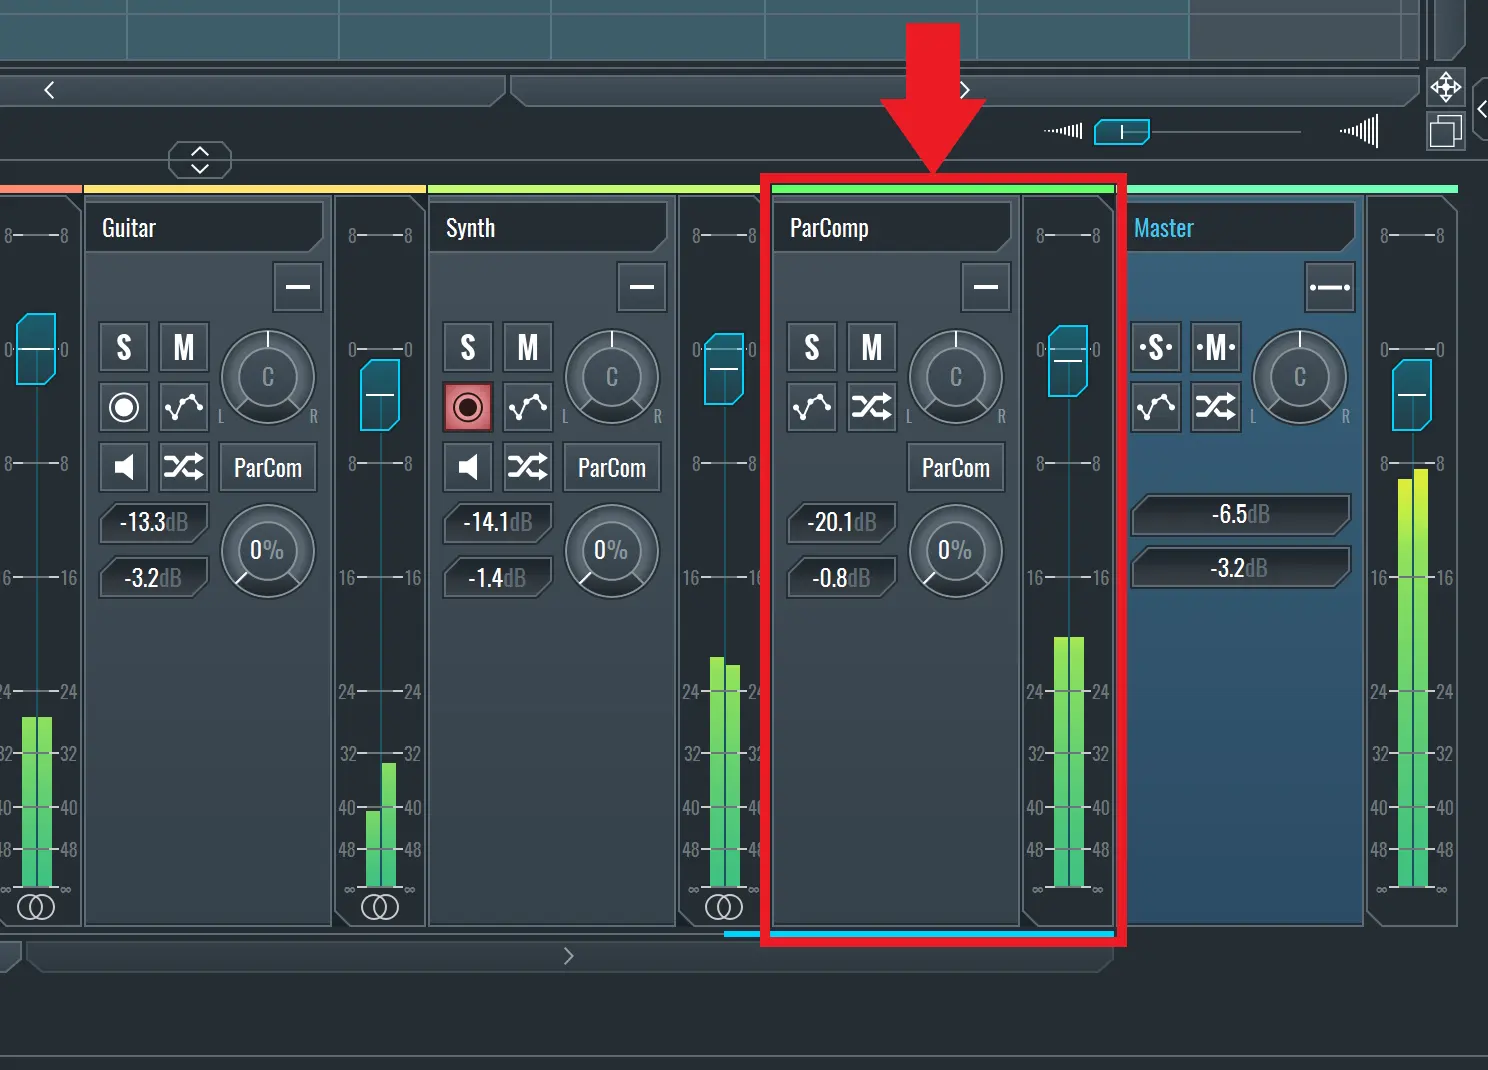
Select Return Channel and name it Parallel Compression or just ParComp.
-
Keep your project organized by clearly labeling return tracks.
This return channel will host your compressor and receive signals from multiple tracks.
~ Full Mix No Compression
~ Drums No Compression
~ Guitar No Compression
~ Percussion No Compression
~ Vocals No Compression
2. Adjusting Compressor Settings for Parallel Compression
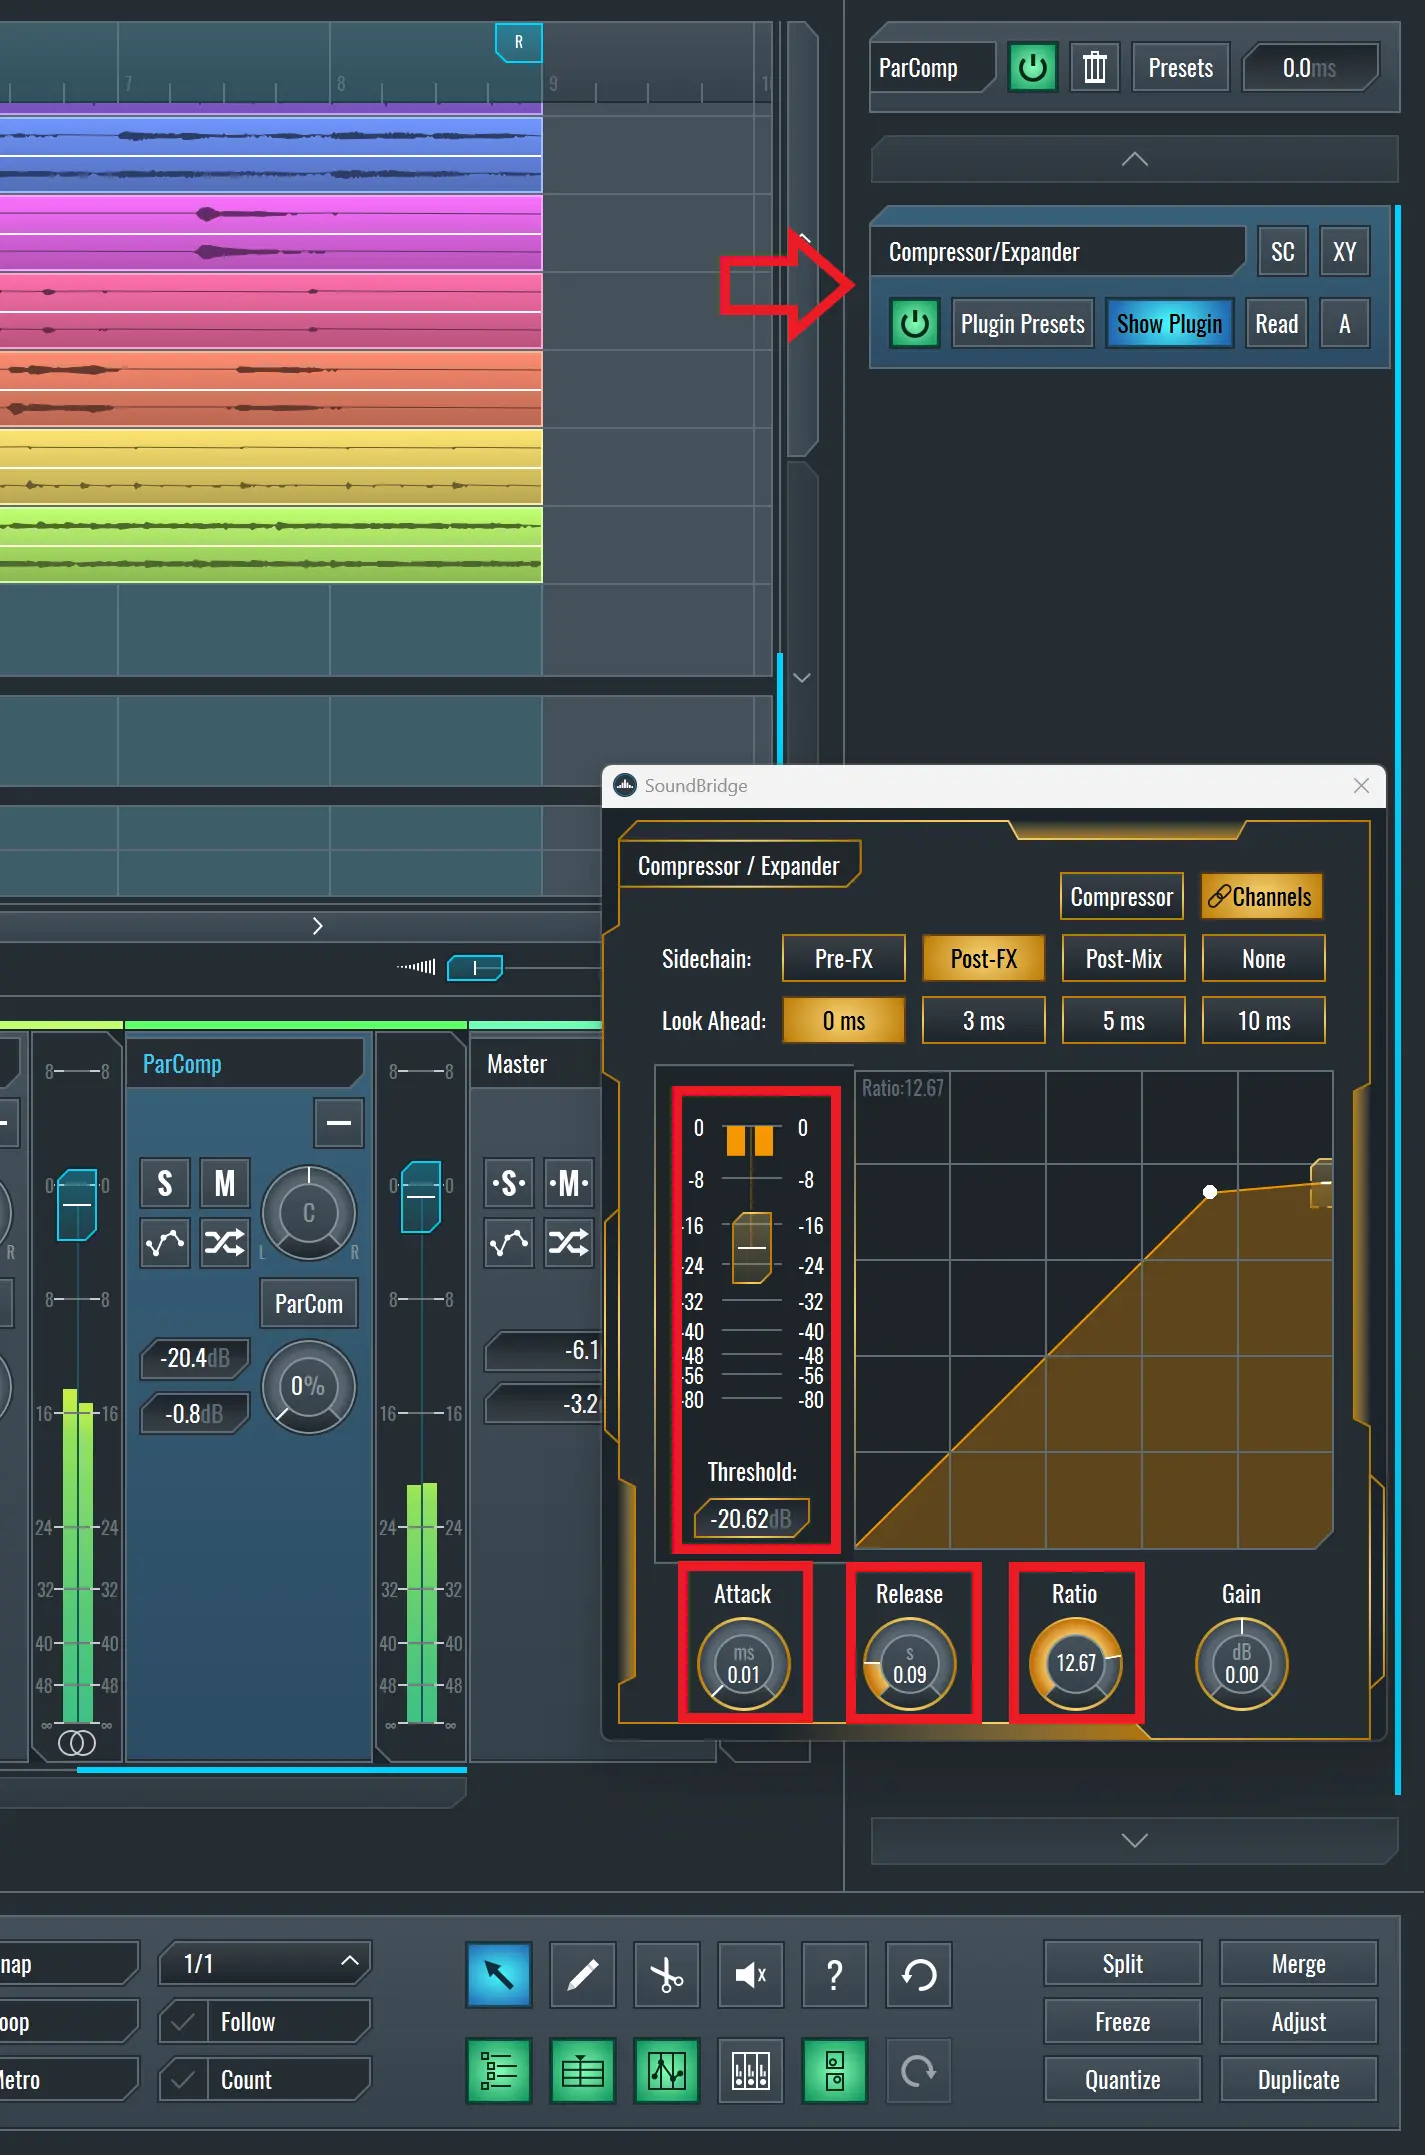
After adding your favorite compressor plugin to the return track, start with these parameters for :
- Threshold: –16 dB.
- Ratio: 10:1.
- Attack: Fast (to catch transients).
- Release: Fast (for snappy recovery).
These aggressive settings ensure the return channel delivers maximum density.
3. Routing and Blending Signals in SoundBridge
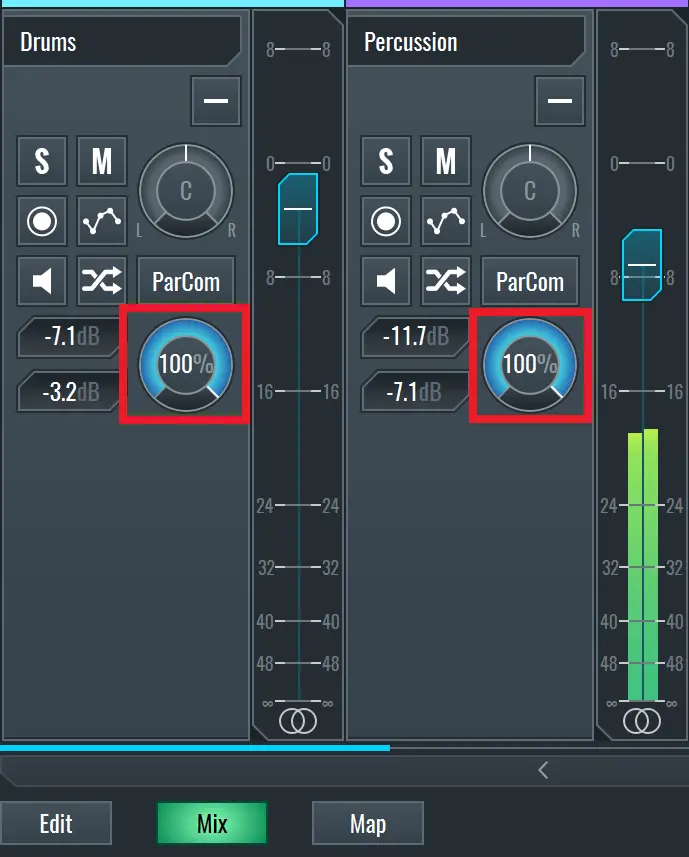
Use the Send knob on each dry track (e.g., drums, loops, guitars) to route audio to the return channel. Then:
- Turn up the send for more compressed signal.
- Blend the wet (compressed) and dry (original) signals in the mixer.
- Aim for 10–30% wet on drums and loops; adjust by ear.
Additionally, record both versions and overlap them in editing for precise control over the dry/wet mix.
~ Drums Parallel Compression
~ Guitar Parallel Compression
~ Percussion Parallel Compression
~ Vocals Parallel Compression
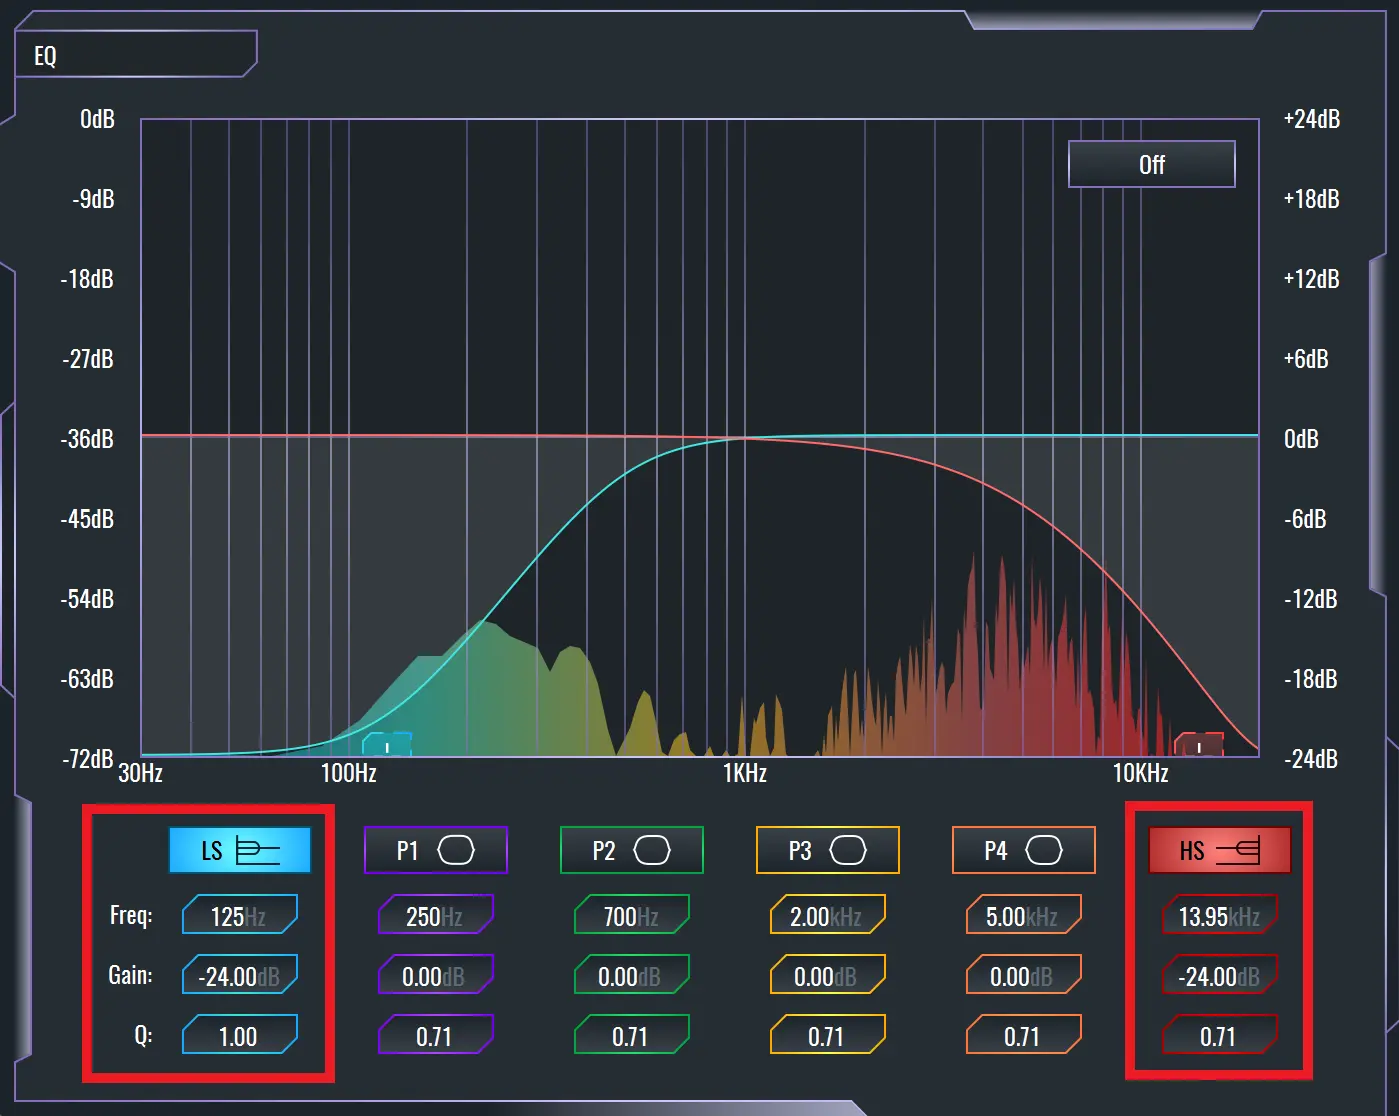
4. Fine-Tuning with EQ
You can add an EQ before the compressor on the return channel to shape which frequencies get compressed:
- Reduce lows to focus compression on mids and highs.
- Cut highs to tighten up top-end content.
- Emphasize vocal clarity by attenuating low-end rumble.
This approach helps prevent mud while accentuating the key tonal ranges.
~ Full Mix Parallel Compression
5. Using Parallel Compression on Different Elements
Parallel compression isn’t just for drums:
- Loops: Bring subtle rhythmic parts forward without harshness.
- Guitars: Tame sharp transients for a smoother, more consistent tone.
- Vocals: Add presence and sustain, especially on soft passages.
- Buses: Group multiple tracks (e.g., all percussion) and send the bus to the return track for cohesive glue.
For more drum processing tips, check out our article on 5 Tips for Mixing Drums.
Tips for Better Results with Parallel Compression
Tips for Better Results
- Balance your dry/wet blend carefully; subtlety wins.
- Tweak attack and release to match the material’s tempo.
- Use automation on the send level for verse/chorus dynamics.
Conclusion
Parallel Compression in SoundBridge DAW can transform flat mixes into lively, powerful productions. By following these steps—creating a return track, setting bold compressor parameters, routing signals, and blending judiciously—you’ll maintain dynamics while adding density. Try it on drums, guitars, vocals, and groups to hear the dramatic difference.
If you liked this article on sound design, here are some more on the same subject:
MASTER MUSIC PRODUCTION
Expert-led courses designed to take you from fundamentals to finished tracks.

HOUSEFrom bouncy bass and solid kicks, this course teaches you the most modern House music production techniques needed to succeed and stand out.

TRAPQuit sounding like generic Trap and produce something World with hints of the Far East. Create ethnic soundscapes to put your Trap ahead of the curve.

AMBIENTProduce relaxing, sophisticated psy-influenced ambient. Psychedelic and relaxing to listen to, create meditative soundscapes to put your listeners in Zen.