


How to Use Serial Compression for Clean and Controlled Vocals
Last Edited: Jul 10, 2026
Producers often approach vocal processing with the idea that one well-set compressor can solve everything. In practice, that rarely holds up. In this tutorial, we'll show you how to apply serial compression to achieve clean and controlled vocals. The process begins with a raw vocal placed in context with a basic instrumental. From there, we introduced multiple compression stages sequentially, each with a clear purpose.
A single compressor forced to handle large dynamic swings tends to cause pumping, loss of clarity, or a vocal that feels either too flat or still inconsistent. The focus is not on extreme settings, but on controlled, incremental changes that build toward a more consistent and professional vocal sound. The result is usually a compromise between a controlled and a natural sound.
A more effective approach is to divide the workload. Instead of relying on one aggressive stage, multiple compressors are used in sequence, each performing a smaller, more focused task. This idea is the basis of serial compression. One stage can manage the peaks, another can smooth the overall performance, and a final stage can shape how the vocal sits in the mix. None of them need to work too hard, which keeps the sound controlled without becoming lifeless.
Another advantage of this method is predictability. When each compressor is responsible for a specific range of dynamics, it becomes easier to fine-tune the response. Transients can be controlled without affecting sustain, and quieter phrases can be lifted without exaggerating noise or artifacts. The vocal remains present and balanced, even in a dense mix.
Listening in Context and in Solo
At the starting point, the vocal was played alongside the instrumental in SoundBridge: DAW. This first check in context reveals how the vocal sits in relation to the track, whether it feels buried, too dynamic, or inconsistent across different phrases.
At this stage, the vocal is completely unprocessed. We kept it that way so we can clearly hear the natural variations in tone and volume. Certain words may jump forward, others may fall back, and the overall level can feel uneven. These differences need to be obvious, as they define what will be addressed with compression later.
After listening in context, we played the vocal solo. This step makes it easier to focus on the raw performance. Breaths, peaks, and quieter sections become more noticeable, along with any abrupt level changes.
We applied no processing here. The goal is to highlight these variations as clearly as possible, creating a strong reference point before introducing serial compression in the next steps. We want to move away from "fixing" the vocal with a single tool, and instead shape it gradually, resulting in a sound that feels both stable and natural.
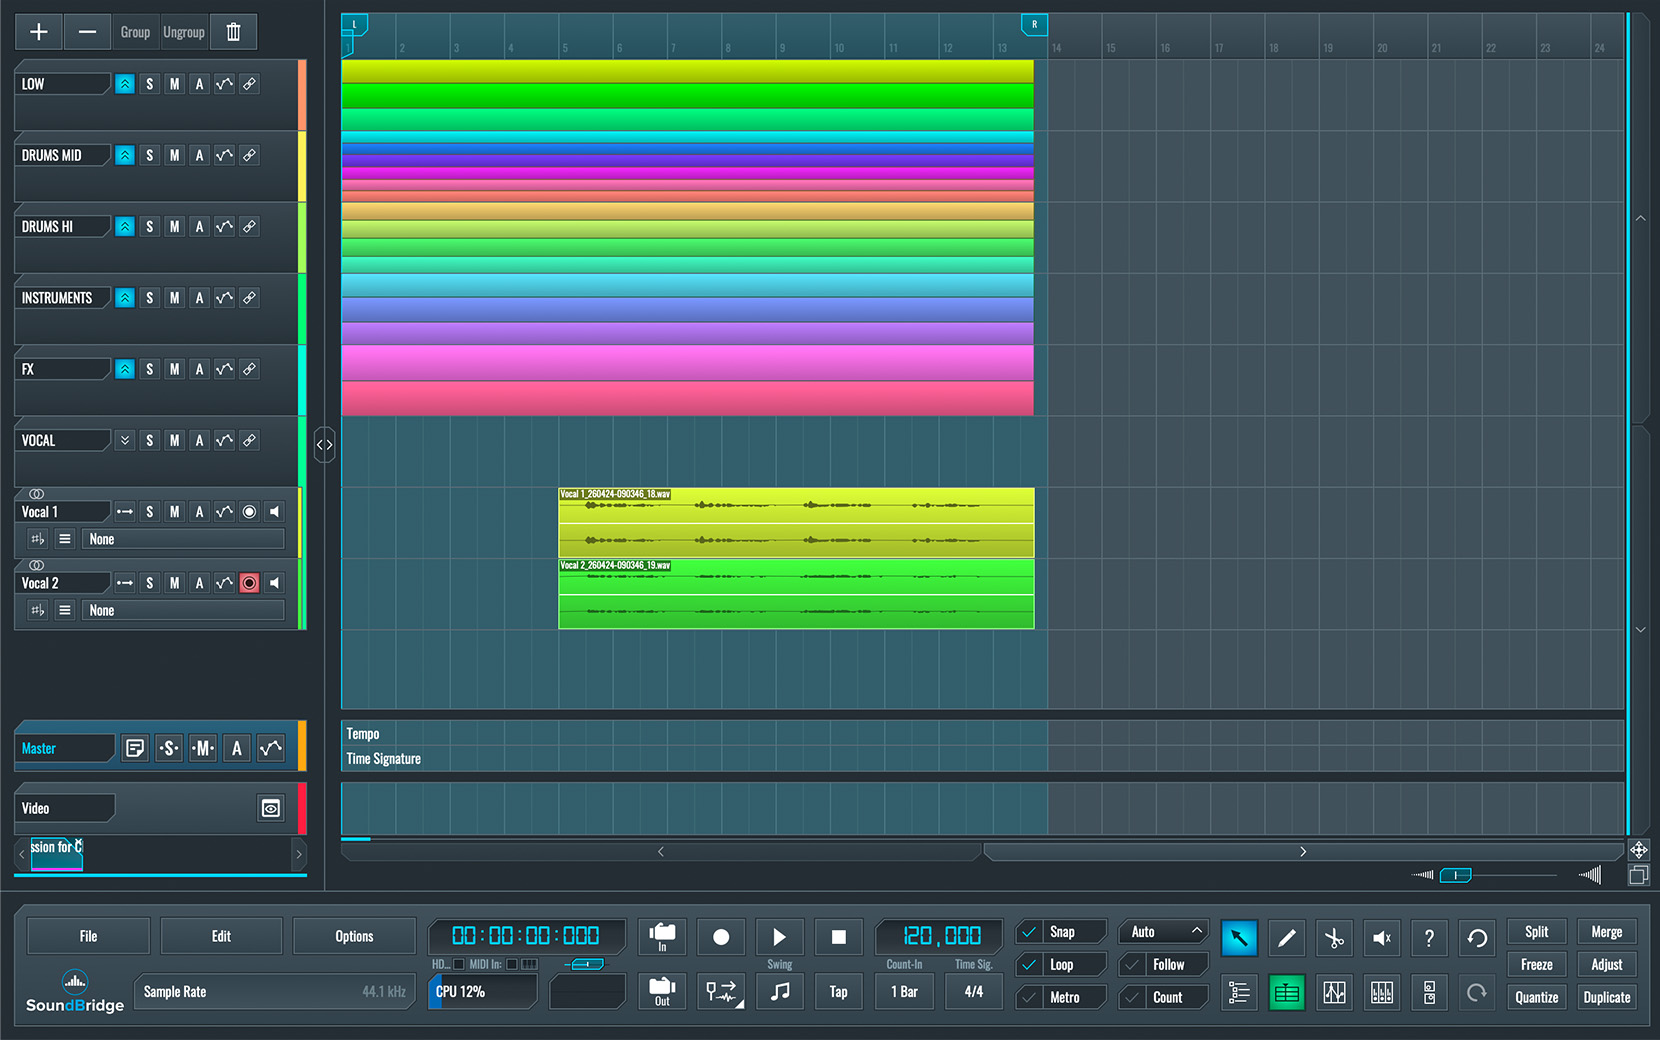
~Full Mix - Vocal (Unprocessed)
~Vocal - Solo (Unprocessed)
Grouping the Vocals and Applying the First Compression Stage for Clean and Controlled Peaks
At this stage, we routed both vocal tracks to a single group channel inside SoundBridge: DAW. This routing allows us to treat the tracks as a single cohesive signal, rather than processing each element separately. Any dynamic changes applied now will affect the vocals as a whole, helping them feel more unified from the start.
We inserted the first compressor on this group channel. For this example, the Molotok Compressor by Tokyo Dawn Records was used. Its role is not to shape the overall tone but to control sudden peaks in the performance. Stronger syllables, consonants, or variations in delivery usually cause these sudden peaks that stand out too much compared to the rest of the vocal.
To achieve this, we set the compressor to have a faster attack time, allowing it to respond quickly to peaks. We also kept the release relatively fast, so the compressor recovers quickly and does not interfere with the natural flow of the vocal. The slightly elevated ratio we used reduced the peaks effectively without unduly affecting the rest of the signal.
The amount of gain reduction at this stage is kept to a minimum, just enough to catch the loudest moments. The goal is not to flatten the vocal, but to remove the extremes so the next stage of compression can work more smoothly.
By the end of this step, the vocal becomes more predictable. The largest peaks are no longer jumping out, and the signal entering the next compressor is more stable. This first compressor stage lays a solid foundation for the next stage, where the focus shifts toward overall balance and consistency.
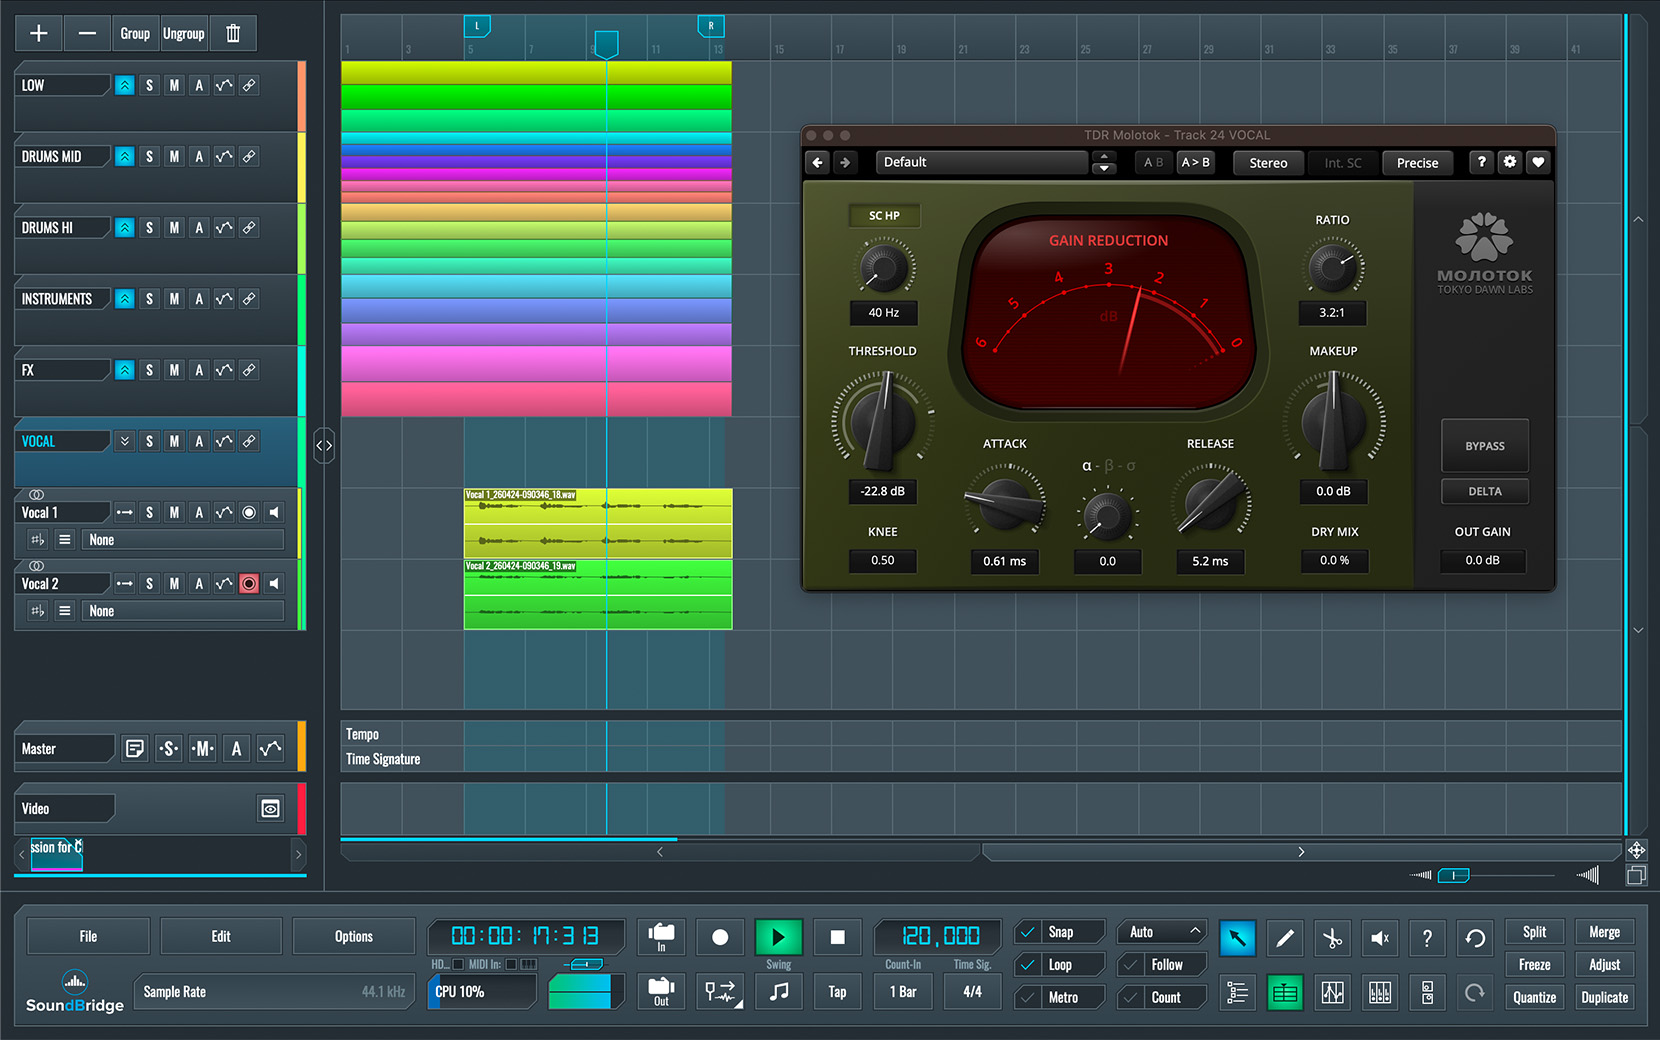
~Vocal - Solo (Processed With Compressor 1)
Adding a Second Compression Stage for Clean and Controlled Vocal Leveling
After controlling the peaks, a second compressor was inserted on the same group channel, placed directly after the first one. While the first stage handles sudden spikes, this second compressor smooths overall performance and makes the vocal more consistent.
For this stage, we used a more gentle approach. A slightly lower attack allowed the initial transients to pass through naturally. A more relaxed release made the compression follow the vocal more smoothly and musically. We also kept the ratio lower than that of the first compressor, as the goal here is not aggressive control but gradual leveling. Instead of reacting only to peaks, this compressor works more continuously, applying light gain reduction across the signal.
At this point, the vocal starts to feel more stable in level. Quieter parts become more audible, and louder sections no longer dominate the mix. The result is a more even, controlled signal that sits more naturally with the instrumental.
When both compressors work together, the behavior becomes predictable. The first stage removes the extremes, while the second stage shapes the overall dynamic range. This combination allows the vocal to remain clear and present without sounding overcompressed.
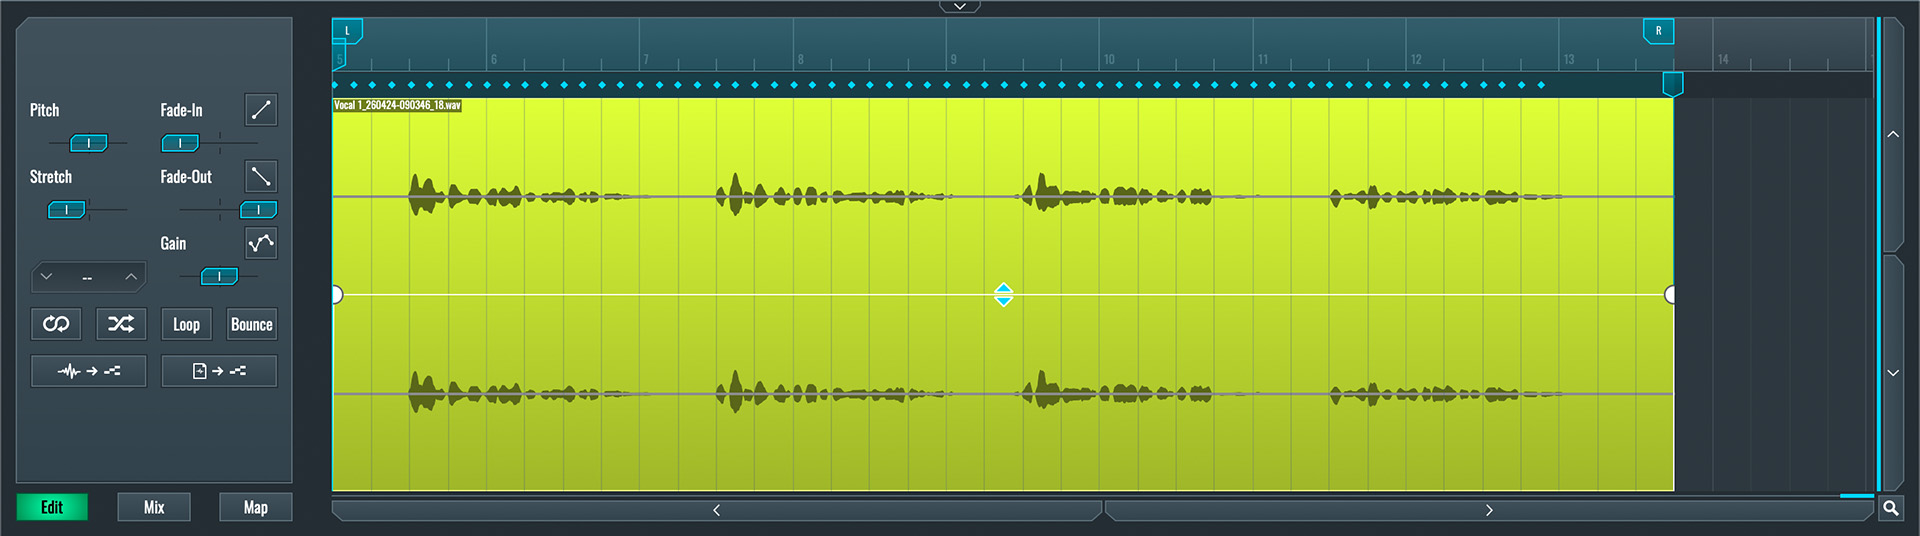
~Vocal - Solo (Processed With Compressor 2)
Adding Reverb and Delay for Space and Placement
After the dynamic control stages, we further processed the vocal using reverb and delay. At this point, the goal is no longer control, but placement; making the vocal sit naturally within the full mix.
Before introducing these effects, we visually inspected the processed vocal. Compared to the original recording, the waveform now appears much more consistent. The large peaks that previously stood out are smaller, and the overall level is more even across phrases. This check confirms that the two stages of compression are working as intended: removing extreme variations and stabilizing the signal without completely flattening it.
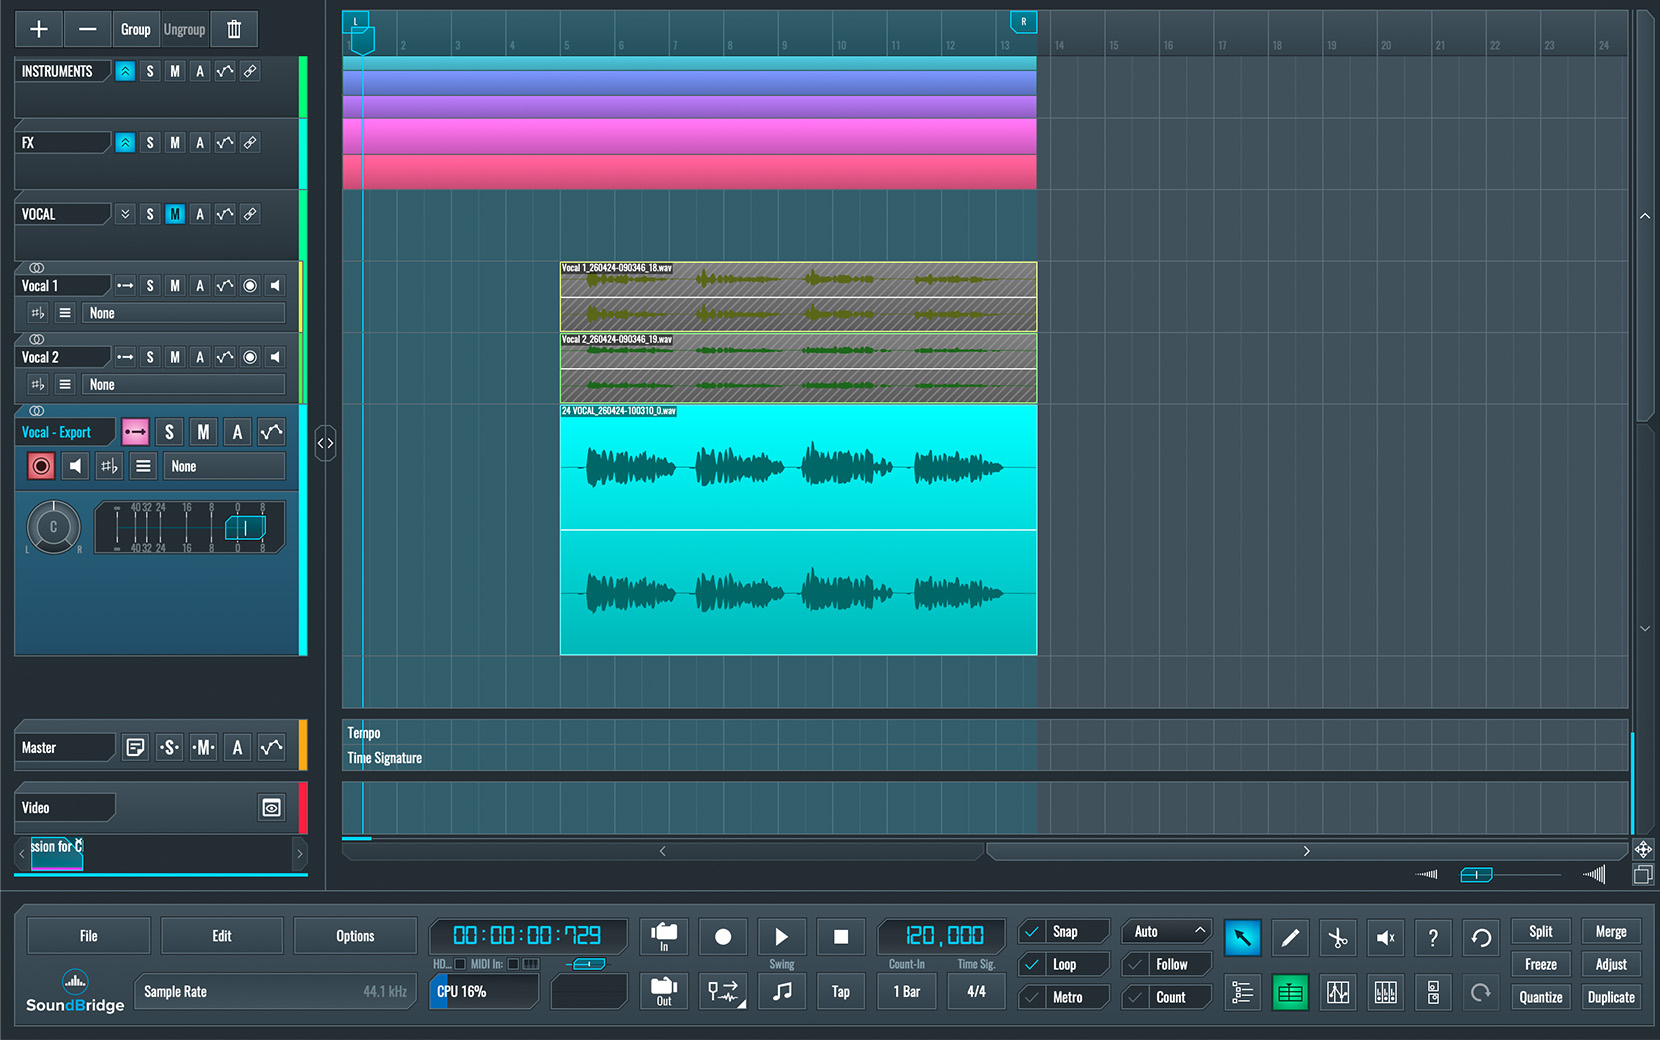
We then introduced a reverb to create depth and a sense of space around the vocal. We used controlled settings, allowing the vocal to remain present while blending into the mix. A moderate decay and subtle wet level were enough to avoid pushing the vocal too far back.
In addition, we added a delay to introduce movement and fill the gaps between phrases. The timing was synced to the track, and the level was kept low so it would support the vocal rather than compete with it. Together, these effects help extend the vocal naturally without making it feel washed out.
Throughout this process, the vocal was checked both in solo and in the full mix. The solo view helps fine-tune the character of the effects, while the full mix ensures that the vocal remains clear and properly positioned within the track.
~Vocal - Solo (Processed Serial Comp & Spatial Effects)
~Full Mix - Vocal (Processed)
Final Thoughts
Serial compression provides a structured way to achieve a clean, controlled vocal without relying on extreme settings. By dividing the workload across multiple stages, the vocal becomes more stable and predictable, while still retaining its natural character.
The first compressor removes the most problematic peaks, preventing sudden jumps in level. The second stage then smooths the overall performance, making the vocal more consistent from start to finish. Together, these stages create a balanced foundation that allows the vocal to sit properly in the mix.
Once the dynamics are under control, spatial processing with reverb and delay helps place the vocal within the track. Instead of sounding isolated, it becomes part of the overall environment, connecting more naturally with the instrumental.
At this point, the fully processed vocal is played back in the full mix. Compared to the original unprocessed version, the result is more controlled, more stable, and easier to integrate into a professional-sounding production.
If you liked this article, here are some more on the same subject:
MASTER MUSIC PRODUCTION
Expert-led courses designed to take you from fundamentals to finished tracks.

HOUSEFrom bouncy bass and solid kicks, this course teaches you the most modern House music production techniques needed to succeed and stand out.

TRAPQuit sounding like generic Trap and produce something World with hints of the Far East. Create ethnic soundscapes to put your Trap ahead of the curve.

AMBIENTProduce relaxing, sophisticated psy-influenced ambient. Psychedelic and relaxing to listen to, create meditative soundscapes to put your listeners in Zen.