Creative Ways to Use the SoundBridge Integrated Sampler
Last Edited: Jul 10, 2025
SoundBridge's new integrated sampler is a simple but powerful tool that opens up a wide range of creative options. In this post, we will explore hands-on examples of how to build complete drum kits, basslines, fills, and even custom loop chops using the built-in sampler.
This article isn't a comprehensive tutorial; rather, it is a collection of creative workflows to help you find inspiration.
Starting the Project & Loading the Sampler
We begin with an empty project and set the BPM to 90. When we add a MIDI track, we can then readily access the sampler from the Edit view in SoundBridge. If you press the number 2 on your keyboard, it opens the MIDI editor, where you can access both the MIDI clip and the sampler on the right.
The workflow begins when we load a kick sample into the SoundBridge integrated sampler. By default, the sampler maps the sample across the whole keyboard. However, in this case, we want it triggered only by one key - C1- so we adjust the root note and limit the note range to just C1. We can also turn on the amp envelope to help control playback length with greater precision.
Building a Drum Kit in the Built-in Sampler in SoundBridge
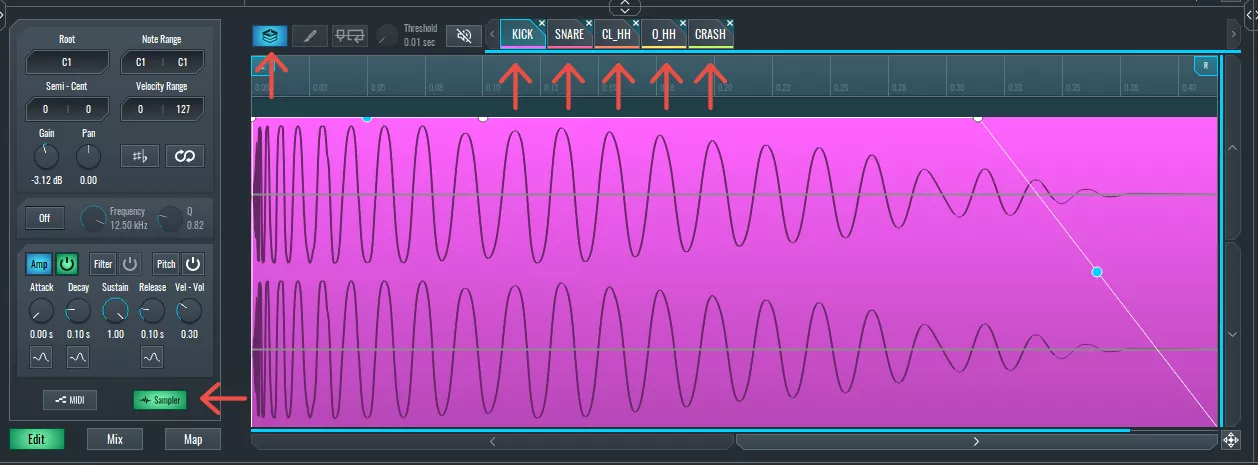
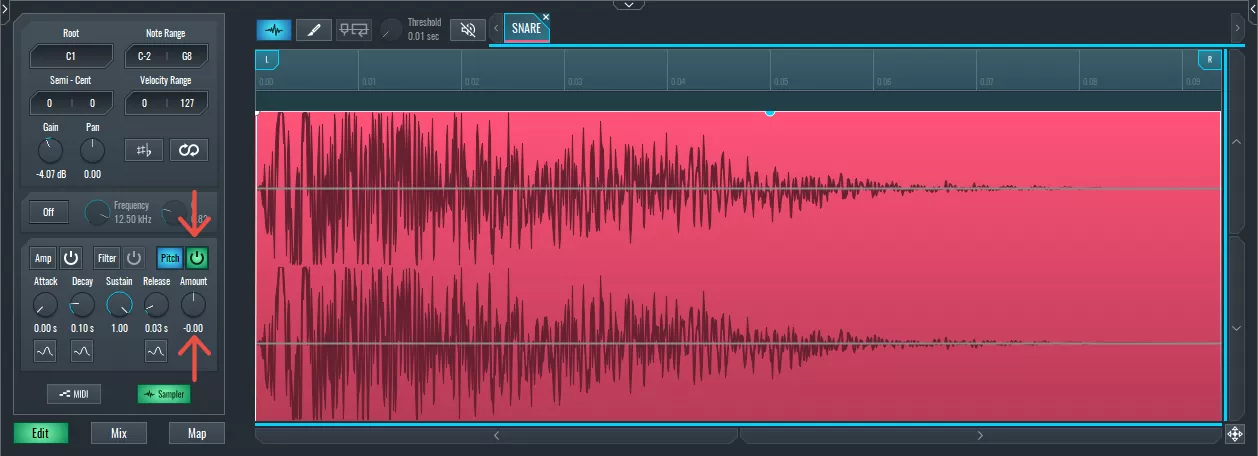
After the kick, we can drag a snare into the SoundBridge integrated sampler. For our project, we can assign it to D1 and again limit the range. Only one of the samples will trigger at this point, as the sampler starts in Single mode. Switching it to Layer mode allows multiple samples to be triggered on different notes.
Next, we can add a hi-hat and map it to F1, as well as an open hi-hat and map it to G1. We can then adjust their volume to maintain balanced levels. We can now add a crash and map it to A1, and then use the amp envelope to shorten the sustain and tighten its tail.
With this setup, we now have a complete custom drum kit inside one instance of the SoundBridge integrated sampler — kick on C1, snare on D1, hats on F1 and G1, and crash on A1.
Recording & Editing the Beat
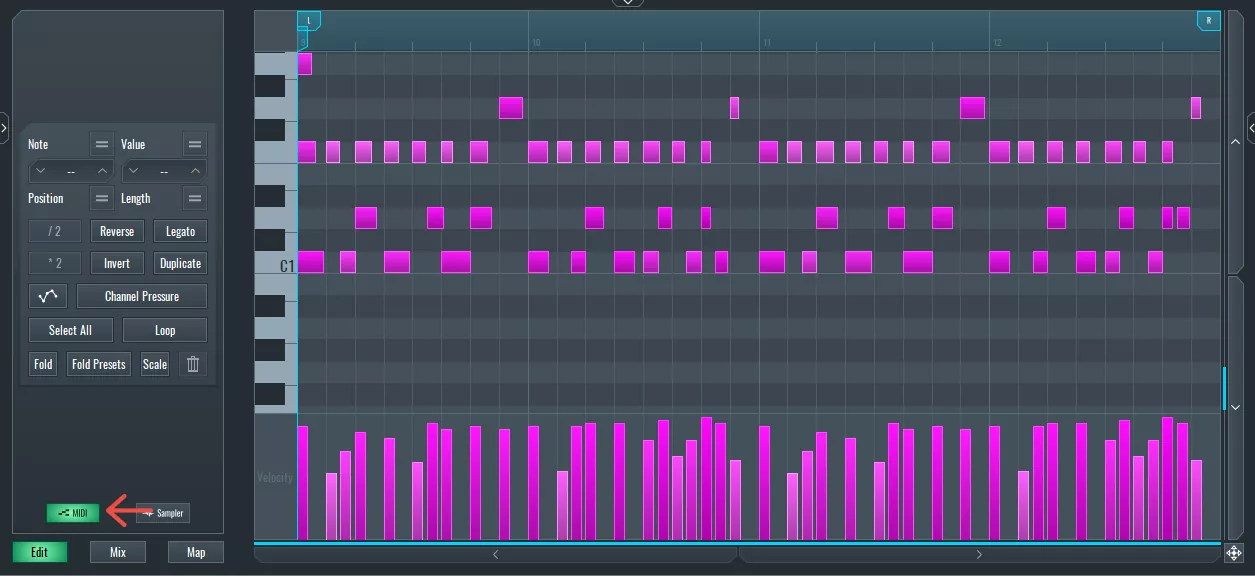
We can choose to draw the beat into the MIDI grid or record it live. We can use the count-in and metronome options to make the live recording feel more natural. Once recorded, we can quantize everything using Ctrl+Shift+Q (or Cmd+Shift+Q on Mac), locking the rhythm into place.
After adjusting a few note positions and adding a crash at the beginning of the loop, the beat is ready. Minor tweaks in the SundBridge built-in sampler (such as lowering the gain per sample) help balance the overall sound.
~ Drum Beat
Adding a Bassline
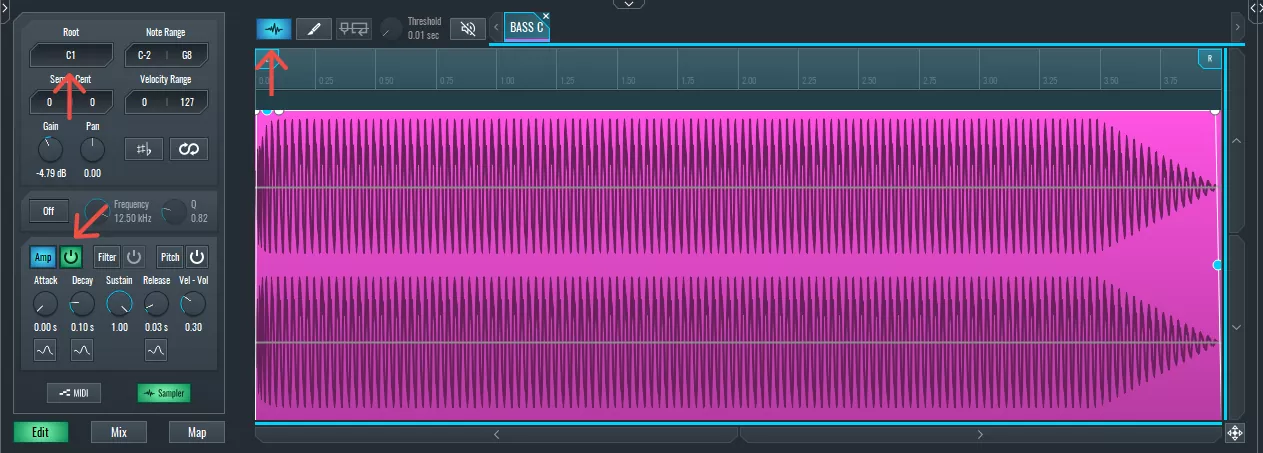
To add a bassline, we create another MIDI track and drag in a one-shot bass sample — preferably one labeled with a root key (like "C"). It's essential to match the SoundBridge integrated sampler's root note with the sample's actual pitch to maintain proper tuning.
We also enable the amp envelope, which is essential for controlling the duration of the bass note. A long sustain might not always work in a rhythmic track, so adjusting the attack, decay, sustain, and release helps shape the bass to fit better.
After setting the gain and testing playback, we record a short bassline, quantize it, and lock it in alongside the drum groove.
~ Bassline
Creating a Snare Fill With Pitch Modulation in SoundBridge's Integrated Sampler
To add a bit of spice, we incorporate a snare fill using another instance of the sampler. A snare is loaded and placed in a MIDI clip at the end of the phrase.
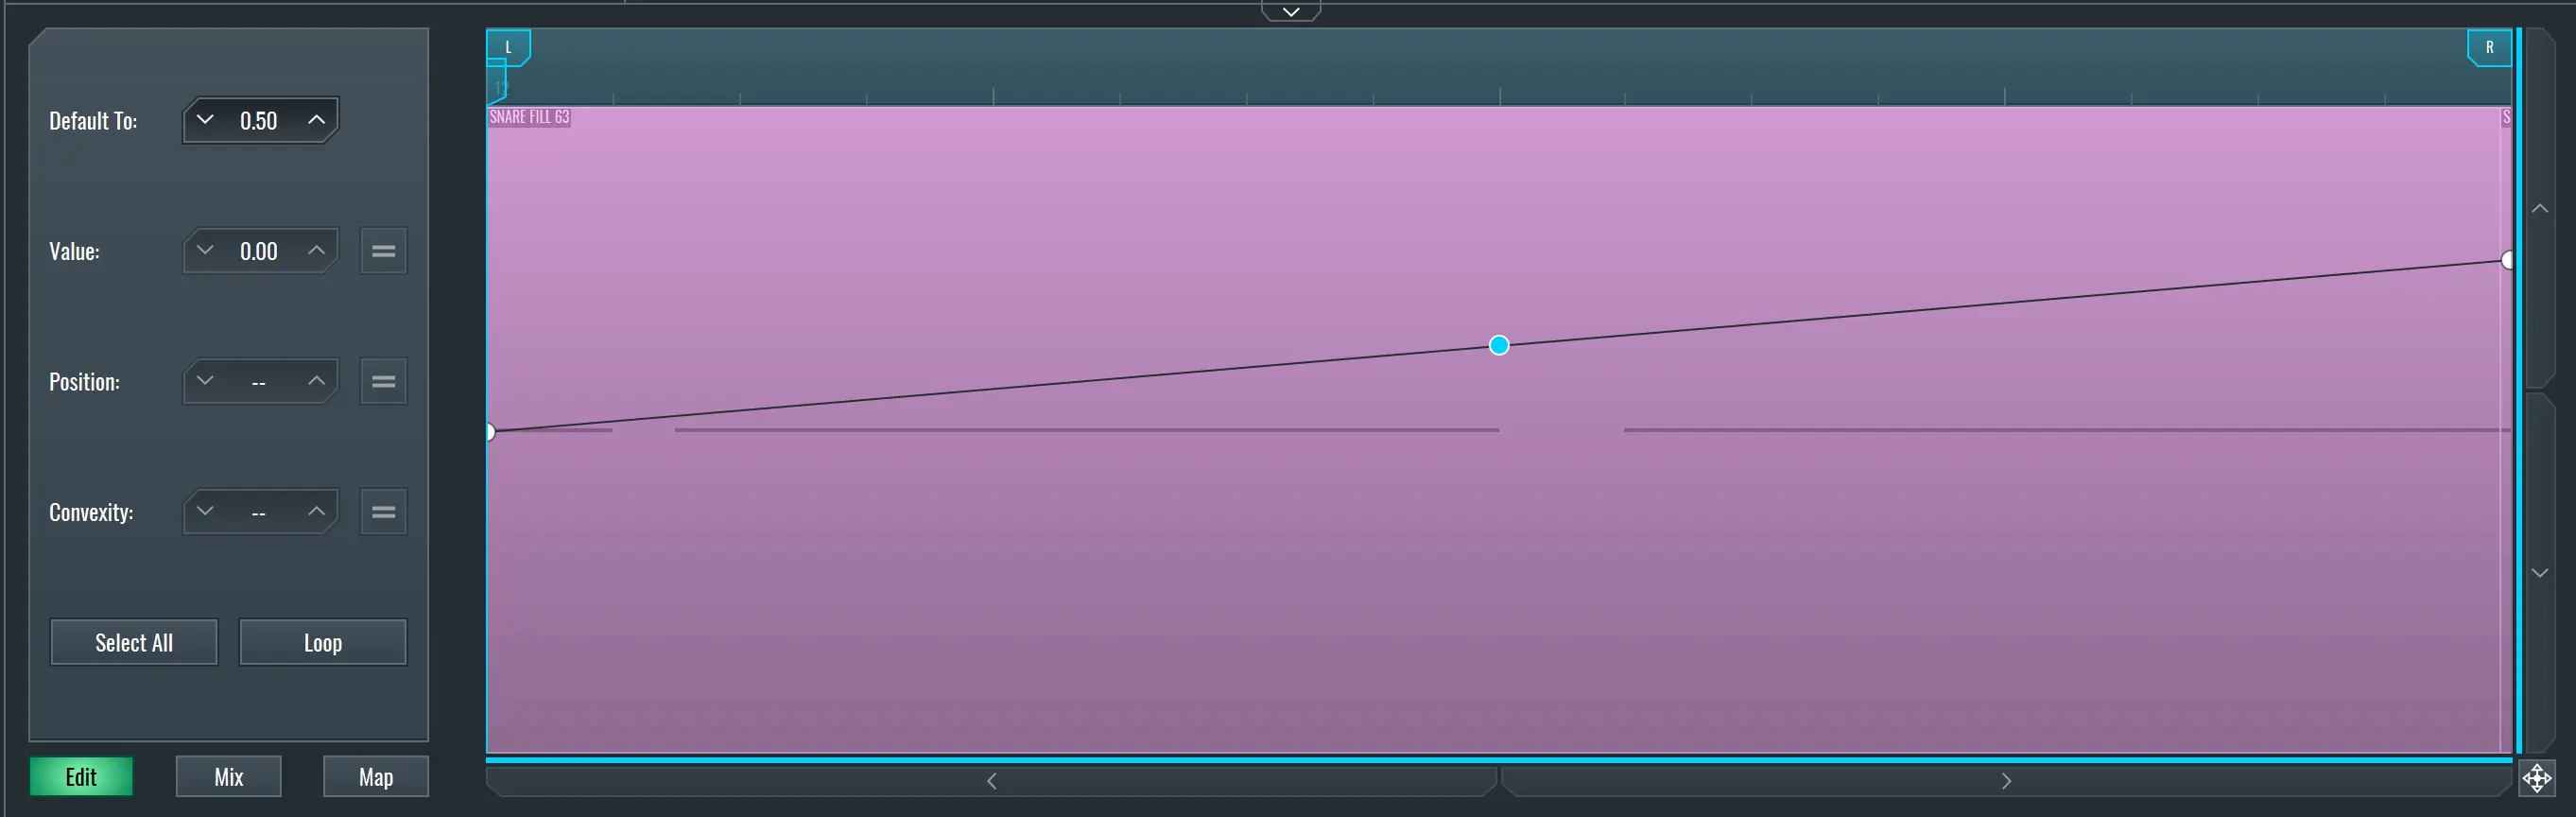
Using SoundBridge's automation system, we can enable pitch automation, activate the pitch envelope, and create a curve that pitches the snare up or down. Only a couple of automation points are needed to get a smooth ramp. You can copy and reverse this for variation — a rise on one phrase and a fall on the next.
Pitch modulation is a simple yet powerful way to add movement and aesthetic appeal to your sounds.
~ Drum Fill
Chopping Loops With the Slice Tool in SoundBridge's Built-In Sampler
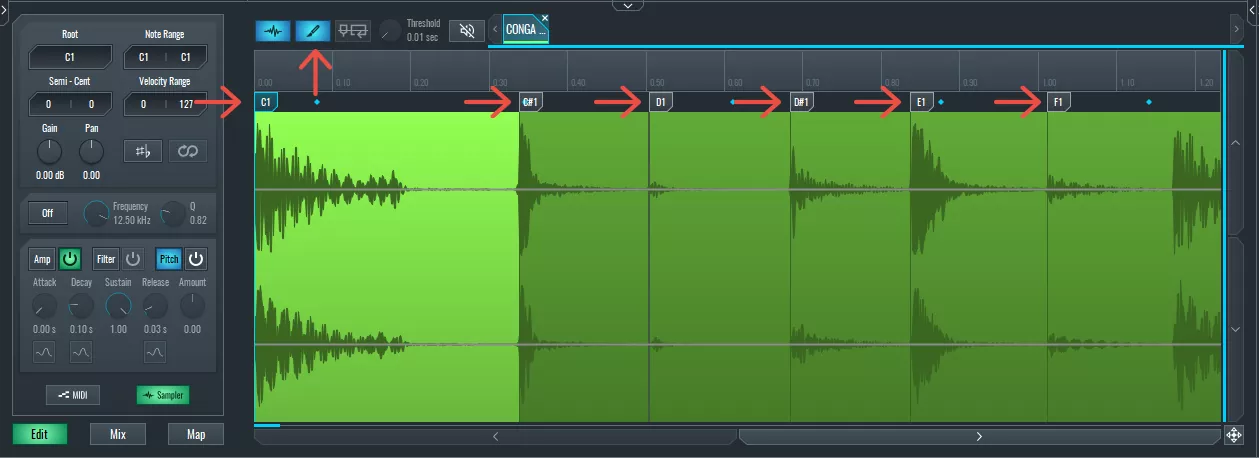
Next, we can load a conga loop into the SoundBridge integrated sampler. Switching to Slice Mode, we can manually add slice points using the draw tool. Turning off the snap allows precise control, and zooming in helps place slices right at transient peaks.
Each slice is automatically mapped to the following MIDI notes — C1, C#1, D1, and so on. We assign only a few of these slices to keep things simple and lower the gain where needed to avoid double hits.
From there, we create a custom rhythm using just a few slices from the original loop. These can be placed into a new MIDI clip, with velocity adjustments and amp envelope tweaks adding further control. The result is a chopped, re-sequenced version of the loop that feels personal and rhythmically fresh.
~ Conga Loop
Final Thoughts
The SoundBridge integrated sampler gives you everything you need to build beats, basslines, fills, and chopped loops — all inside one compact interface. There's no need for third-party tools; everything runs natively within your session.
It's simple to use, and once you understand the basic workflow — drag, assign, tweak, play — it opens up a wide range of possibilities.
If you found this helpful or would like us to explore more advanced sampler tricks, please check out these similar articles:
DOMINA LA PRODUZIONE
Corsi guidati da esperti per portarti dalle basi alle tracce finite.

HOUSEDa bassi rimbalzanti e kick solidi, questo corso insegna le tecniche di produzione House più moderne per riuscire e distinguerti.

TRAPSmetti di suonare come Trap generica e produci qualcosa di World con tocchi del Far East. Crea soundscape etnici per portare la tua Trap avanti.

AMBIENTProduci ambient rilassante e sofisticata con influenza psy. Psichedelica e rilassante all'ascolto, crea soundscape meditativi per mettere i tuoi ascoltatori in Zen.