

Five Step Parallel Compression Routing Setup for Any DAW
Last Edited: Oct 5, 2026

Parallel compression routing blends a heavily compressed auxiliary return beneath your uncompressed signal, lifting quiet details while keeping your transients intact. Build it fast: create an aux bus, send your source post-fader (or duplicate the track), slam a compressor on that aux, then blend the wet return under the dry signal until it feels dense but alive. Watch for latency, phase cancellation, and stereo-link ducking. Those three gremlins are what separate a punchy bus from a flat, thin one.
TL;DR:
- Proper routing and delay compensation are essential to prevent phase issues and ensure a punchy, full sound in parallel compression setups.
- Heavy compression ratios of 4:1 to 10:1 with 6 to 10 dB of gain reduction on the wet bus are typical starting points for impactful parallel compression.
- Using a shared rear bus for multiple drum elements can create a cohesive, breathe-together effect rather than isolated layers.
- Adjust blending on the return fader rather than the send to maintain consistent compressor behavior and predictable results.
- Address common problems like low-end muddiness or harshness by EQing the parallel bus after compression rather than fighting the effect at the mastering stage.
How Do You Set Up Parallel Compression Routing?
You don’t need exotic gear to build this chain. You need the right order of operations, and a compressor willing to work hard.
Here’s the routing sequence that works in virtually any modern DAW:
- Create an aux or FX bus and route your source into it, either through a Send or by duplicating the track outright.
- Set the send to post-fader so the parallel blend tracks your fader moves during automation and mixdown.
- Insert a compressor on the aux bus. VCA compressors give you tight, punchy control; FET-style units add aggression and grit; optical compressors smooth things out with a gentler curve.
- Push the compressor hard. This isn’t your usual insert-compression restraint. You’re going for heavy, obvious gain reduction on this bus alone.
- Set the send level to unity (0 dB), then pull the aux return fader down and bring it up slowly while listening in full context, not solo.
A few things separate a clean setup from a messy one:
- Keep the send at unity and do all your blending on the return fader. That way your compressed chain stays predictable, and you’re never second-guessing what’s driving the sound.
- Confirm your DAW’s plugin delay compensation is active before you commit to a blend. Skipping this step is the number one reason parallel buses sound thin or smeared.
- If your DAW lacks automatic delay compensation on certain routing paths, nudge the compressed bus by samples manually, or drop in a short delay plugin to realign it.
Pro Tip: Resist the urge to ride the send level to change the blend amount. Adjusting the return fader instead means your compressor always sees the same input, so its behavior never shifts unpredictably mid-mix.
What Are the Main Parallel Compression Variants?
Not every source wants the same parallel treatment. The routing method changes depending on what you’re trying to glue together.
- New York style (wet/dry): the classic approach. A parallel bus gets crushed hard and blended under the dry mix or drum bus. It’s the go-to for drums and full mixes that need density without losing snap.
- Rear-bus (Andrew Scheps’ technique): instead of one source feeding one parallel bus, multiple instruments feed a single stereo compressed bus at once. Because different sources hit the compressor at different moments, you get a cohesive kind of movement as elements duck and interact with each other in real time.
- Mid/side parallel: compress the mid or side channel independently to manage center energy against stereo width. This works well on overheads, crash cymbals, or a full mix that needs width control without smashing the center image.
- Left/right dual-mono parallel: process each channel separately with matched settings to avoid the cross-channel ducking that stereo-linked compressors can cause.
- Dynamic parallel: split the parallel signal by frequency, or sidechain the wet bus to duck against the kick, for cleaner low-end definition on busy drum buses.
Pro Tip: Try feeding your kick, snare, and overheads into a single shared rear bus rather than separate parallel chains for each. You’ll hear the drums start to breathe together rather than sit as isolated layers.
If you’re layering multiple drum elements on one bus, this pairs well with drum-layering techniques that rely on the same kind of glue.
What Compressor Settings Should You Start With?
Numbers only matter once you know what they’re doing. Here’s where to start and why each range earns its place.
- Attack: fastest or very fast, to clamp down hard on transients hitting the wet bus. Try a slightly slower attack when you want more snap poking through the compression.
- Release: program-dependent, so lean on auto-release or a medium-fast fixed setting that breathes with the material.
- Ratio: 4:1 up to 10:1 or higher. This isn’t subtle insert compression. You want the wet bus working hard.
- Gain reduction: industry tutorials commonly target 6 to 10 dB of reduction, with some workflows pushing toward 20 dB on the wet bus for a more aggressive effect.
Statistic Callout: Tutorial guidance across FabFilter’s compression resources and Slate Digital’s own breakdown of the technique both point to the same territory: heavy ratios paired with double-digit gain reduction on the parallel bus, blended at a fraction of its raw volume under the dry signal.
EQ the parallel bus once compression is dialed in. High-pass below 30 to 60 Hz so you’re not bloating the low end with mud. A gentle shave in the low mids or a light high-shelf boost adds vibe without piling on harshness.
To audition properly, solo the wet bus first so you can hear its raw tone in isolation. Then bring it back into context and blend by ear, gain-matching as you go so louder doesn’t trick you into thinking “better.”
Why Do Phase and Latency Ruin Parallel Compression?
Plugin processing delay, or a manually routed chain, can knock your wet and dry signals out of sync. The result is comb filtering or smeared transients that make the whole bus sound thinner than either signal alone.
Here’s how to catch and fix it:
- Mono-sum your mix and toggle the compressed return on and off. If transients shift position or the sound thins out noticeably, you’ve got a phase or timing problem.
- Confirm your DAW’s automatic plugin delay compensation is switched on for every plugin in the chain.
- If delay compensation isn’t available on a given routing path, nudge the compressed bus by samples manually, or insert a short delay plugin to match timing exactly.
- Watch for stereo-link ducking: a loud transient on one side can pull down gain on the opposite channel. Switch to dual-mono processing whenever pan-dependent dynamics matter to the mix.
Pro Tip: Run an in-phase versus inverted-phase test on your parallel bus. If flipping polarity cancels more than expected, you’ve found your cancellation point fast, without guessing.
How Do You Fix a Bad-Sounding Parallel Bus?
A parallel bus gone wrong usually falls into one of five familiar traps, and each has a quick fix.
Flabby low end: high-pass the wet bus more aggressively, tighten the attack, or sidechain the low end from your kick so the compressor isn’t reacting to every bass frequency.
Harsh or overly bright wet bus: add a mild low-pass or de-esser, pull the compressed-bus fader back, and re-EQ the wet chain rather than fighting it at the master.
Pumping or drowning the mix: shorten the release time or ease off the gain reduction amount. Check whether your sidechain or auto-release setting is fighting the program material.
Masking and lost transients: back off the wet-bus level, shorten the attack time, or run a transient shaper before the compressor hits.
No improvement after A/B testing: stop pushing further into parallel compression and try a different tool instead. Serial compression, multiband processing, or transient shaping might solve the problem parallel compression can’t.
How Does SoundBridge Handle Parallel Routing?
Routing flexibility is the backbone of this whole technique, and it’s built into how SoundBridge handles sessions.
- Flexible aux buses, groups, and inserts let you build any of the routing variants above without fighting the software.
- High-fidelity processing up to 192kHz keeps your compressed bus clean even under heavy gain reduction.
- Routing flexibility and steady plugin handling help reduce delay-compensation challenges in collaborative sessions with multiple contributors routing into shared buses.
If you want a deeper look at how upward and downward dynamics concepts relate to the “uplift” idea behind parallel compression, SoundBridge’s compression guides walk through the theory alongside practical presets.
Where Can You Learn More About Parallel Compression?
For deeper technical grounding, read Sound On Sound’s breakdown of parallel bus compression, FabFilter’s compression techniques guide, and Sage Audio’s practical parallel compression walkthrough.
Why Parallel Compression Still Gets Misunderstood
Most tutorials treat parallel compression as a settings problem. It isn’t. The settings are almost forgiving, since you’re deliberately overcompressing a bus that never has to sound good on its own. The part everyone skips past is routing hygiene: delay compensation, stereo-link behavior, post-fader sends. Get those wrong and no ratio or attack time will save you.
The conventional advice oversells the “secret sauce” angle, as if 8 dB of gain reduction versus 12 dB is where the magic lives. It’s not. The real skill is knowing when a rear bus (Scheps’ approach) beats a simple wet/dry blend, and when dual-mono processing saves you from a mix that ducks unpredictably on one side.
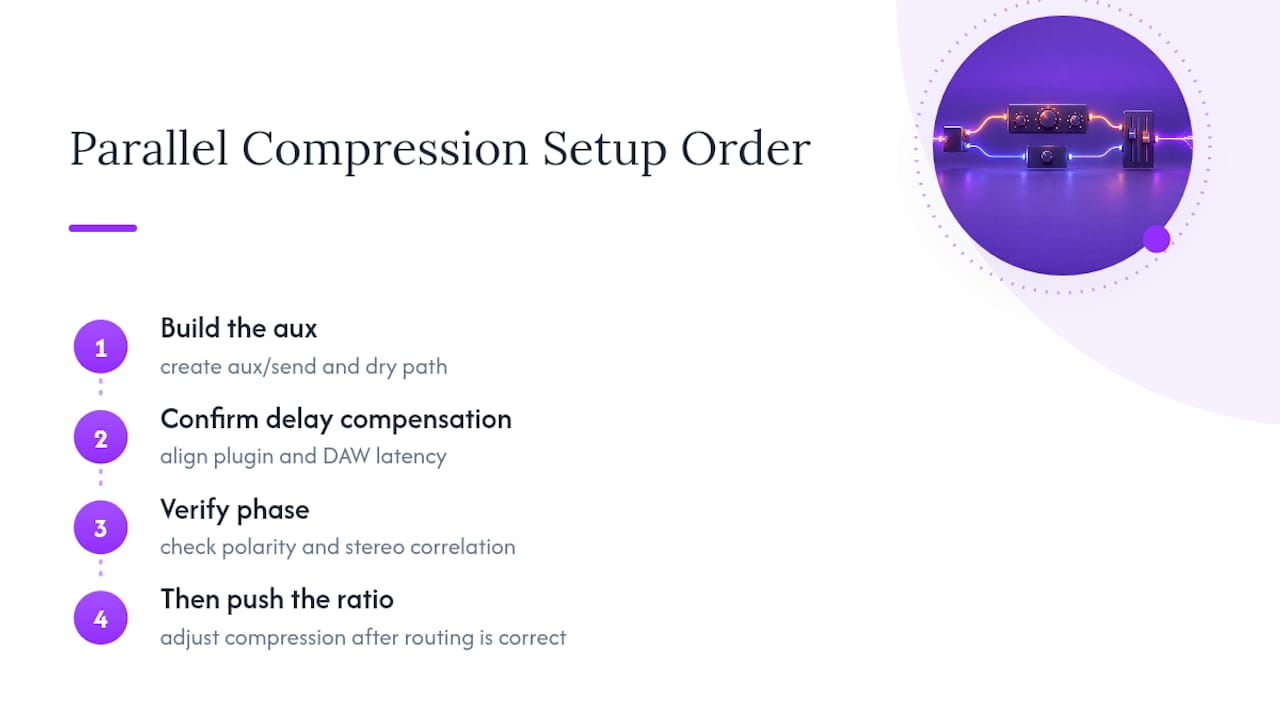
If you’re new to this, prioritize routing correctness before you touch a single knob. Build the aux, confirm delay compensation, verify phase. Then, and only then, start pushing the ratio. A technically clean parallel bus with mediocre settings still beats an aggressive one built on a broken signal path.
— Wake
Sources
- Parallel compression explained (and how to use it) | Slate Digital
- Compression techniques: bus, parallel and mix bus | FabFilter Learn
- Cubase: Parallel Bus Compression (Sound On Sound)
FAQ
Does Andy Wallace Use Parallel Compression?
Andy Wallace is widely associated with parallel drum bus techniques in mainstream rock and metal mixing, a style that shaped how the New York approach gets taught today. The core idea, which blends a heavily compressed bus under the dry drums, aligns with the traditional parallel compression method described throughout this guide.
How Does Parallel Compression Work?
It works by blending a heavily compressed duplicate signal under the dry, uncompressed original, usually routed through an aux send. The compressed bus raises quiet details and adds density while the dry signal preserves the original transients and dynamics.
Why Does Parallel Compression Sound So Good?
It sounds good because it solves a problem insert compression can’t: adding sustain and perceived loudness without flattening the initial hit of a drum or note. Mike Senior at Sound On Sound describes this as an “uplift” effect that lifts the quiet parts while leaving the peaks untouched.
What Are the Best Parallel Compression Settings for Drum Sounds?
Start with a ratio between 4:1 and 10:1, a fast attack, and program-dependent release, aiming for 6 to 10 dB of gain reduction on the parallel bus (some workflows push closer to 20 dB). Blend the compressed return in gradually while listening in full mix context, not solo, until the drums feel denser without losing their initial hit.
Recommended
MASTER MUSIC PRODUCTION
Expert-led courses designed to take you from fundamentals to finished tracks.

HOUSEFrom bouncy bass and solid kicks, this course teaches you the most modern House music production techniques needed to succeed and stand out.

TRAPQuit sounding like generic Trap and produce something World with hints of the Far East. Create ethnic soundscapes to put your Trap ahead of the curve.

AMBIENTProduce relaxing, sophisticated psy-influenced ambient. Psychedelic and relaxing to listen to, create meditative soundscapes to put your listeners in Zen.