Reduce CPU Usage in Music Production: Pro Tips
Last Edited: Jun 24, 2026
Reduce CPU Usage in Music Production: Pro Tips

Reducing CPU usage in music production is the difference between a session that flows and one that crashes mid-take. High CPU load causes audio dropouts, glitches, and the kind of latency that kills your creative momentum. The good news is that specific, proven techniques like freezing tracks, deactivating plugins, and tuning your buffer settings can dramatically cut system load without sacrificing sound quality. Whether you work in Cubase, Ableton Live, or Reaper, these methods apply across the board and will keep your sessions running clean.
How to reduce CPU usage in music production with plugin management
Plugin management is the single most impactful place to start. Most producers assume that bypassing a plugin removes its CPU cost. That assumption is wrong. Plugin bypass still consumes CPU because the real-time DSP engine stays active. Full deactivation actually disconnects the plugin from processing, which is where the real savings happen. In Cubase, this distinction is built into the interface. Other DAWs handle it differently, but the principle is universal.
Freezing tracks takes this further. Freezing renders plugins into audio, stopping real-time processing entirely while keeping your mix decisions intact. Think of it as pressing pause on your CPU’s workload for that track. You can still unfreeze and edit at any time. This is not a workaround. It is a professional workflow tool used in commercial studios every day.

Oversampling is another hidden CPU drain that catches producers off guard. Synths like Serum run oversampling to reduce aliasing, but keeping oversampling at 1x–2x during production and raising it only for the final bounce is a smart trade. After that, bounce your MIDI to audio and free up the CPU entirely. A project with 12 instances of Serum at 4x oversampling will eat your CPU alive. The same project with those tracks bounced to audio runs effortlessly.
Here is a practical plugin management workflow to follow on every session:
- Start the session by deactivating, not bypassing, any plugin you are not actively using.
- Set all synth oversampling to 1x or 2x during the writing and arrangement phase.
- Freeze any track that is finalized or close to finalized.
- Bounce MIDI synth tracks to audio once the sound design is locked.
- Reserve full deactivation or deletion for plugins you know you will not revisit.
Pro Tip: Schedule a “freeze pass” every time you finish a major section of your arrangement. Treat it like saving your project. It takes two minutes and can recover 30–40% of your CPU headroom on dense sessions.
What role do buffer size and sample rate play in CPU performance?
Buffer size is the most direct control you have over the CPU-to-latency trade-off. Larger buffer sizes reduce CPU spikes and dropouts by giving the processor more time to deliver each audio block. The cost is latency. Smaller buffers cut latency but push the CPU harder, which causes glitches if your system cannot keep up.
The right buffer size depends on what you are doing. Recording vocals or live instruments demands low latency, so a buffer of 64 or 128 samples makes sense. Mixing a finished arrangement has no latency requirement, so pushing the buffer to 512 or 1,024 samples gives your CPU significant breathing room. Most producers keep one DAW template for tracking and another for mixing, each with different buffer settings pre-configured.
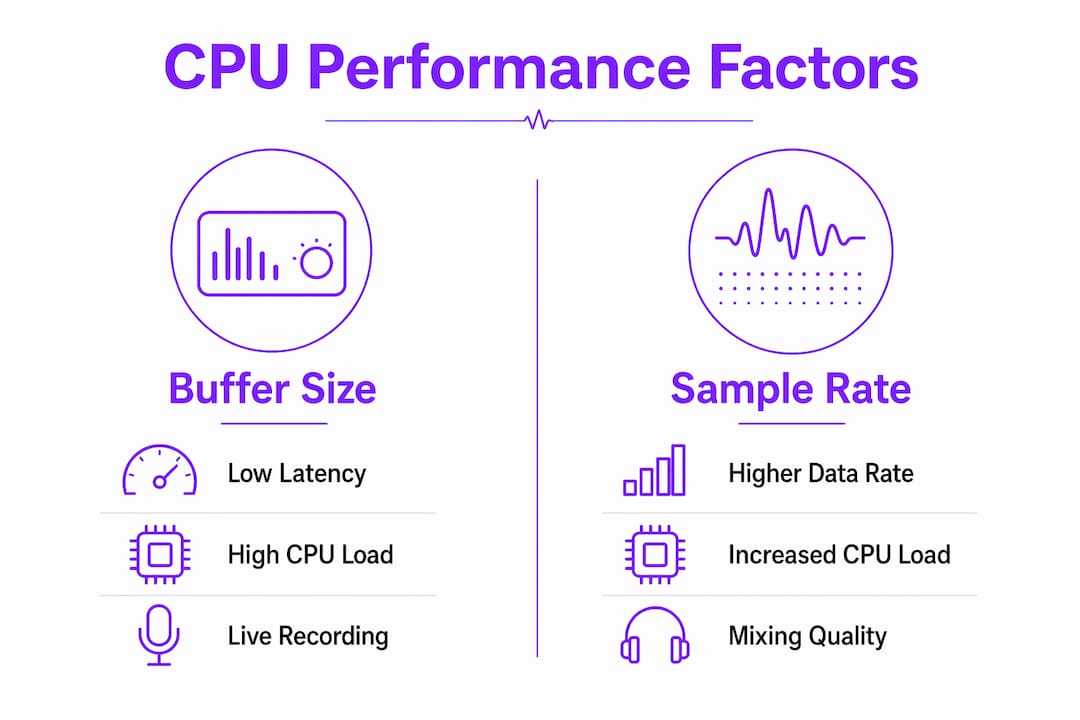
Sample rate choices compound the effect. Running at 96kHz doubles the data your CPU processes compared to 44.1kHz. For most music production work, 44.1kHz or 48kHz delivers professional results without the overhead. Reserve 96kHz and above for film scoring, mastering, or projects where the client specifically requires it.
| Buffer size | Latency | CPU load | Best use case |
|---|---|---|---|
| 64 samples | Very low | Very high | Live recording, real-time monitoring |
| 128 samples | Low | High | Tracking with light plugin use |
| 256 samples | Moderate | Moderate | Hybrid tracking and light mixing |
| 512 samples | Noticeable | Low | Mixing and arrangement |
| 1,024 samples | High | Very low | Heavy mixing, final bounce prep |
Pro Tip: Create two session templates in your DAW: one set to 128 samples for recording and one set to 512 or 1,024 for mixing. Switching between them takes seconds and removes the guesswork from every session.
How can Windows system settings improve DAW CPU performance?
System-level settings are where many producers leave serious performance gains on the table. These changes take under 30 minutes to apply and can make a bigger difference than upgrading hardware.
- Set your power plan to High Performance. Windows power plans prevent CPU throttling when set correctly. The Balanced plan, which is the Windows default, actively downclocks your CPU during low-demand moments. A DAW session is never truly low-demand, so that downclocking causes real-time audio spikes.
- Disable core parking and C-States. Disabling core parking keeps all CPU cores active, eliminating the wake-up delay that causes latency spikes. C-States are power-saving sleep modes for CPU cores. They are useful for general computing but destructive for audio.
- Turn off Windows visual effects. Windows animations and transparency consume CPU and RAM. Disabling them under System Properties gives audio tasks higher scheduling priority. The performance gain is small per effect but meaningful when combined.
- Use an SSD for your project drive. Sample libraries and audio files loaded from a spinning hard drive create I/O bottlenecks that show up as CPU spikes. An SSD eliminates that bottleneck entirely.
- Disconnect unused USB devices and disable Wi-Fi during sessions. Every connected USB device generates hardware interrupts. Wi-Fi drivers are particularly notorious for causing DPC latency spikes that corrupt audio buffers. Unplugging your USB hub and turning off Wi-Fi before a session is a free performance upgrade.
- Adjust background service scheduling. Set processor scheduling to favor background services in Windows performance options. This gives your audio driver more consistent access to CPU time.
The Mac vs. Windows DAW debate often comes down to these system-level differences. Windows gives you more control but requires more configuration. Mac handles many of these settings automatically.
What are the best troubleshooting steps for high CPU load in complex sessions?
High CPU load in a complex session rarely has a single cause. Isolating CPU issues requires testing clean projects, varying buffer sizes, and identifying the specific plugin or sample library causing the spike. Watching the CPU meter hit 90% tells you there is a problem. It does not tell you where the problem lives.
Follow this numbered process to track down the source:
- Open a clean, empty project and play it back. If you still get glitches, the problem is system-level, not session-level.
- Increase your buffer size to 1,024 samples. If glitches stop, your CPU is genuinely overloaded. If they continue, the issue is driver-related.
- Disable Wi-Fi and disconnect all non-essential USB devices. Retest.
- Solo track groups one at a time to identify which section of the session spikes the CPU.
- Deactivate plugins one by one on the offending tracks to find the specific culprit.
- Restart your full PC, not just the DAW. A full restart clears memory leaks and resets driver states that a DAW restart cannot fix.
Beyond troubleshooting, build these habits into every session to prevent problems before they start:
- Freeze tracks as you finish each section of the arrangement.
- Bounce all MIDI synth tracks to audio before the mixing phase.
- Keep your plugin count per track honest. Three well-chosen plugins beat eight mediocre ones.
- Use audio editing automation to handle repetitive processing tasks without stacking live plugin instances.
- Monitor DPC latency with a tool like LatencyMon to catch driver spikes before they become session-ending problems.
CPU percentage alone is misleading. Audio glitches often stem from driver timing and interrupt latency, not raw processing load. A session running at 60% CPU can still glitch if a USB driver fires an interrupt at the wrong moment.
Key Takeaways
Reducing CPU load in music production requires a combination of plugin discipline, buffer tuning, system configuration, and systematic troubleshooting rather than any single fix.
| Point | Details |
|---|---|
| Deactivate, don’t bypass | Full plugin deactivation saves more CPU than bypass, which keeps DSP running. |
| Freeze tracks regularly | Freezing renders plugins to audio and stops real-time processing without losing your mix. |
| Match buffer size to task | Use small buffers for recording and large buffers for mixing to balance latency and CPU load. |
| Configure Windows for audio | Set High Performance power plan, disable core parking, and turn off Wi-Fi before sessions. |
| Troubleshoot systematically | Test clean projects and isolate variables rather than relying on CPU percentage alone. |
What I’ve learned from years of chasing the perfect session
The most common mistake I see producers make is treating CPU optimization as a one-time fix. You tweak the buffer size once, freeze a few tracks, and assume the problem is solved. Then three months later, the session is bloated again and the glitches are back.
The real shift happens when you start treating CPU management as a workflow habit, not a troubleshooting task. Freezing tracks after each arrangement section, bouncing synths to audio before mixing, and running a system check before every session. These are not emergency measures. They are the difference between a producer who finishes records and one who spends sessions firefighting.
The bypass versus deactivation distinction genuinely surprised me when I first dug into it. I had bypassed plugins for years thinking I was saving CPU. I was not. That single change, switching to full deactivation on idle plugins, recovered meaningful headroom in sessions that had felt maxed out.
One more thing worth saying: the CPU meter in your DAW is not the whole story. Audio buffers must be delivered on time under processor interrupt pressure for glitch-free playback. A session can look fine on the meter and still drop out because a driver fired at the wrong moment. LatencyMon is free, takes five minutes to run, and will show you driver-level problems that your DAW meter will never reveal. Run it before you blame your plugins.
The producers who get the most out of their systems are not the ones with the fastest hardware. They are the ones who understand what their system is actually doing and work with it, not against it.
— Wake
Soundbridge and smarter music production workflows
If you are building a production setup that handles complex sessions without constant CPU headaches, the tools and workflow you choose matter as much as the techniques you apply.
Soundbridge is built for producers and audio engineers who want high-performance audio processing without fighting their system. With support for 192kHz sample rates, zero-latency remote tracking, and a workflow designed around real-world session demands, it gives you the technical foundation to apply everything covered here. Explore the complete DAW guide on Soundbridge to understand how the right platform handles CPU demands at the architecture level. If you are evaluating your current DAW setup, the top DAW alternatives breakdown is worth your time.
FAQ
What is the fastest way to reduce CPU load in a DAW?
Freeze your most CPU-intensive tracks first. Freezing renders plugins to audio and stops real-time processing immediately, recovering headroom faster than any other single action.
Does bypassing a plugin save CPU?
No. Bypassing a plugin in most DAWs leaves the real-time DSP engine running. Full deactivation is required to actually disconnect the plugin and save CPU resources.
What buffer size should I use for music production?
Use 64–128 samples when recording to keep latency low, and 512–1,024 samples when mixing to reduce CPU load. Switching between the two based on your task is standard professional practice.
Why does my DAW glitch even when CPU usage looks low?
Glitches at low CPU percentages are usually caused by driver timing issues or interrupt latency, not raw processing load. Tools like LatencyMon can identify the specific driver causing the problem.
Does sample rate affect CPU performance?
Yes. Running at 96kHz roughly doubles the processing demand compared to 44.1kHz. For most music production, 44.1kHz or 48kHz delivers professional results with significantly lower system load.
Recommended
MASTER MUSIC PRODUCTION
Expert-led courses designed to take you from fundamentals to finished tracks.

HOUSEFrom bouncy bass and solid kicks, this course teaches you the most modern House music production techniques needed to succeed and stand out.

TRAPQuit sounding like generic Trap and produce something World with hints of the Far East. Create ethnic soundscapes to put your Trap ahead of the curve.

AMBIENTProduce relaxing, sophisticated psy-influenced ambient. Psychedelic and relaxing to listen to, create meditative soundscapes to put your listeners in Zen.