

Five Minute Sidechain Compression Setup for Producers in Any DAW
Last Edited: Sep 26, 2026
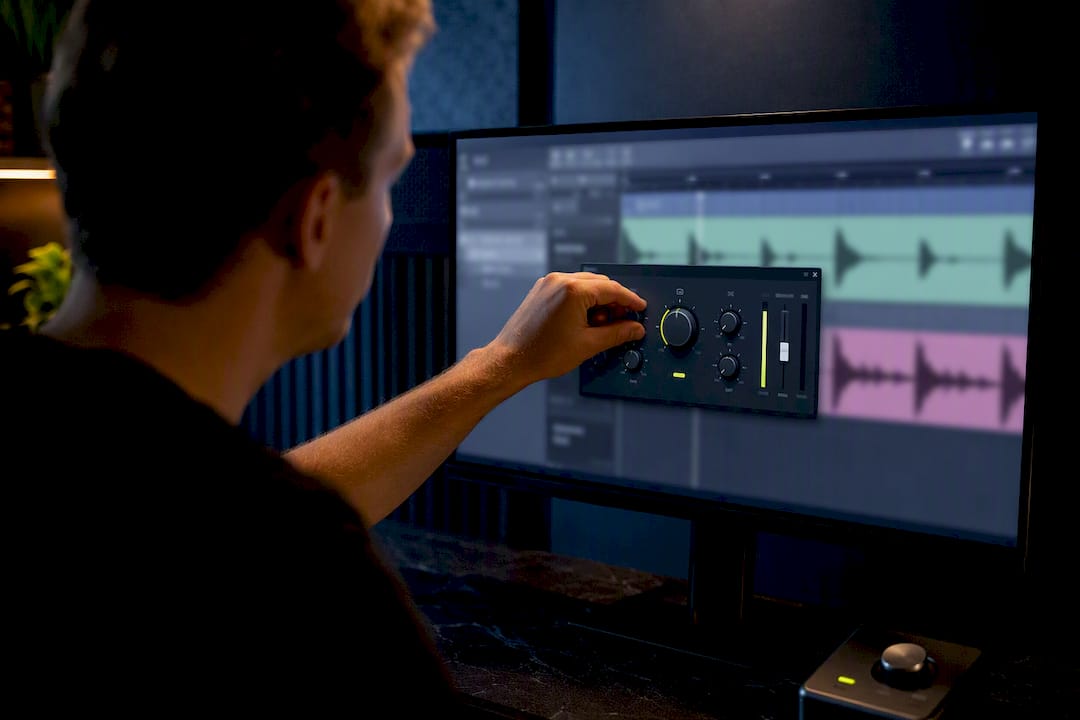
Insert a compressor on the track you want to duck, whether that’s your bass, pad, or reverb bus, then route your kick into that compressor’s sidechain (key) input. Pull the threshold down until you see gain reduction on the meter, and you’ll hear the target track duck in time with the kick hits. Just keep that kick trigger out of your master mix, since it’s only there to control the compressor, not to be heard.
TL;DR:
- Proper sidechain routing involves selecting the kick as the trigger source and filtering the detector signal to prevent over-triggering on low-end rumble.
- Using a ghost trigger or normalized kick sample creates consistent gating, especially useful when swapping kick samples or collaborating across sessions.
- Attack should be fast for tight ducking or slower for a more natural sound, while release should match the beat to avoid stacking gain reduction.
- A ratio of 2:1 to 4:1 with a threshold just above average signal levels provides transparent ducking, whereas higher ratios induce obvious pumping effects.
- Save templates with preset sidechain buses, ghost triggers, and detector filters for consistent, repeatable results across multiple projects.
Quick Setup Checklist For Audible Ducking
Getting your first duck happening takes about five minutes once you know the order of operations. Here’s the sequence that gets you there fastest:
- Insert a compressor on the track you want to duck, bass, pad, or a reverb return.
- Route the kick into that compressor’s sidechain or key input, either directly or through a dedicated send/bus.
- Keep the trigger silent in your master output; mute the send or use a ghost/trigger track if you need a cleaner pulse.
- Lower the threshold until the gain reduction meter moves, then set a starting ratio around 4:1, a fast attack, and a release time suited to the track’s tempo.
- Select Pre-FX detection where your plugin allows it, so EQ or other processing downstream doesn’t confuse the trigger.
Listen while you adjust. If you’re not hearing movement, the routing is usually the culprit, not the compressor settings, and we’ll cover exactly how to fix that in the troubleshooting section below.
How Do You Route Sidechain Signals In A DAW?
Every DAW handles sidechain routing in one of two ways, and knowing which one you’re using saves a lot of guesswork.
- External key input: you open the compressor’s sidechain menu and select the kick channel directly as the trigger source. This is the fastest method and works well in most modern DAWs.
- Send/bus method: you create a dedicated sidechain bus, send the kick to it at unity gain, and point your compressor’s key input at that bus instead. This gives you more control when multiple tracks need the same trigger.
- Ghost or trigger track: a short, consistent kick sample kept muted in the master output, used purely to fire the sidechain. This stabilizes your ducking when the actual kick sample changes between sections or gets swapped during a remix.
- Pre-FX vs Post-FX detection: Pre-FX pulls the trigger signal before any plugins on that channel touch it, which keeps the detection consistent even if you add EQ or saturation later. Post-FX can work, but it’s more prone to drift if you tweak the chain afterward.
- Label everything: name your sidechain sends and buses clearly (“KICK_SC_TRIGGER”) so a future session recall, or a collaborator picking up your project, doesn’t have to guess what’s feeding what.
Ableton’s newer sidechain workflow leans heavily on this Pre-FX selection and a dedicated Sidechain EQ section, which is worth exploring if you’re routing kicks through Ableton’s mixer.
What Attack, Release, And Ratio Settings Work Best?
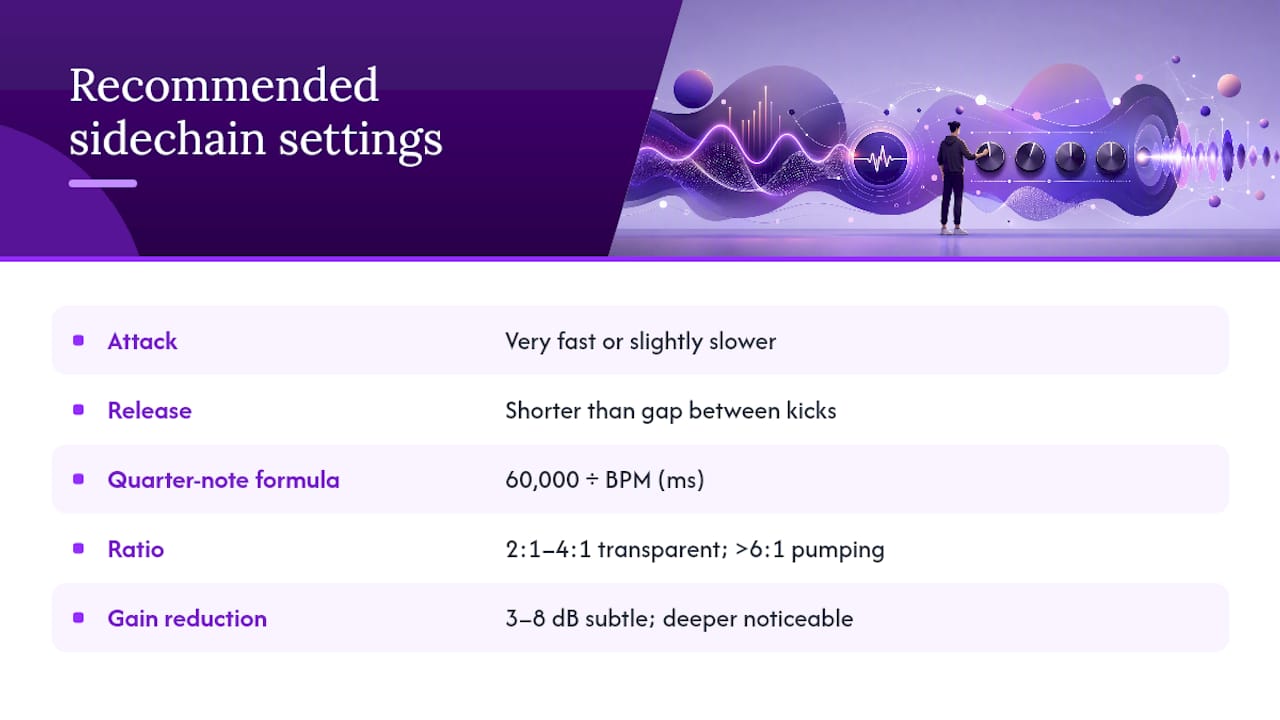
Attack time decides how much of the kick’s transient punches through before the compressor clamps down. Very fast attacks grab the signal quickly for tight ducking, while slightly slower attacks let some transient through before compression, creating a more natural sound on pads or vocals.
Release is where the tempo comes in. Calculate the length of a quarter note in milliseconds by dividing 60,000 by your track’s BPM. At moderate tempos like 128 BPM, a quarter note typically lasts a few hundred milliseconds, with eighth notes lasting less. Shorter releases produce a tighter, punchier duck; longer ones create the classic pumping effect you hear in a lot of EDM. According to The Producer’s Bible, your release should generally be shorter than the gap between trigger hits; otherwise, gain reduction stacks up and the track never fully recovers before the next kick.
Ratio and threshold work together to decide how aggressive the effect sounds. A 2:1 to 4:1 ratio, paired with a threshold set just above your detector’s average level, gives you transparent ducking that clears space without drawing attention. Push past 6:1, and you start hearing obvious pumping, which is fine when that’s the goal. Watch your gain reduction meter: 3 to 8 dB usually reads as subtle, while anything deeper starts to feel like an arrangement element in its own right. If you need more control than compression alone offers, automation or a parallel processing chain often does a cleaner job than cranking the ratio.
Why Filter The Sidechain Detector Signal?
The signal feeding your compressor’s detector doesn’t have to be the full-frequency kick. Filtering it changes what actually triggers the duck, and that one tweak solves more problems than almost any other adjustment.
- High-pass the detector somewhere between 60 and 120 Hz to stop sub-bass rumble from over-triggering the compressor on every low thump, even the quiet ones.
- For kick-to-bass ducking specifically, a detector HPF around 80 to 150 Hz tends to isolate the kick’s punch without letting stray low-end noise fire false triggers.
- Narrow-band detection works the same way for de-essing: filter the detector to the 4 to 9 kHz sibilance range so the compressor only reacts to harsh “S” sounds, not the whole vocal.
- Filtering shifts perceived timing, too. A tighter detector band often makes the duck feel snappier, since the compressor responds to a cleaner, more defined trigger rather than a smeared full-range signal.
This is described as one of the single most effective tweaks for avoiding over-triggering on a mix bus or master bus setup, and it’s worth doing before you touch attack or release at all.
Advanced Sidechain Techniques For Cleaner Low End
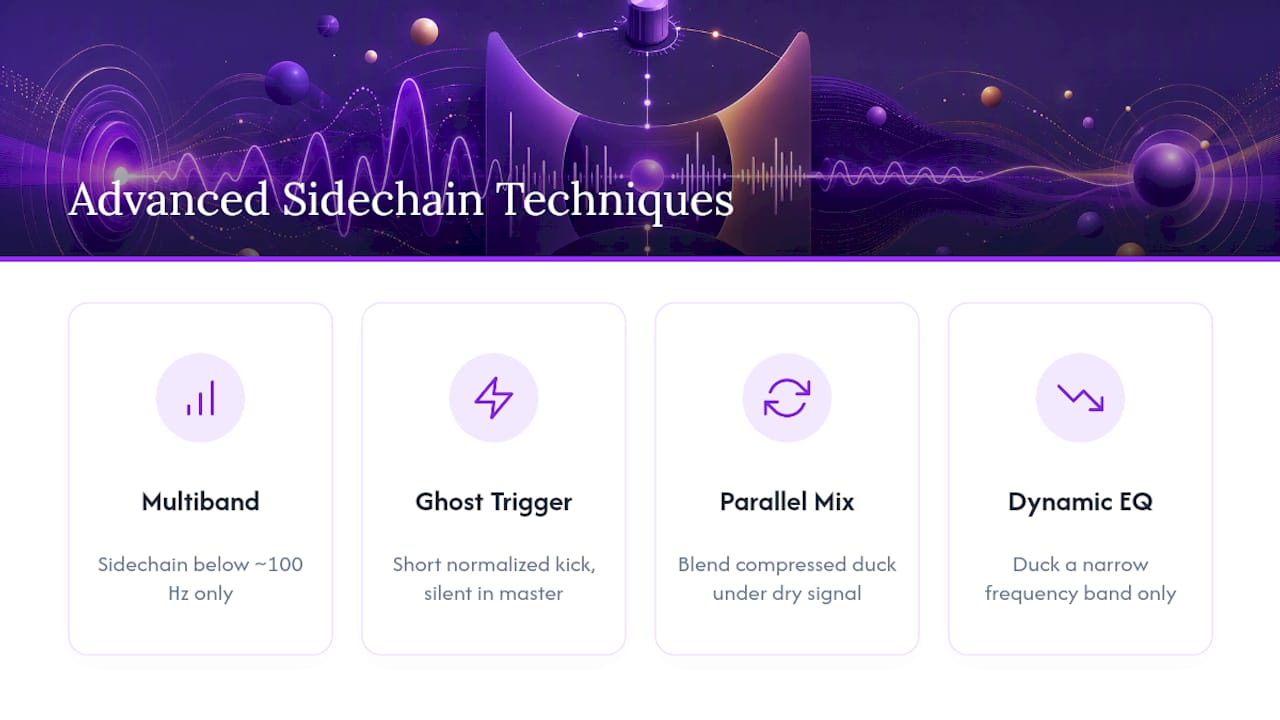
Full-band sidechain compression solves masking, but it can also thin out your bass in ways that hurt the mix. Splitting the signal path fixes that. Run your bass through a crossover, sidechain only the material below roughly 100 Hz, and leave the midrange and upper harmonics untouched. The kick still carves out room in the sub, and your bass keeps its growl and character everywhere else. Multiband sidechaining like this is standard practice for genres where the bassline needs to stay melodically present even while the kick hits.
Ghost triggers matter here too. A short, normalized kick sample, kept silent in the master bus, gives you a consistent trigger no matter how many times you swap the audible kick during production. Parallel returns add another layer of control: blend a heavily compressed duck signal underneath the untouched original, and you get movement without sacrificing sustain. For surgical cases, a dynamic EQ or spectral dynamics processor can duck a narrow frequency band instead of the whole signal, which is worth exploring when full-band sidechaining feels too broad for the problem you’re solving.
Pro Tip: Save your ghost trigger as a two-bar loop at a fixed level, then drop it into every new session template. You’ll never have to rebuild your sidechain reference from scratch again.
Why Isn’t My Sidechain Compression Working?
Most sidechain problems trace back to routing, not the compressor itself. Run through this list before you start second-guessing your parameter choices.
- No audible duck at all: check that the sidechain source is actually selected in the plugin, confirm the send level isn’t at negative infinity, and verify you’re on the correct Pre/Post setting.
- Duck sounds late or clicky: look at attack time first, then check for plugin latency or lookahead settings that might be misaligned with your DAW’s compensation.
- Over-pumping or breathing artifacts: lower the ratio, shorten the release, or restrict the effect to a single frequency band with a multiband approach instead of compressing everything.
- Inconsistent results across kick swaps: switch to a normalized ghost trigger so every session starts from the same detector level, regardless of which kick sample you’re auditioning.
- Phase or low-end smearing in mono: sum your mix to mono and listen for cancellation, since aggressive sidechain moves can sometimes expose phase issues that were hiding in stereo.
Building A Repeatable Sidechain Workflow
The producers who get consistent results treat sidechain setup like a template, not a one-off task. Save a labeled sidechain bus with a default detector HPF already dialed in, so every new project starts from a stable baseline instead of rebuilding routing from scratch. Document your preferred attack, release, and ratio ranges in session notes once you find combinations that work for your style, then A/B against the unprocessed track to confirm the duck is doing what you intended.
Collaboration adds another wrinkle. If you’re passing sessions between studios, freeze or document your ghost trigger levels so timing doesn’t shift when someone else opens the project. Wake’s tutorials and SoundBridge’s compression guides include downloadable templates that bake these habits in from the start, saving you from relearning the same lessons on every new track.
Subtle Ducking Or Obvious Pumping: Which Should You Choose?
Transparent ducking, that 2:1 to 4:1 range with fast release, suits acoustic genres, broadcast mixes, and anywhere mix clarity matters more than effect. Obvious pumping earns its place in electronic genres, especially at build-and-drop moments, where the movement itself becomes part of the arrangement. Ask yourself one question before dialing in ratio: does this track need to breathe, or does it need to announce itself?
— Wake
Get Sidechain Templates Built Into Your Sessions
Some DAW platforms provide templates that speed up sidechain setups, allowing you to set up a labeled sidechain bus, a ghost trigger, and a default detector HPF once, then reuse that template across projects, even in remote collaborations with studio-accurate sync.

Musicians and engineers of any skill level can start with the Free Version to try the routing workflow firsthand, or upgrade to the Premium Version or a Lifetime License for expanded processing and template features. If you’re collaborating across locations, STUN/TURN access runs $4.99 per month and keeps remote sessions synced. Head to the SoundBridge product page to download a starter template and hear the difference a properly built sidechain chain makes on your next mix.
Sources
FAQ
Is Sidechain Compression Necessary?
No, it’s not required, but it solves a common problem: kick and bass masking each other, more musically than aggressive EQ cuts in most dance and hip-hop production.
Should EQ Or Compression Come First?
For sidechain purposes, EQ the detector signal (not the track itself) before the compressor reacts to it; filtering the trigger with a high-pass around 60 to 120 Hz keeps the compression response cleaner from the start.
Should I Sidechain The Kick To The 808, Or The 808 To The Kick?
Route the kick as the trigger and let it duck the bass, not the other way around, since the kick’s transient needs to stay front and center while the low bass makes room around it.
What Should Be Sidechained To What?
The kick almost always acts as the trigger, ducking bass, pads, or reverb returns; less commonly, producers sidechain a lead vocal to duck pads or reverb tails so the vocal cuts through during busy sections.
Recommended
MASTER MUSIC PRODUCTION
Expert-led courses designed to take you from fundamentals to finished tracks.

HOUSEFrom bouncy bass and solid kicks, this course teaches you the most modern House music production techniques needed to succeed and stand out.

TRAPQuit sounding like generic Trap and produce something World with hints of the Far East. Create ethnic soundscapes to put your Trap ahead of the curve.

AMBIENTProduce relaxing, sophisticated psy-influenced ambient. Psychedelic and relaxing to listen to, create meditative soundscapes to put your listeners in Zen.