Speed up Your Workflow With Keyboard Shortcuts
Last Edited: Apr 1, 2024
Speed and efficiency are critical factors for any music producer. The shorter the time it takes for ideas to get from your mind to your song, the more fulfilling and productive your creative process will be. For this purpose, most DAWs offer a wide range of shortcuts to help musicians improve their workflow, and mastering keyboard shortcuts will make you spend less time on strenuous things like GUI browsing and mouse clicks.
A streamlined workflow can help you focus more on the creative aspect of music production, improve your productivity, and complete projects much faster. It's always advisable to know all the standard keyboard shortcuts and create shortcuts for any process you frequently do that is not already provided. In this article, we'll show you how to speed up your workflow with keyboard shortcuts in SoundBridge.
Basic Keyboard Shortcuts You Should Have at Your Fingertips
1. Tab: Toggle Between the Mixer and Sequencer Views
Hitting the Tab key switches you from the sequencer view to the mixer view or vice versa.

~ SoundBridge: Sequencer View
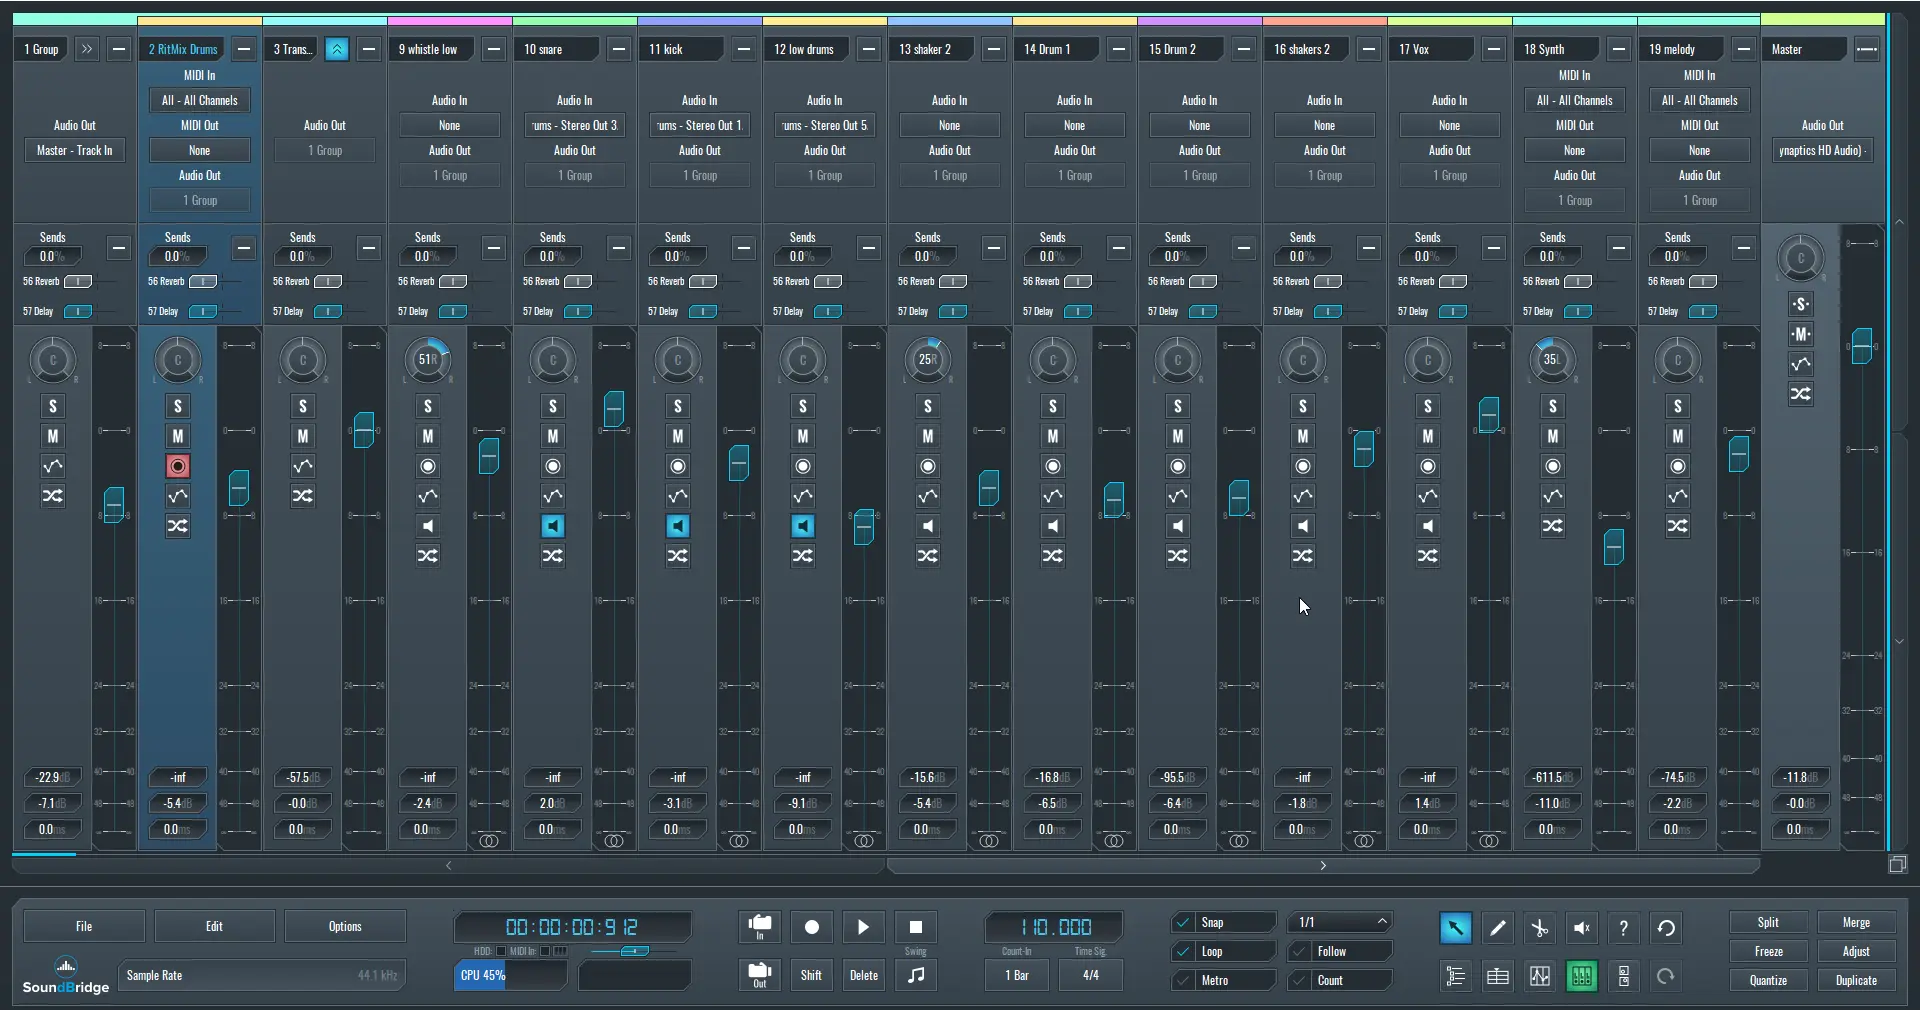
~ SoundBridge: Mixer View
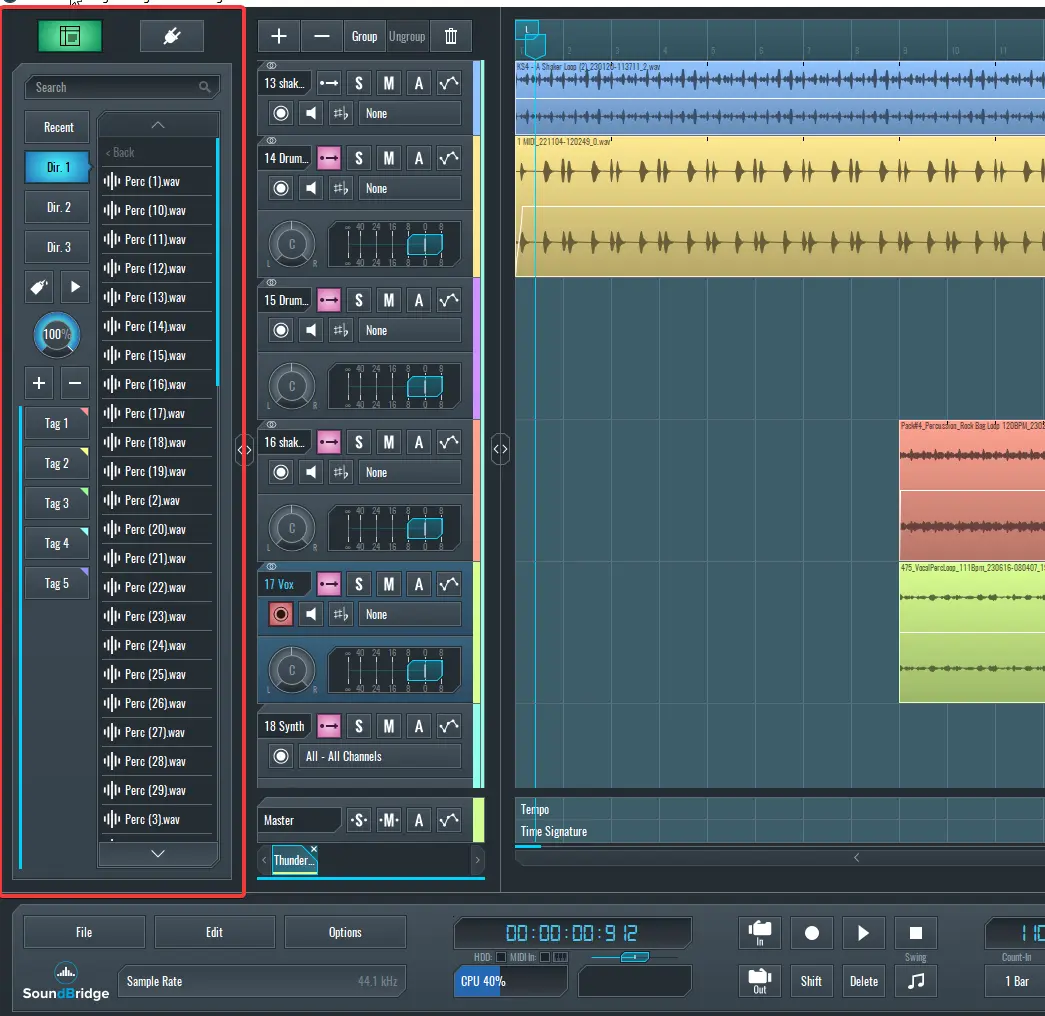
2. "1": Show/Hide the File/Plugin Browser
You can use your keyboard's "1" key to show/hide the file browser quickly. This can help you free up screen space when you need it.
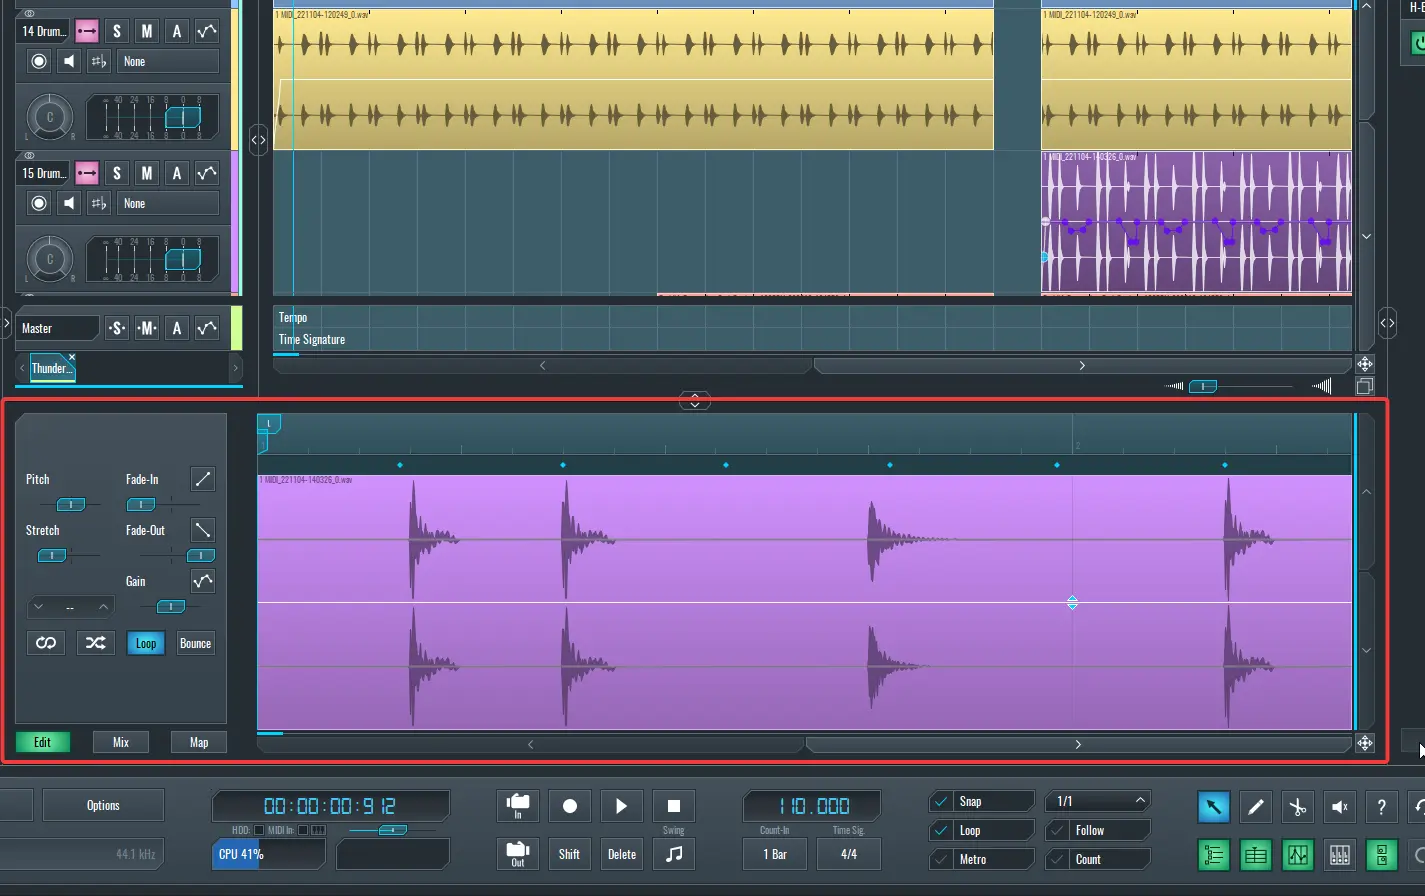
3. "2": Show/Hide the Edit Window
The "2" key on your keyboard can help you show/hide the edit window.
4 "3": Show/Hide the Insert Rack.
Hit the "3" key on your keyboard to show/hide the insert rack.
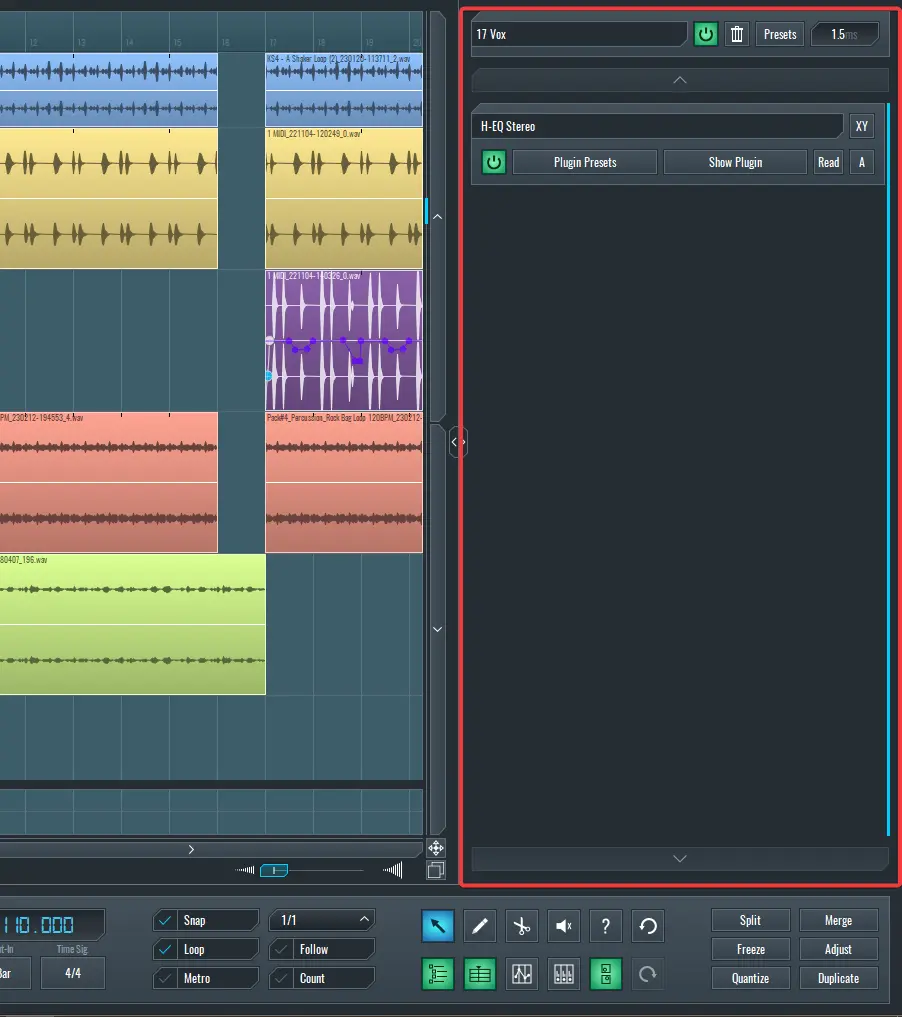
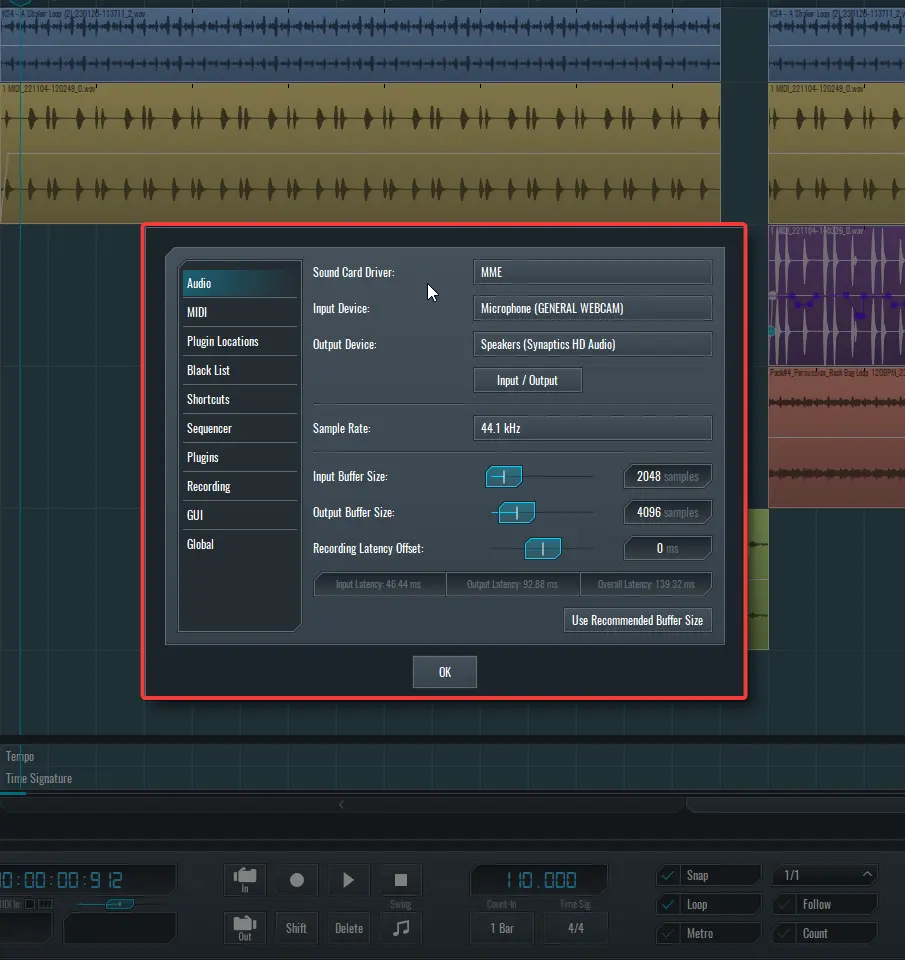
5. "P": Open the Preferences
Hitting the P key on your keyboard helps you open the Preferences widget, where you can find basic SoundBridge settings.
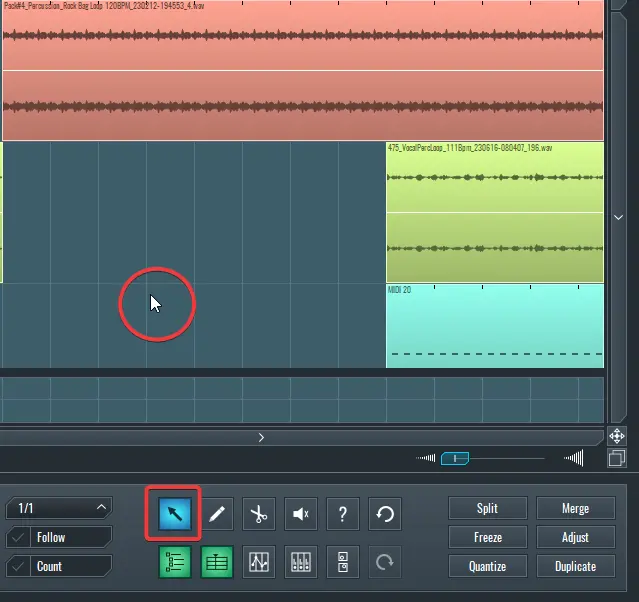
6. "Q": This Selects the Select Tool
Use the Q key to change your cursor to the Select tool. This is equivalent to clicking the Select tool on the transport bar in SoundBridge.
7. "X": This Selects the Cut Tool
You can hit the X key to make your cursor a Cut tool for cutting blocks in the sequencer or edit window.

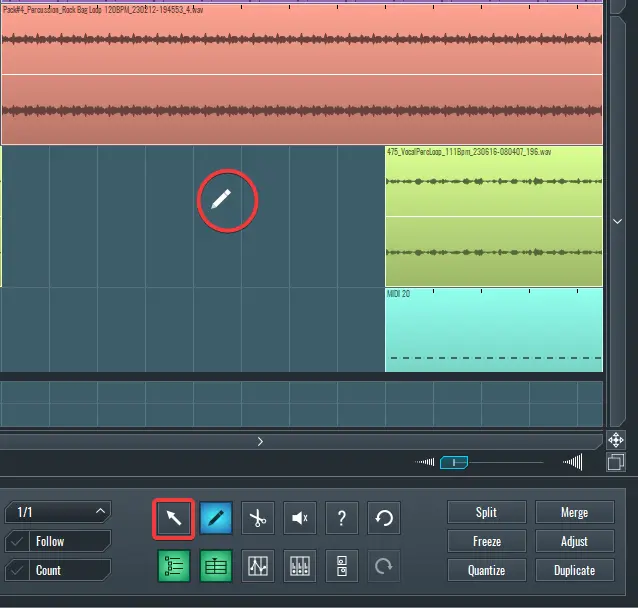
8. "D": This Selects the Draw Tool
Hitting the D key makes your cursor a Draw tool, helping you quickly draw blocks, MIDI notes, or automation points.
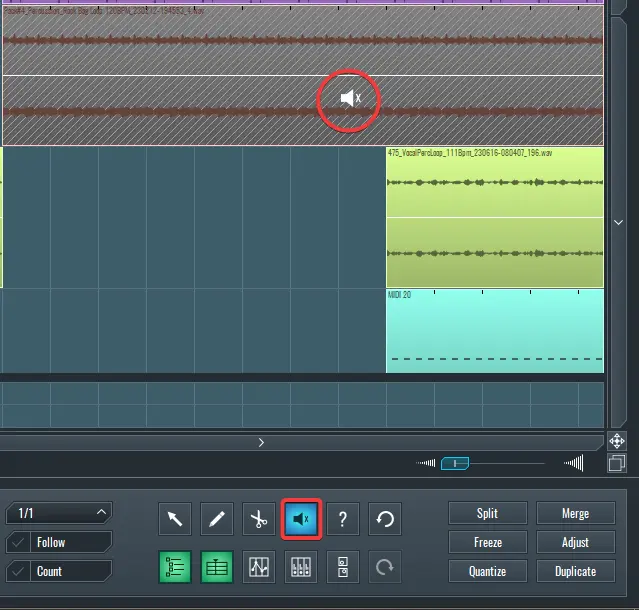
9. "Z": This Selects the Mute Tool
Use the Z key to make your cursor a Mute tool for muting Audio, MIDI, or automation blocks in SoundBridge.
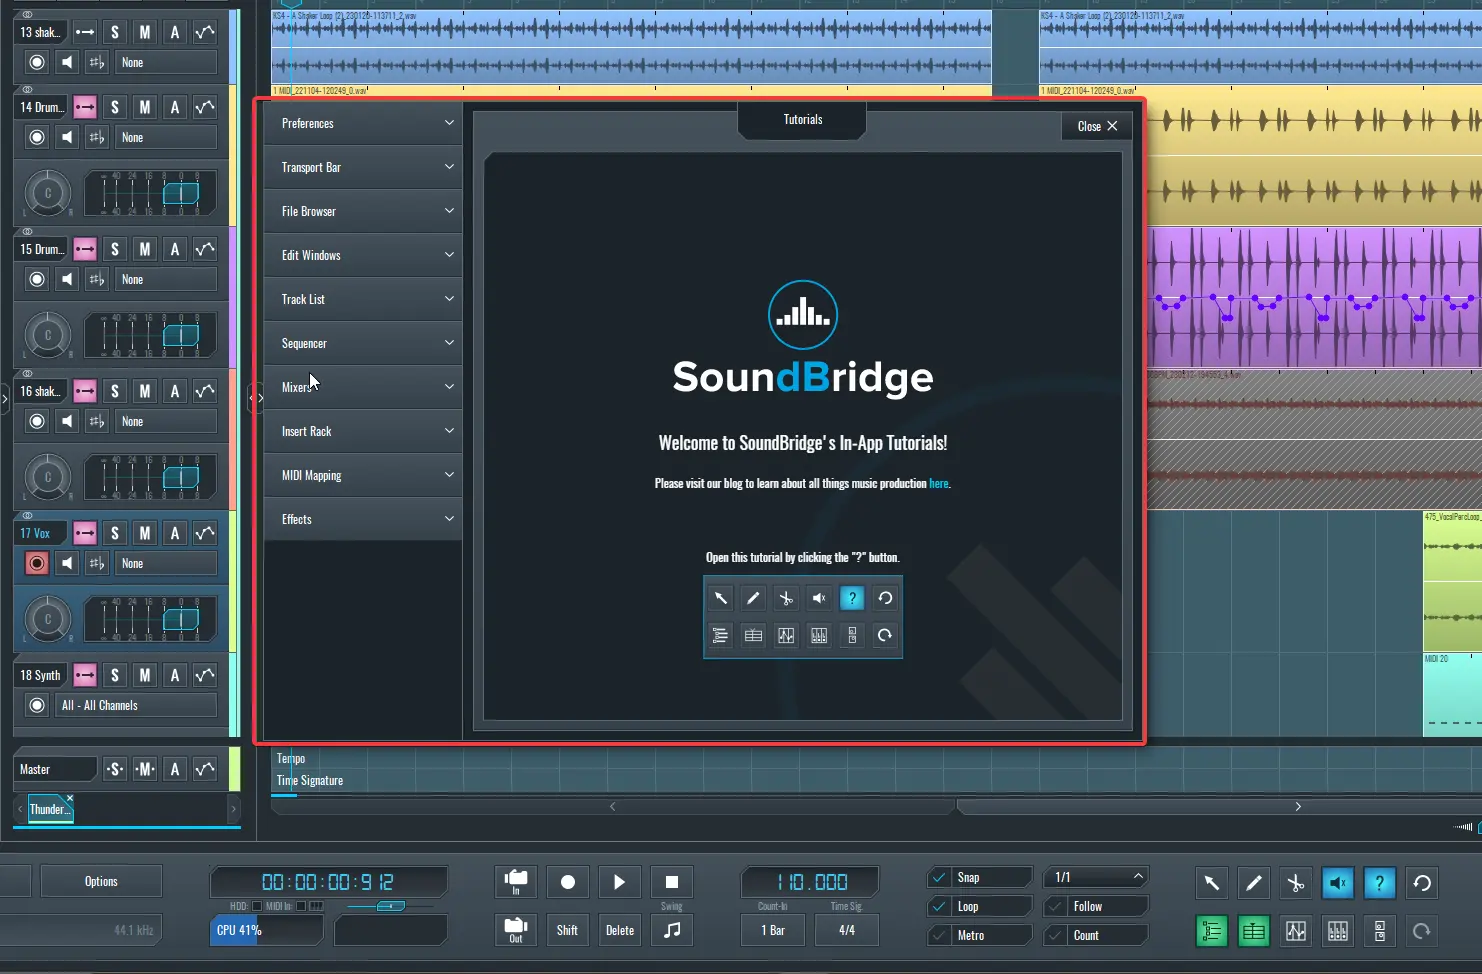
10. "T": Open/Close the Tutorial.
Hit the T key to open the SoundBridge in-app manual.
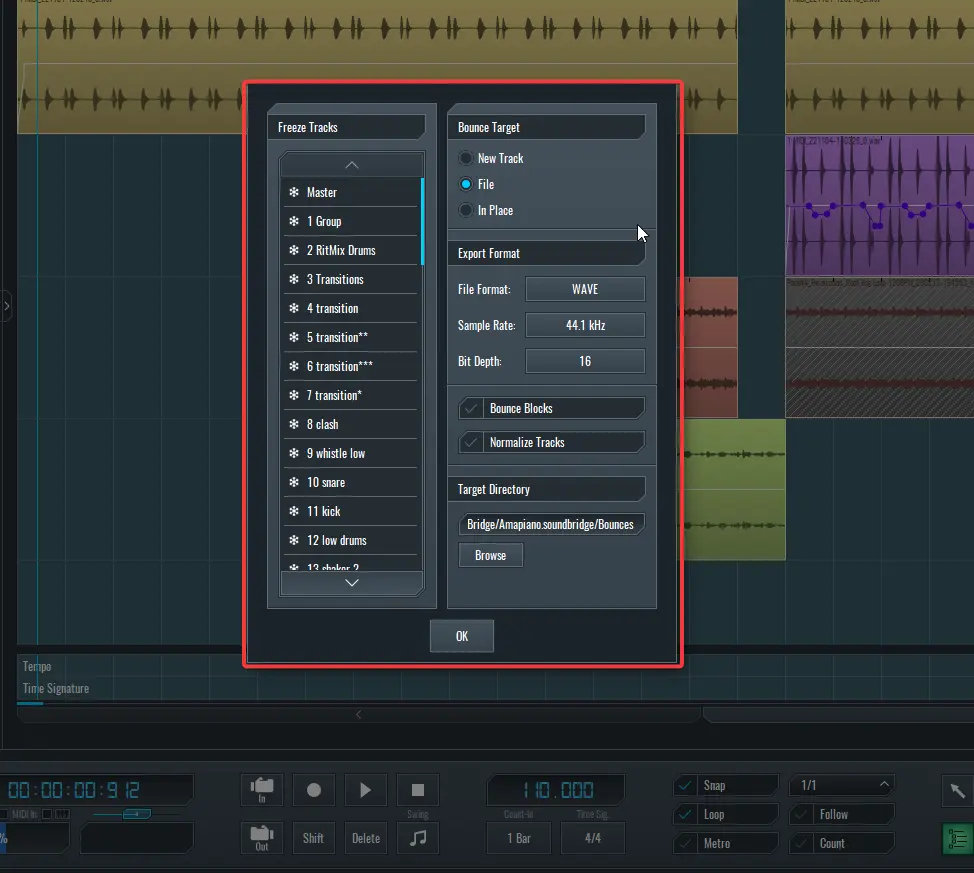
11. Ctrl + F: Freeze
Use Ctrl + F to open the freeze menu and freeze tracks in SoundBridge when you need to.
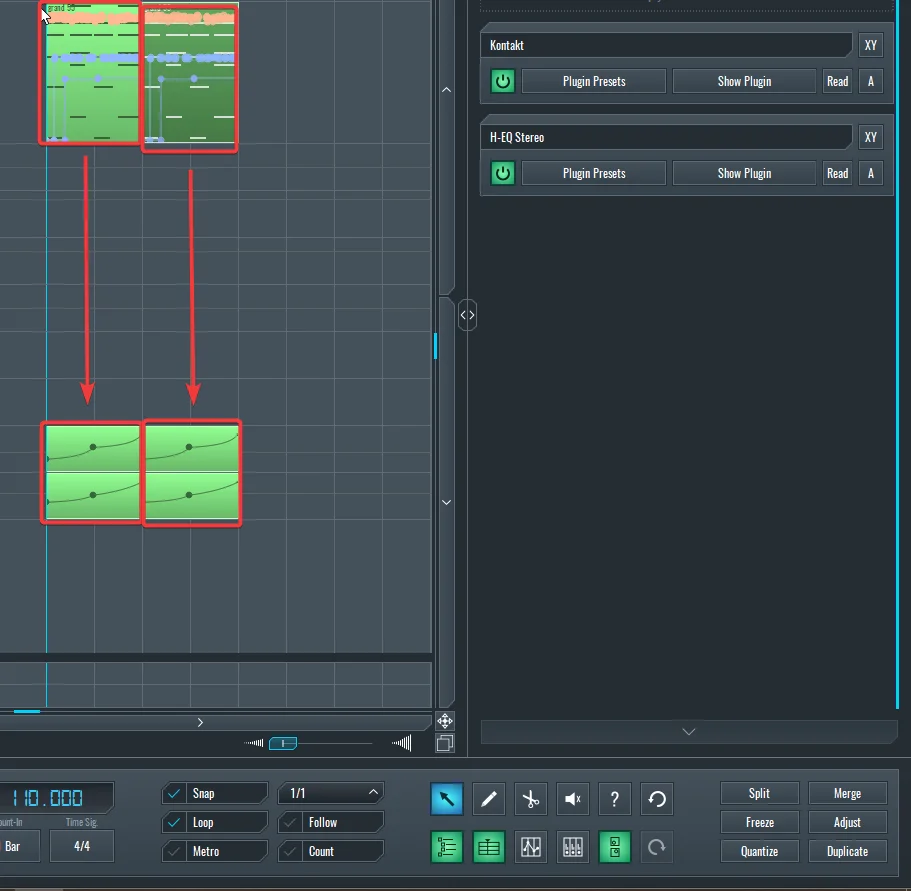
12. Ctrl + D: Duplicate
Ctrl + D duplicates the selected track(s) or block(s) in SoundBridge with all automation information.
~ Selected Block Before Duplicating With Ctrl + D
~ Selected Block After Duplicating With Ctrl + D
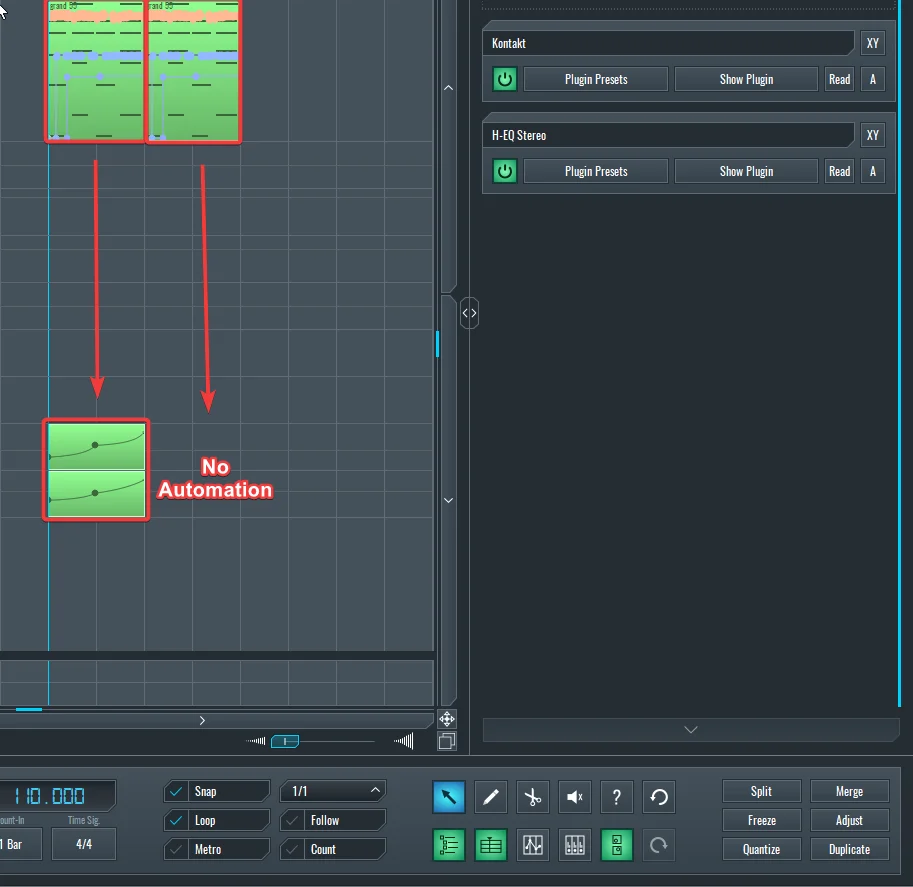
13. Ctrl + Shift + D: Duplicate Without Automation
Ctrl + Shift + D duplicates selected blocks without duplicating their automation information.
~ Selected Block Before Duplicating With Ctrl + Shift + D
~ Selcted Block After Duplicating it WIth Ctrl + Shift + D
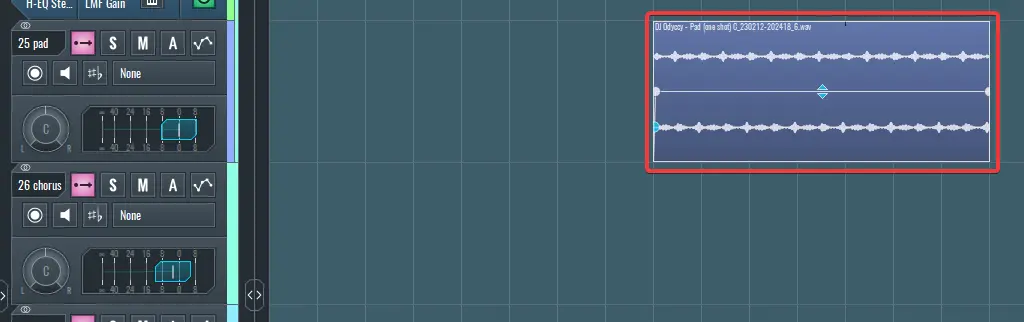
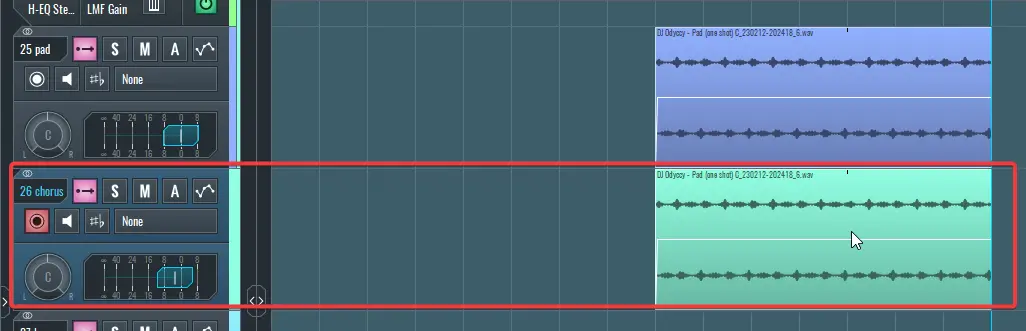
14. Ctrl + B: Paste to the Selected Track
Ctrl + B Pastes whatever block was copied to the currently selected track.
Please note that you can only paste audio blocks into audio tracks, MIDI blocks into MIDI tracks, and automation blocks into automation tracks.
~ Copied Block Before Pasting to Another Track with Ctrl + B
~ Copied Block After Pasting to The Selected Track with Ctrl + B
15. Ctrl + G: Group Selected Tracks
Ctrl + G helps you group selected tracks. Select any tracks you want to group and hit Ctrl + G on your keyboard to do so quickly.
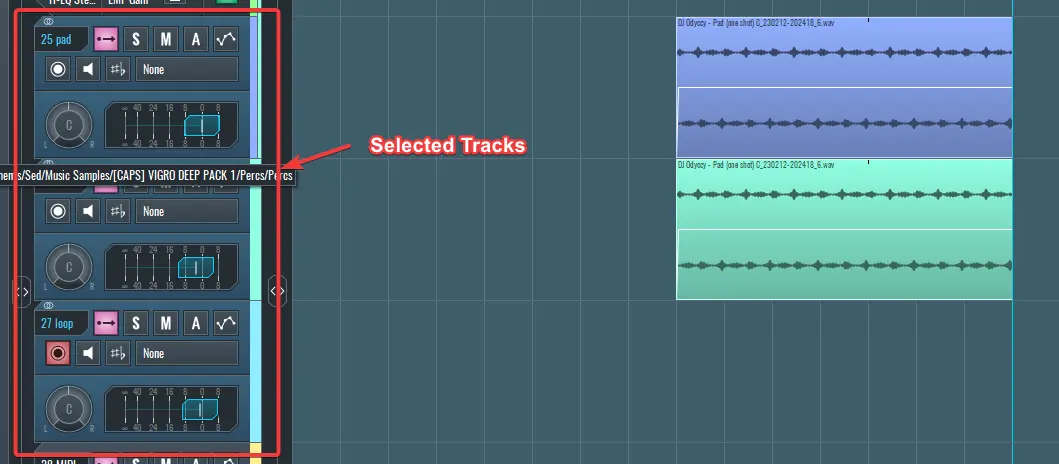
~ These are the selected tracks before they are grouped with Ctrl + G
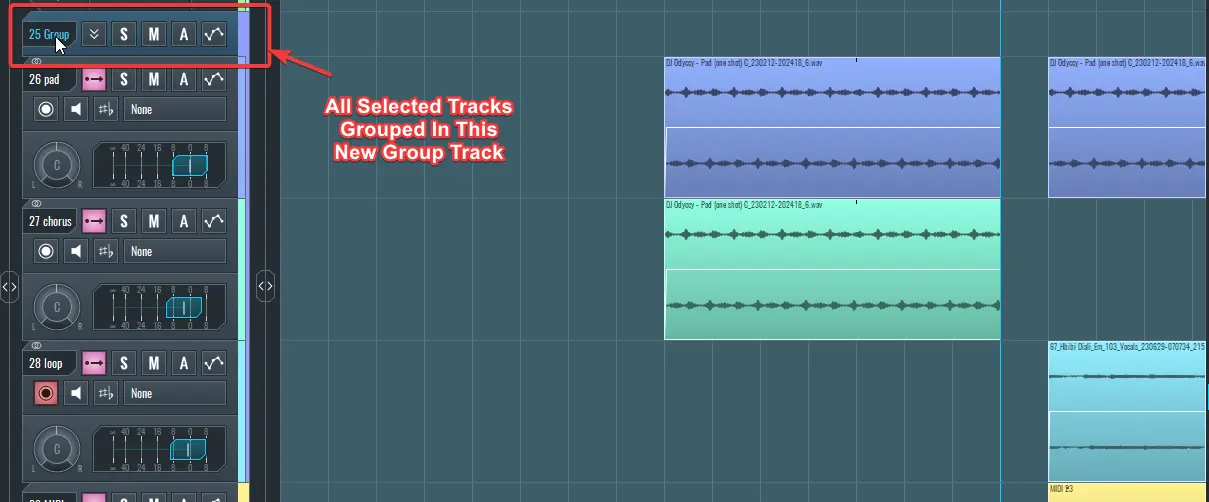
~ These are the selected tracks after they are grouped with Ctrl + G
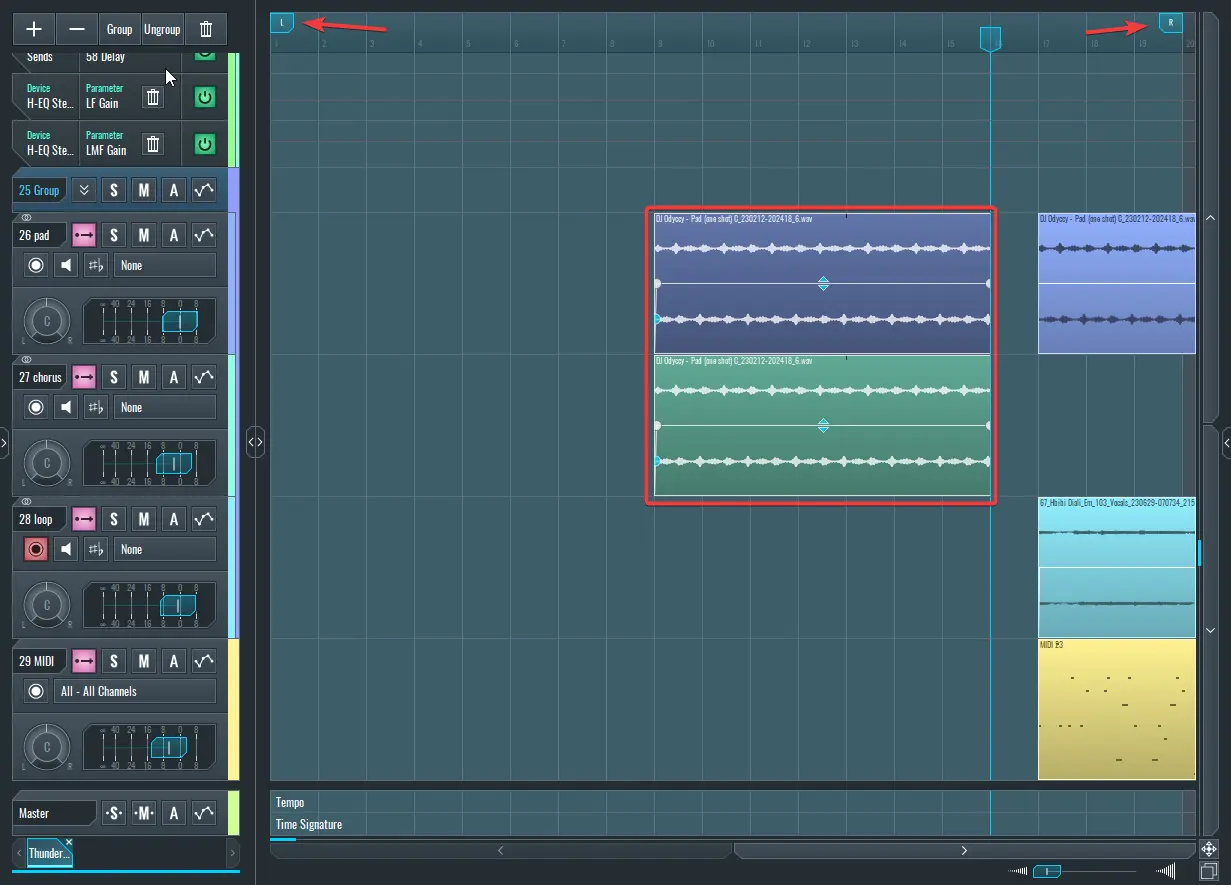
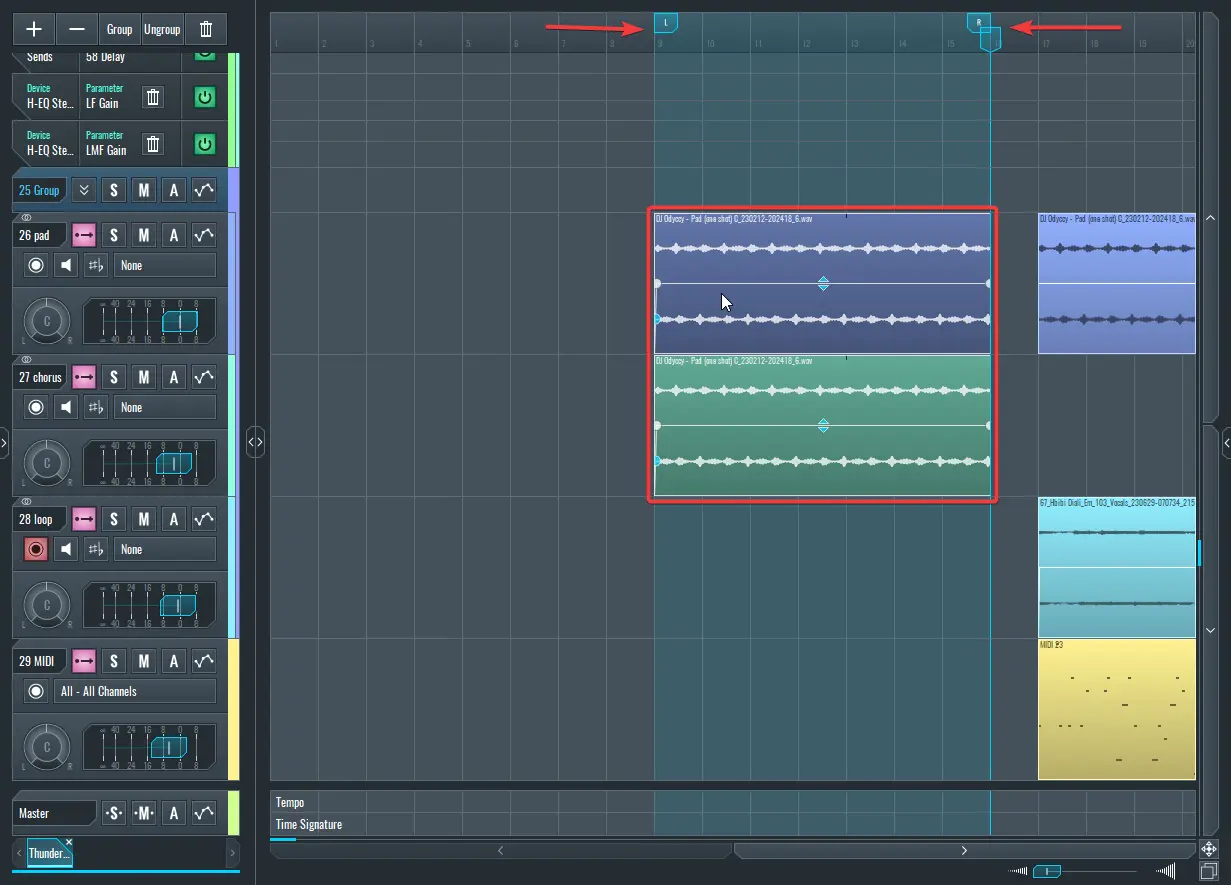
16. Ctrl + L: Loop Selected Blocks
This sets the left and right loop markers to encompass the borders of the selected blocks.
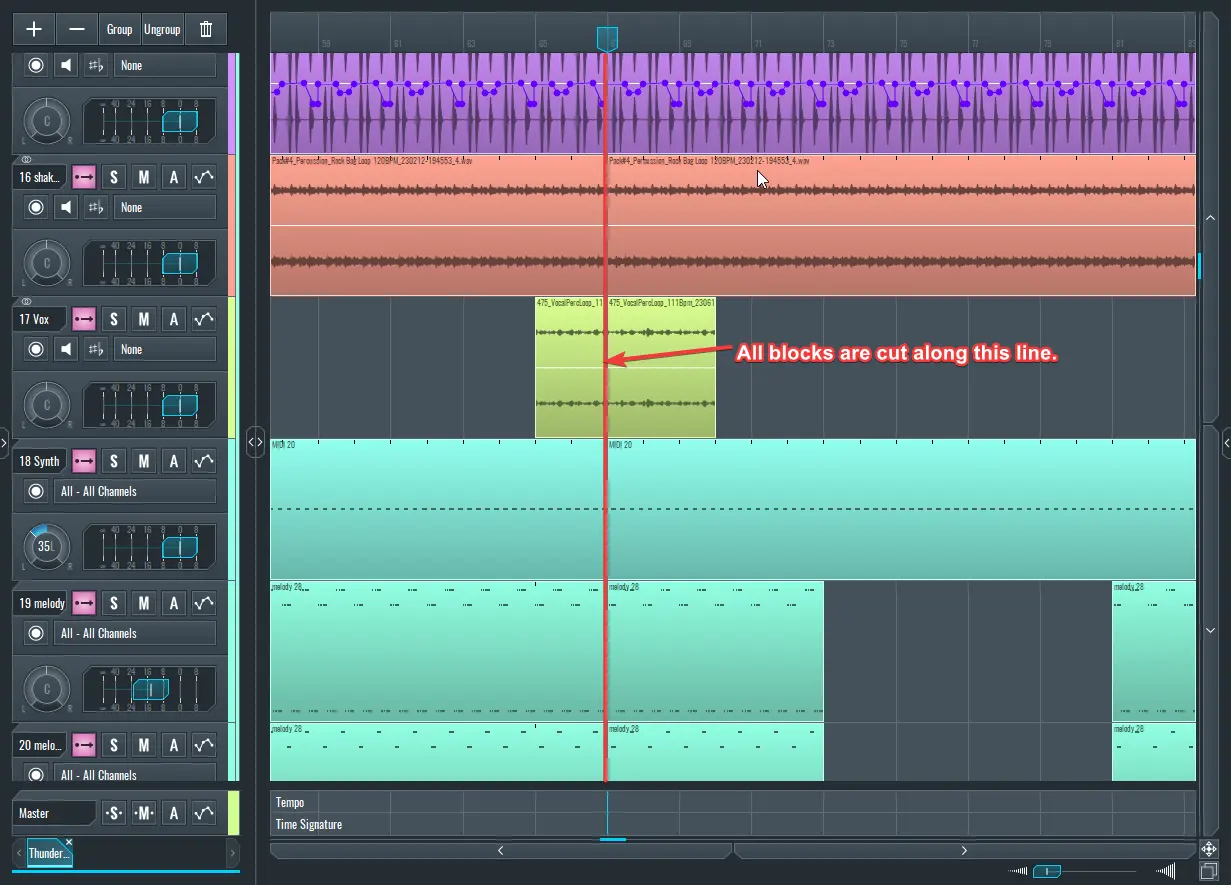
17. Ctrl + Shift + S: Split
Using the Ctrl + Shift + S shortcut splits all blocks on the sequencer at the point where the play head is on the timeline.
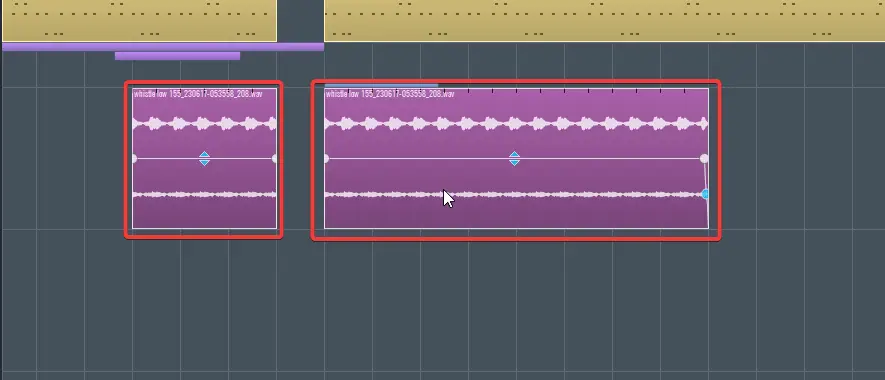
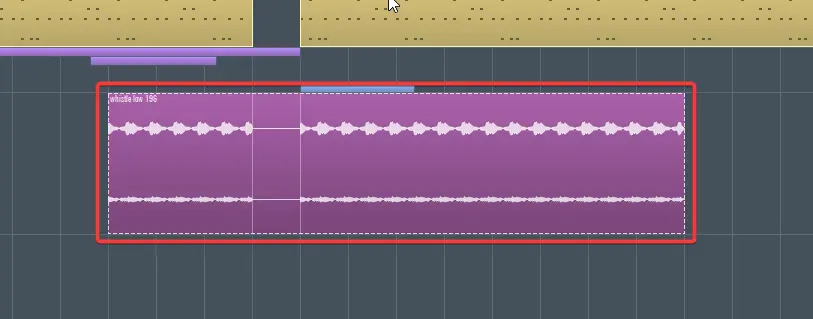
18. Ctrl + M: Merge Selected Blocks
If you want to merge some blocks quickly, select them and use Ctrl + M to merge them.
~ These are the selected blocks before they are merged with Ctrl + M
~ These are the selected blocks after they are merged with Ctrl + M
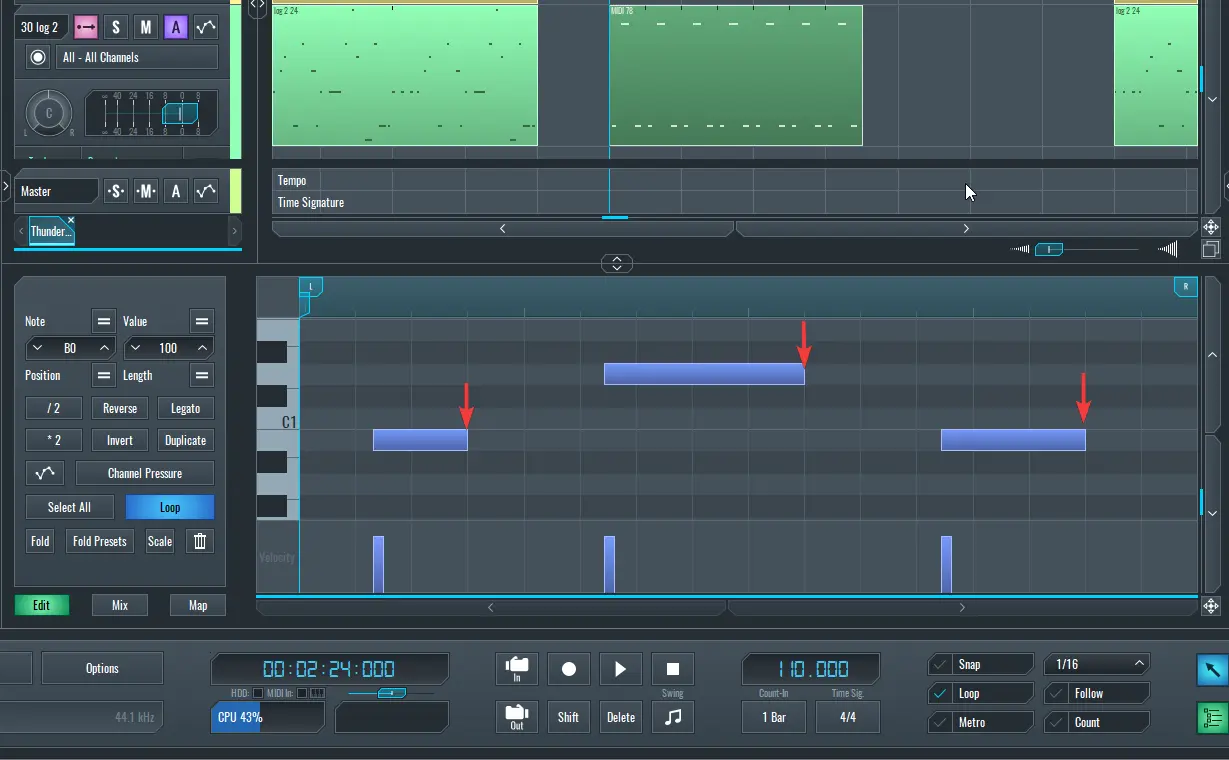
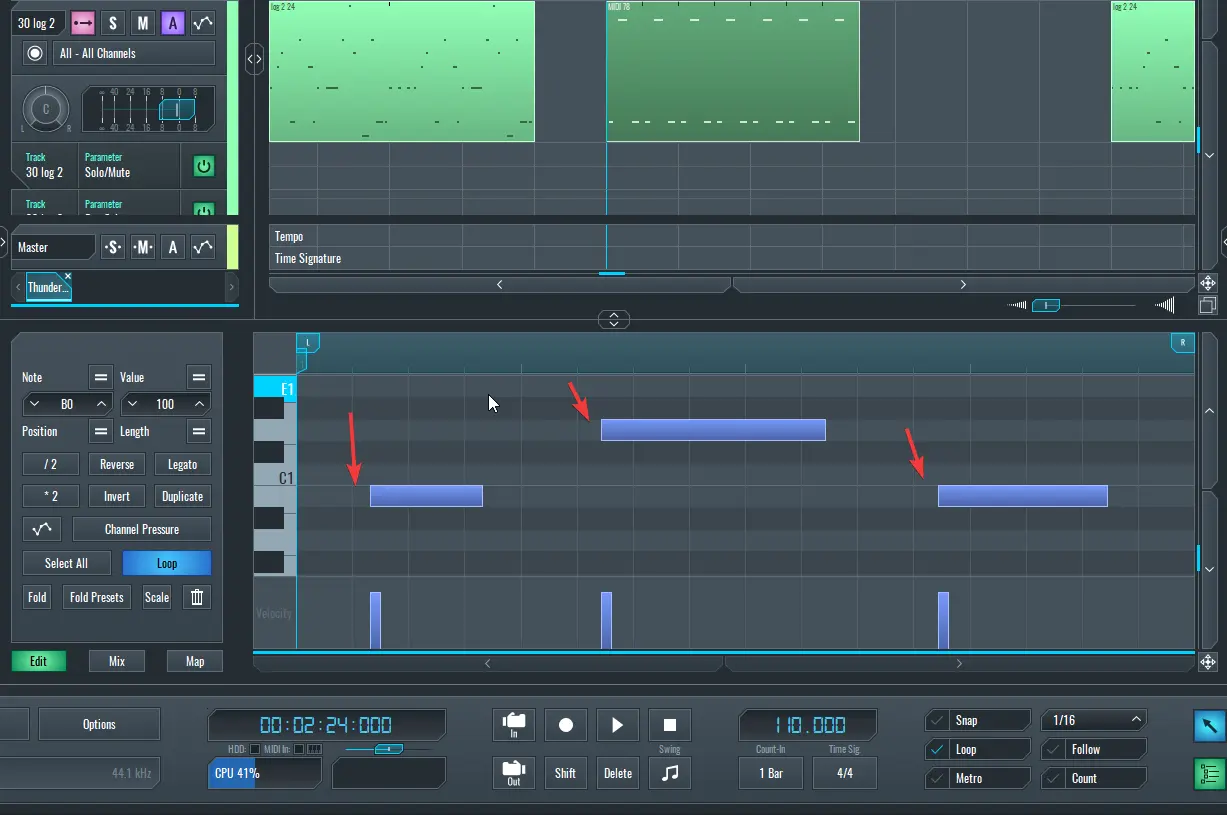
19. Ctrl + Alt + L: Adjust Length
Use this tool to round the duration of selected MIDI notes to the nearest increment determined by the Beat Selector to the right of "Snap"
~ These are the selected MIDI notes before they are adjusted with Ctrl + Alt + L
~ These are the selected MIDI notes after they are adjusted with Ctrl + Alt + L and snapped to the grid.
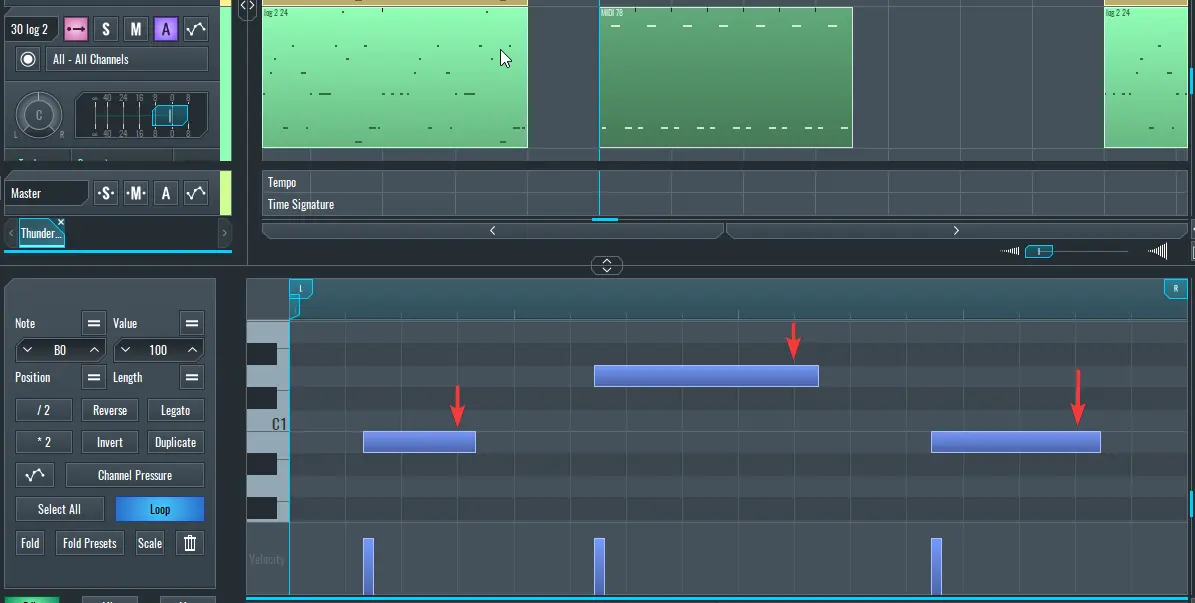
20. Ctrl + Shift + Q: Quantize
Use Ctrl + Shift + Q to quantize whatever is selected to the nearest grid line as selected in the beat selector.
~ These are the selected MIDI notes before they are quantized with Ctrl + Shift + Q
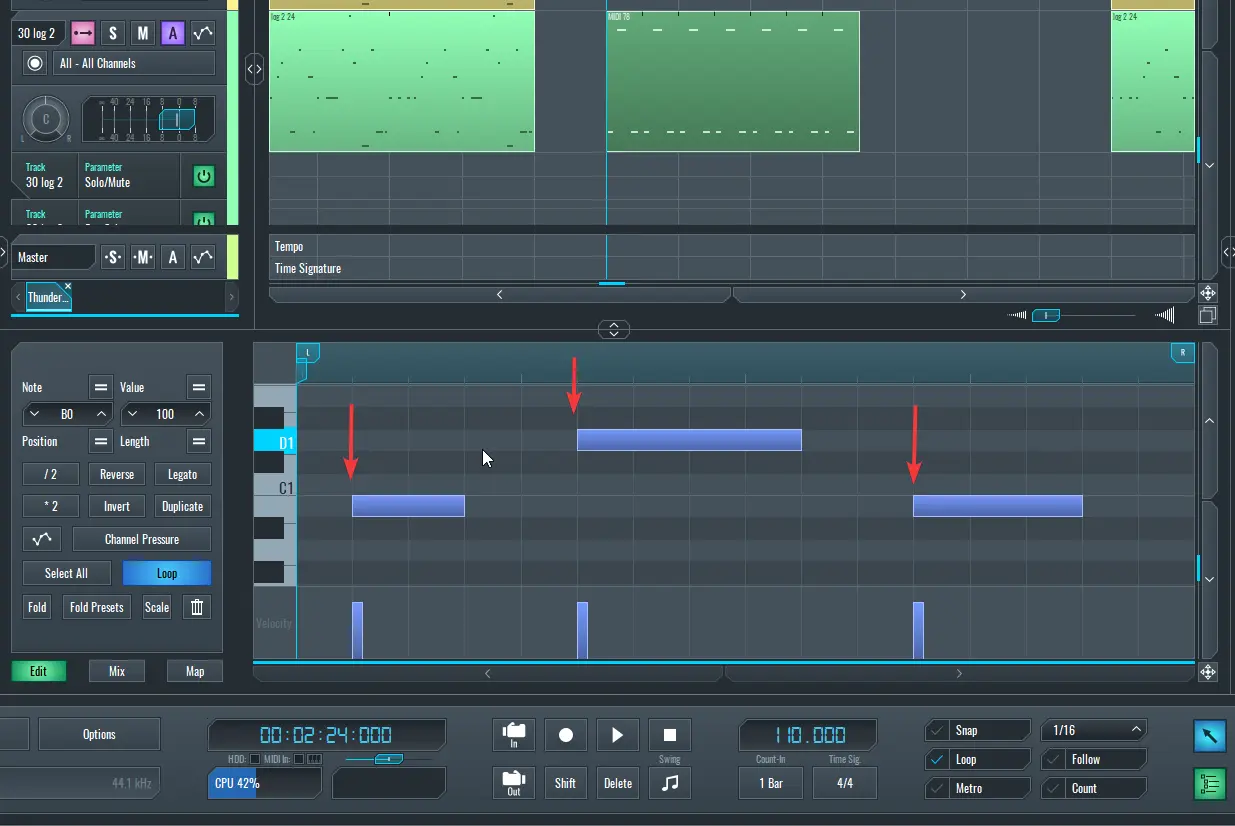
~ These are the selected MIDI notes after they are quantized with Ctrl + Shift + Q
Practice Using These Shortcuts to Improve Your Workflow
Learning these keyboard shortcuts requires practice, and even though learning these shortcuts by heart may take some time, the rewards are well worth the effort. Using shortcuts often will become second nature if you make it your habit. Also, consider making a cheat sheet with the shortcuts you use the most frequently and keeping it handy while working.
If you enjoyed this article, please check out the following:
MASTER MUSIC PRODUCTION
Expert-led courses designed to take you from fundamentals to finished tracks.

HOUSEFrom bouncy bass and solid kicks, this course teaches you the most modern House music production techniques needed to succeed and stand out.

TRAPQuit sounding like generic Trap and produce something World with hints of the Far East. Create ethnic soundscapes to put your Trap ahead of the curve.

AMBIENTProduce relaxing, sophisticated psy-influenced ambient. Psychedelic and relaxing to listen to, create meditative soundscapes to put your listeners in Zen.