SoundBridge Widgets: Track List
Last Edited: Oct 9, 2023
[et_pb_section fb_built="1" admin_label="section" _builder_version="3.22" _i="0" _address="0"][et_pb_row admin_label="row" _builder_version="3.25" background_size="initial" background_position="top_left" background_repeat="repeat" _i="0" _address="0.0"][et_pb_column type="4_4" _builder_version="3.25" custom_padding="|||" _i="0" _address="0.0.0" custom_padding__hover="|||"][et_pb_text admin_label="Text" _builder_version="3.29.3" background_size="initial" background_position="top_left" background_repeat="repeat" hover_enabled="0" _i="0" _address="0.0.0.0"]
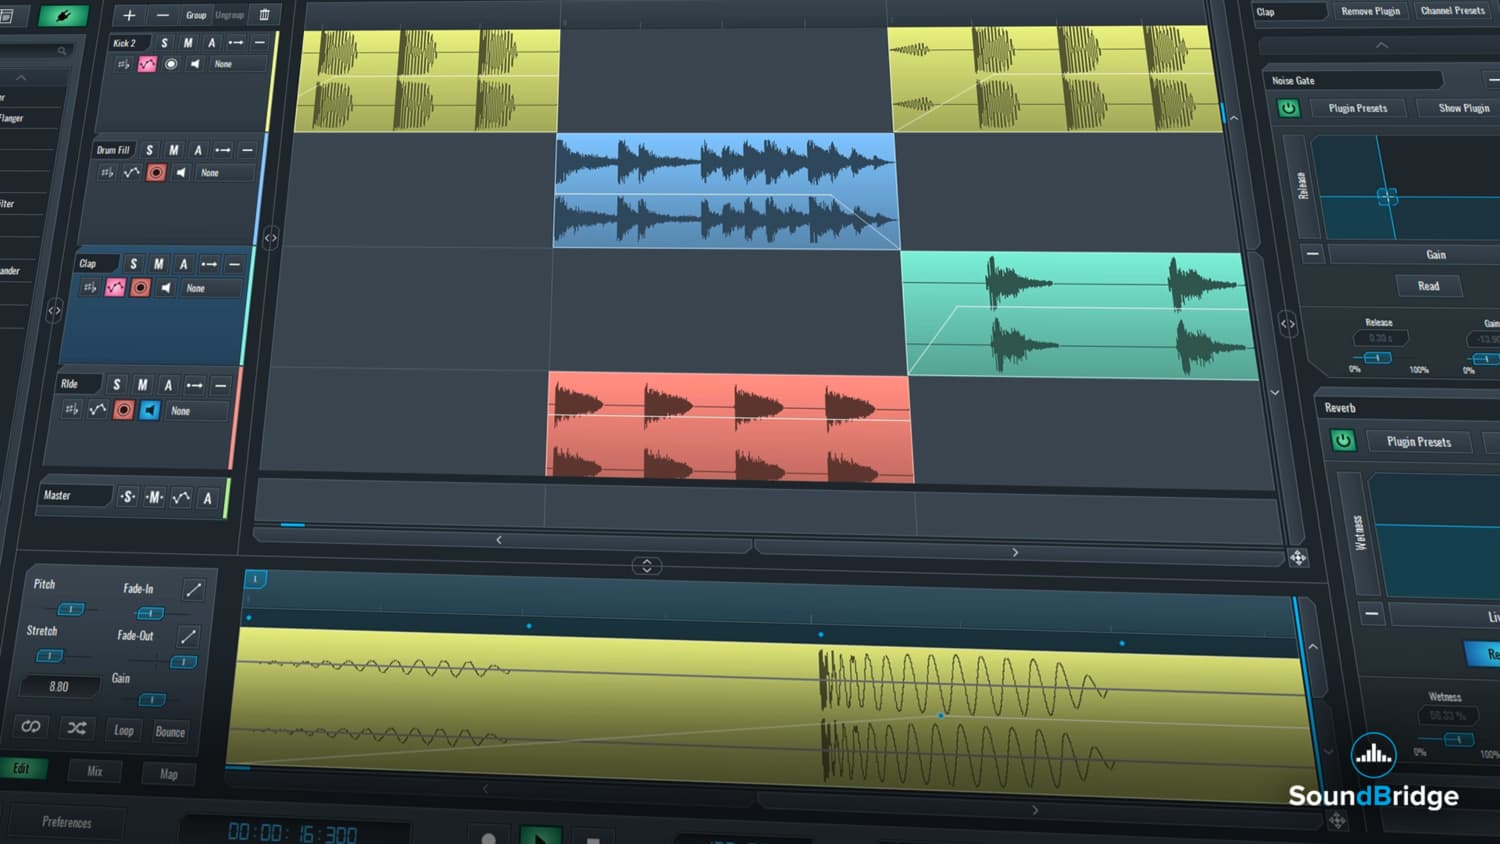
The Track List widget within the SoundBridge: DAW is used to control some of the main aspects of the sequencer. It offers many essential features that we'll cover in the following tutorial.
As you can see from the picture below, for this tutorial we have selected a finished project which contains many MIDI, Audio, Automation, and Group tracks for you to get the bigger picture. The Track List is marked in red.


 The “Solo” and “Mute” buttons serve a purpose of muting and soloing out tracks. The “Automation” button, when clicked, will open up the automation lanes for each of the channels respectively. You can also enable or disable these lanes by using this green button or delete non-default ones by clicking on the “Minus” sign.
 The “Arm automation” button, which we mentioned above, is going to prepare the track to record the incoming changes of parameters as automation.


 [/et_pb_text][/et_pb_column][/et_pb_row][/et_pb_section]
Plus and Minus
On the very top of the “Track List” widget, we can see a “Plus” sign. You can use it to create new tracks. It opens a new dialogue in which you can select different types of tracks (Audio, MIDI or Return). You can decide how many new tracks you want to create, type the name of the track in the field below. In addition to this, you can create tracks in Stereo or Mono. Once you are done with the track options you can click on the “Create” button and the new track will appear in the “Track List”. Finally, the “Minus” sign deletes the selected track from the “Track List”.
Group, Ungroup and Delete
The “Group” button, when clicked, creates a group track that contains selected tracks. If nothing is selected, it creates an empty group track which you can populate by click-dragging the tracks into it. This feature compares to bussing multiple outputs on a console mixer. It will converge the outputs of all tracks in that group to its channel strip. The “Ungroup” button will remove the group channel selected and place the tracks it contained back into the “Track List”. Moving forward, the “Delete” button will remove any element in the project, and it works the same as the delete button in the “Transport Bar” widget. To give you an example, you can compare the following pictures of the “LOW END” group in the project. The first one shows a collapsed and the second one an expanded group track. Just click on the “Collapse Track” button in the group track. This feature is suitable for getting your project and channels in order.
Scroll
Furthermore, the “Scroll” buttons, marked in red, are used to scroll left/right and up/down inside the sequencer. By engaging this toggle button, marked with a magnifying glass icon, you can switch the functionality of these “Scroll” buttons to be, either scroll positioning, or zoom of the sequencer.
Solo, Mute and Arm automation
Each track in your project posses “Solo”, “Mute” “Automation” or “Arm automation” buttons.
The “Arm automation” button, which we mentioned above, is going to prepare the track to record the incoming changes of parameters as automation.
Additional buttons
In addition to this main 4 buttons, different types of tracks have additional buttons. The “Collapse/Expand” button shows or hides all of the channels that the group contains. Consequently, this helps in making your project more organized. The “Audio” tracks also have a “Pitch” and “Stretch” algorithm chooser toggle button, show or hide “Pre-Gain” toggle button and “Pan” toggle button.
Expand/Collapse
Finally, we have the “Expand/Collapse” toggle button for easier organization of the project. This button also opens the next row of buttons where you can find the “Arm” button which is used to prepare the audio tracks for recording audio. The “Monitor” button lets you hear the physical input you assigned to the audio track as a source for recording in the next dialogue menu of the physical inputs on your audio interface.
Midi Tracks
The “MIDI” tracks have more-less the same choice of buttons as “Audio” track with an exception of “Arm” button. Here, it is used here to prepare the “MIDI” track for recording MIDI. You can also use it if you want to add the instrument on that MIDI channel by using your MIDI controller. Furthermore, you can select this from the dialogue menu shown in the picture below. Use it to select the MIDI input device.
Track Settings
Right clicking on the track will open up a “Track Settings” dialogue. You can rename a channel or color it. You can also create a palette of your colors and save it for frequent use. Using the border arrows, you can expand the “Track List” view.
[/et_pb_text][/et_pb_column][/et_pb_row][/et_pb_section]教育
精通音乐 制作
专家授课的课程,带你从基础到成片。

HOUSE从弹跳贝斯与扎实踢鼓出发,本课程教授最现代的 House 制作技术,助你成功并脱颖而出。

TRAP别再像千篇一律的 Trap,做出带东方点缀的“世界感”。打造民族音景,让你的 Trap 领先一整条街。

AMBIENT制作放松、精致的 psy 风格 ambient。迷幻又耐听,打造冥想音景,把听众带进Zen。